
New


BMG-X2-M Dual Extruder For Mosquito IDGA


New Version WITH IDGA Shipping Now!
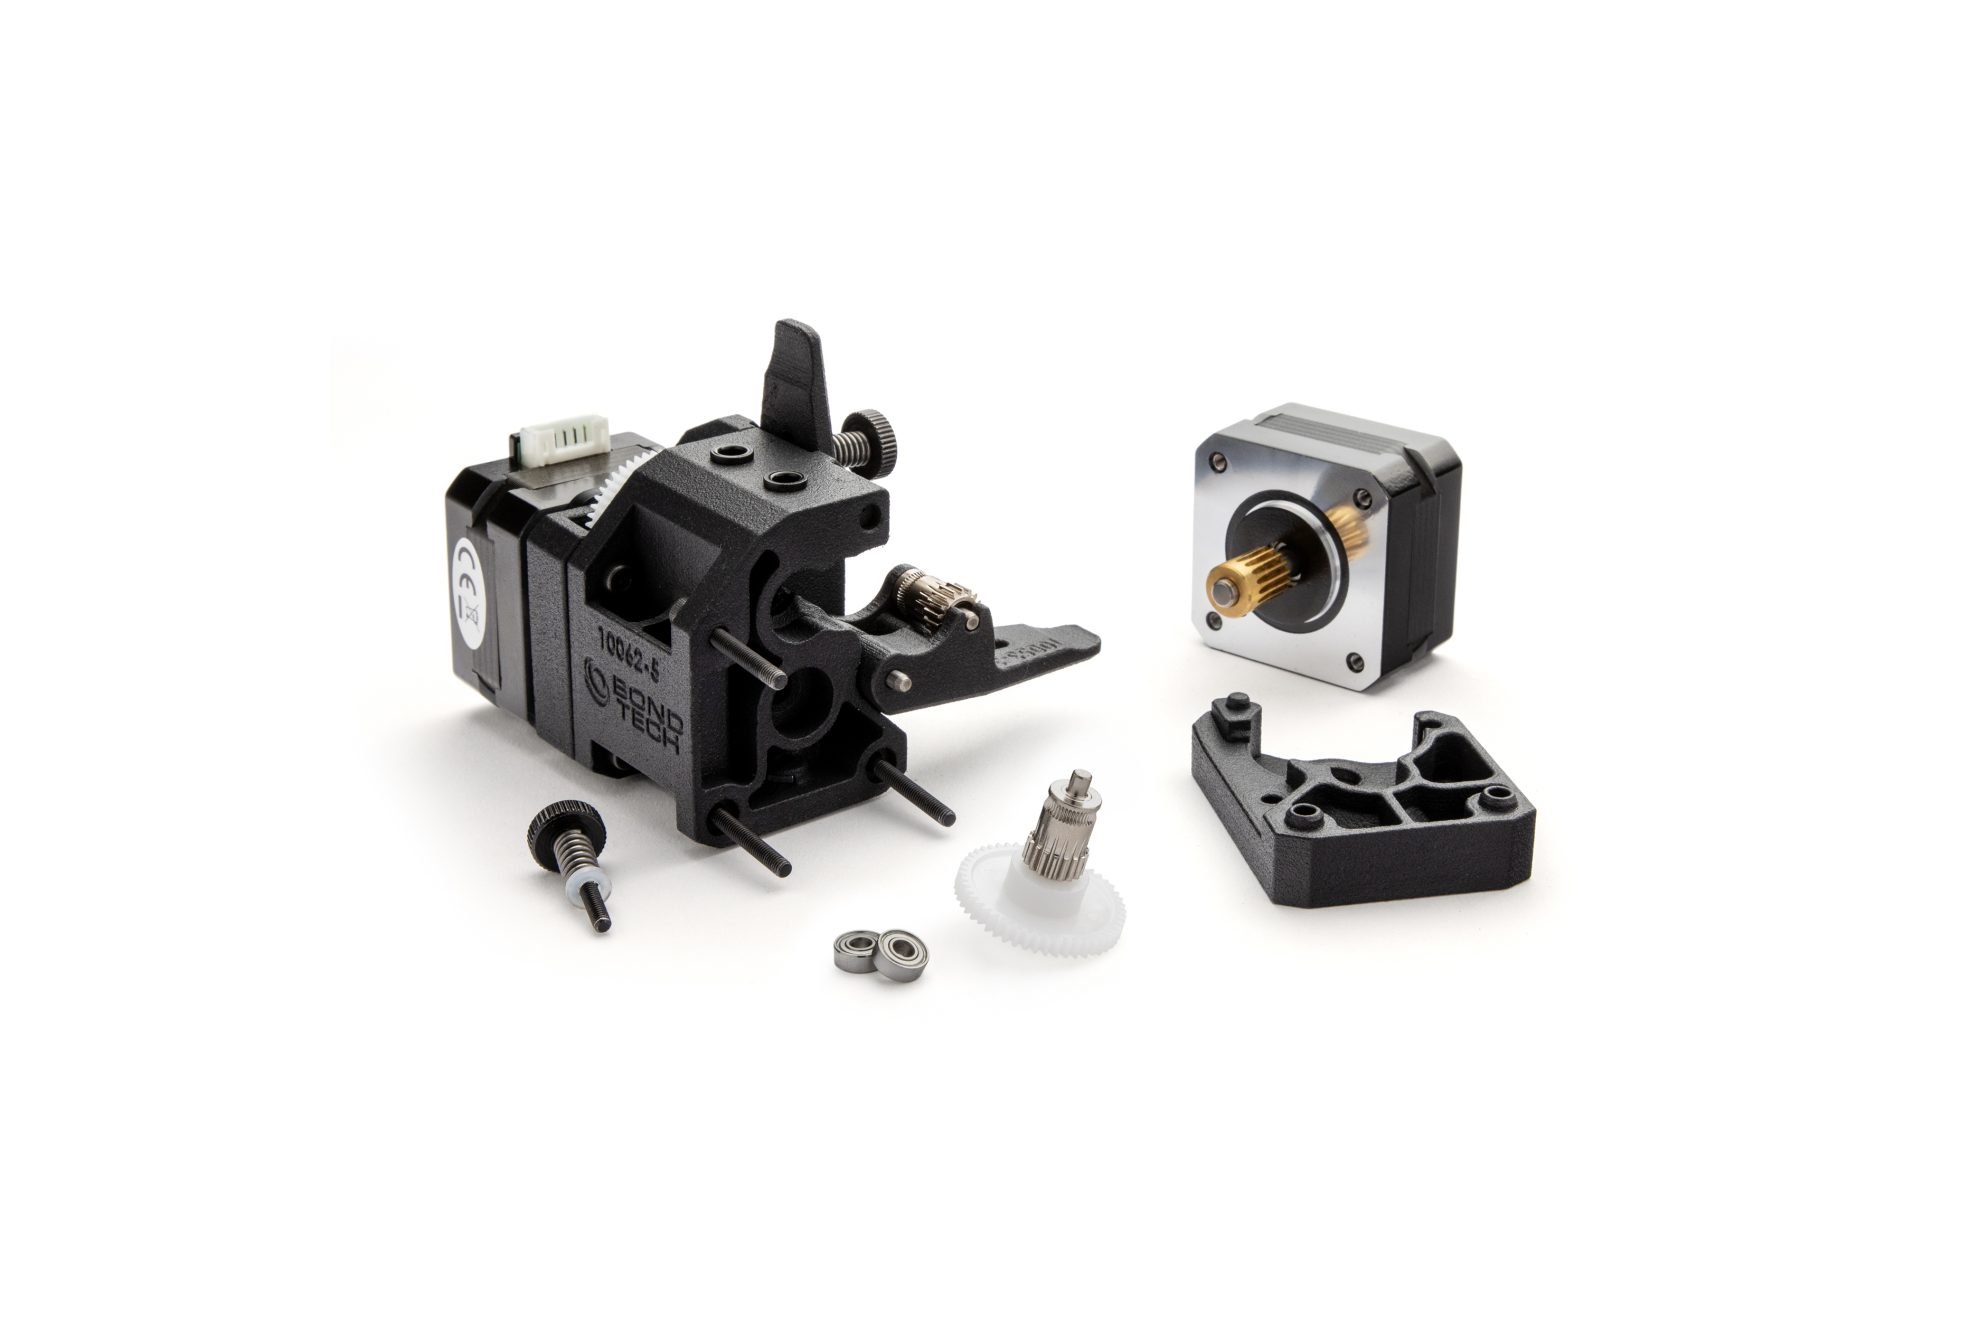
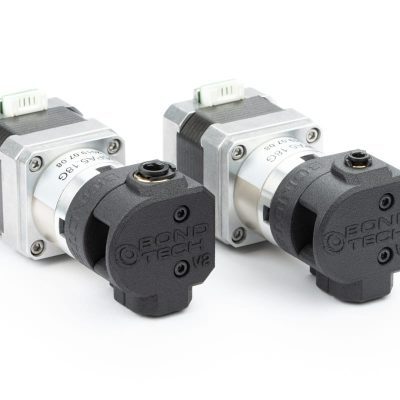
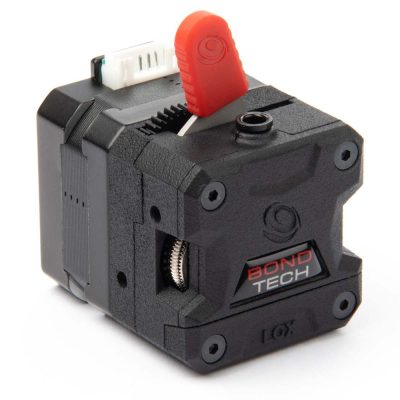
with new white plastic main gear and integrated drive gear for lower run-out
Now including the new white plastic main gear and assembled with a new method to reduce run-out and improve 3D print´s surface quality.
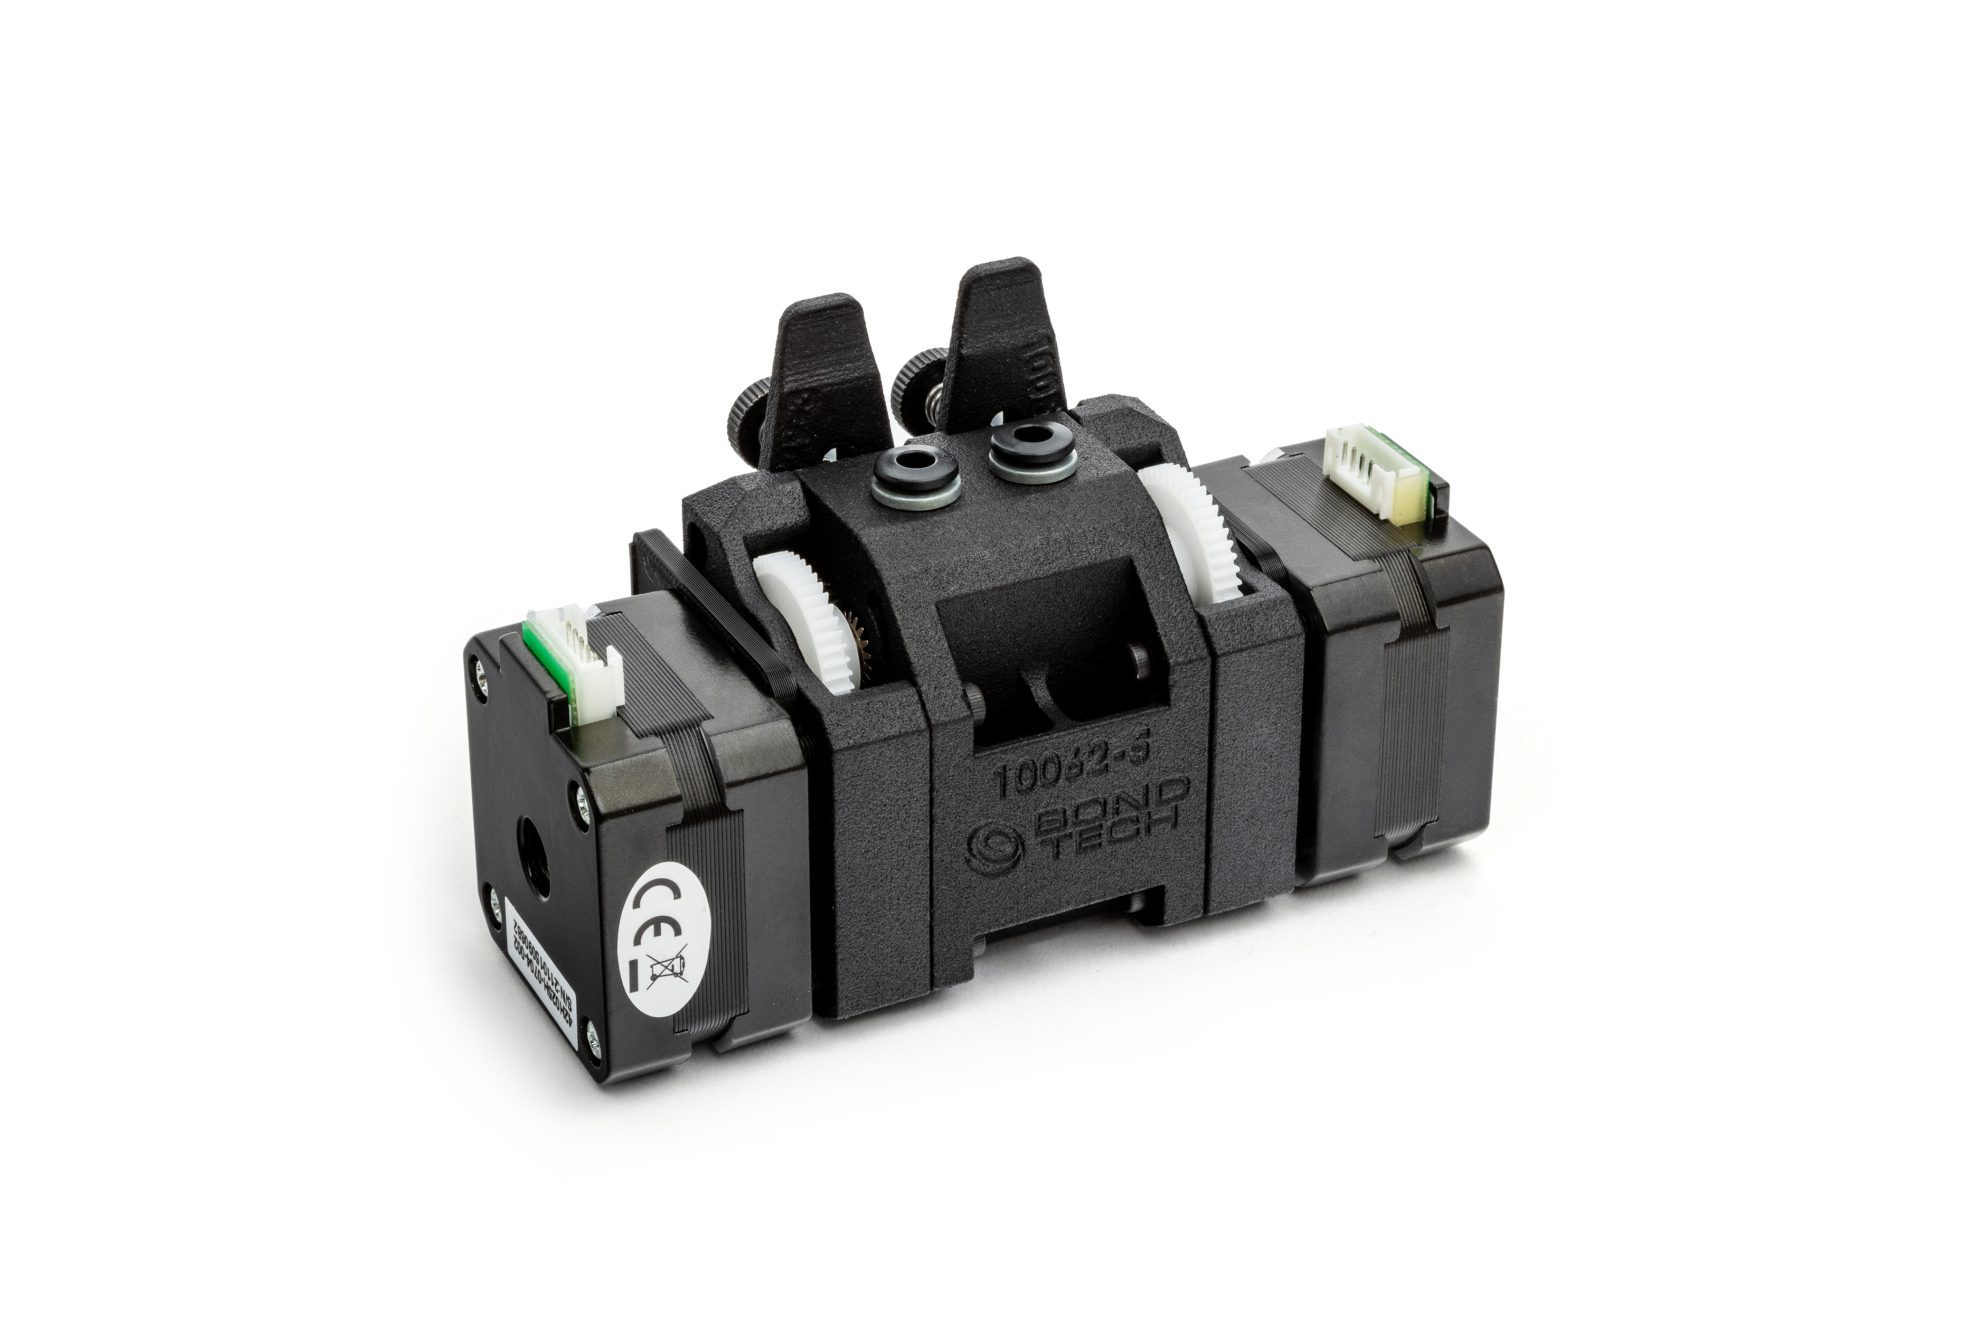
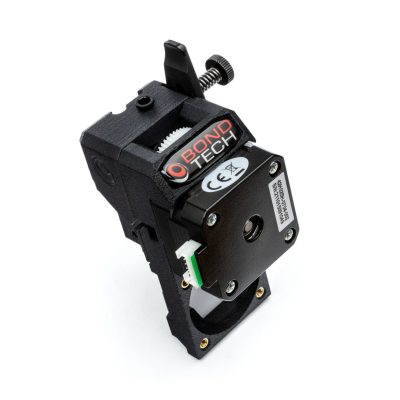
The Bondtech BMG-X2 is the best and lightest performing extruder on the market that combines low weight with dual high feeding capacity.
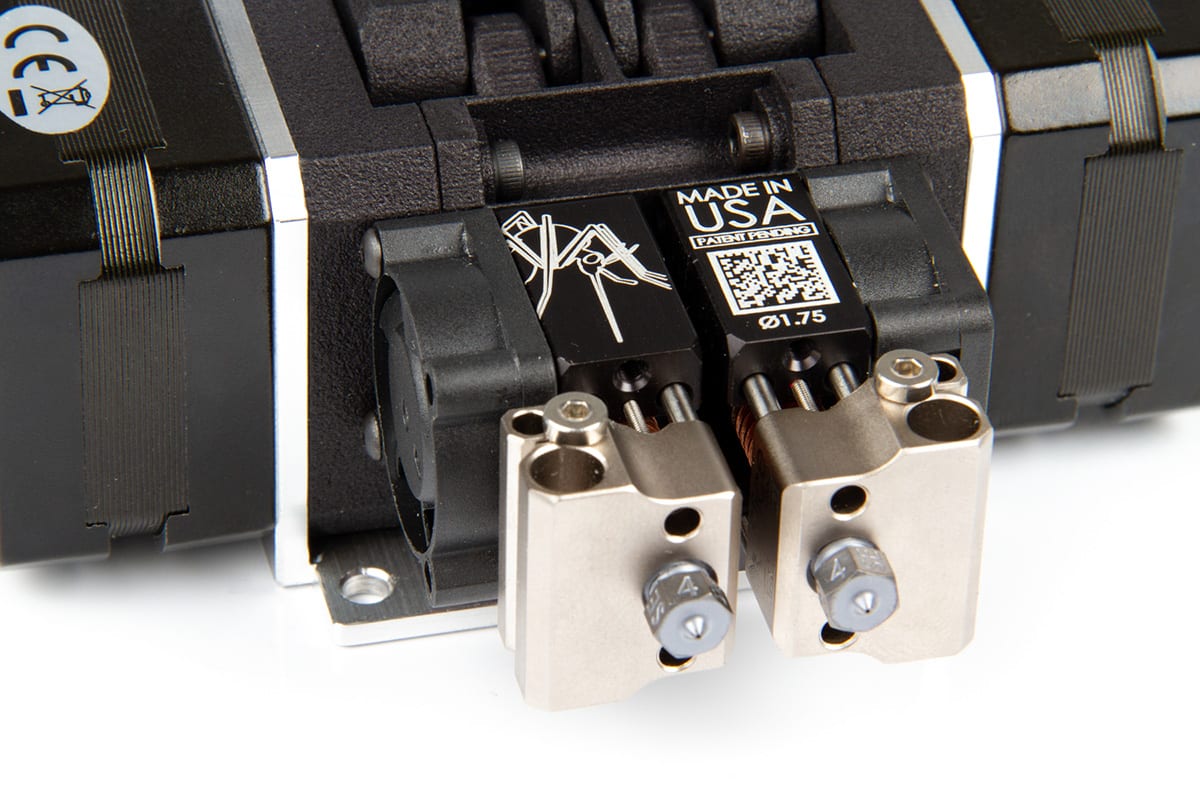
Dedicated For Mosquito Hotends
This extruder is available in a single version, to use Mosquito hotends. The same version is also compatible with Mosquito Magnum.
Both have a C-C distance of 15mm.SLS 3D Printed Housing in PA
The housing parts are professionally SLS printed in nylon for maximum strength and precision.
For 1.75mm Filaments only
Price:
$135.00
Only 9 left in stock (can be backordered)
Chose Currency / Country
Select Currency
Select Country
Description
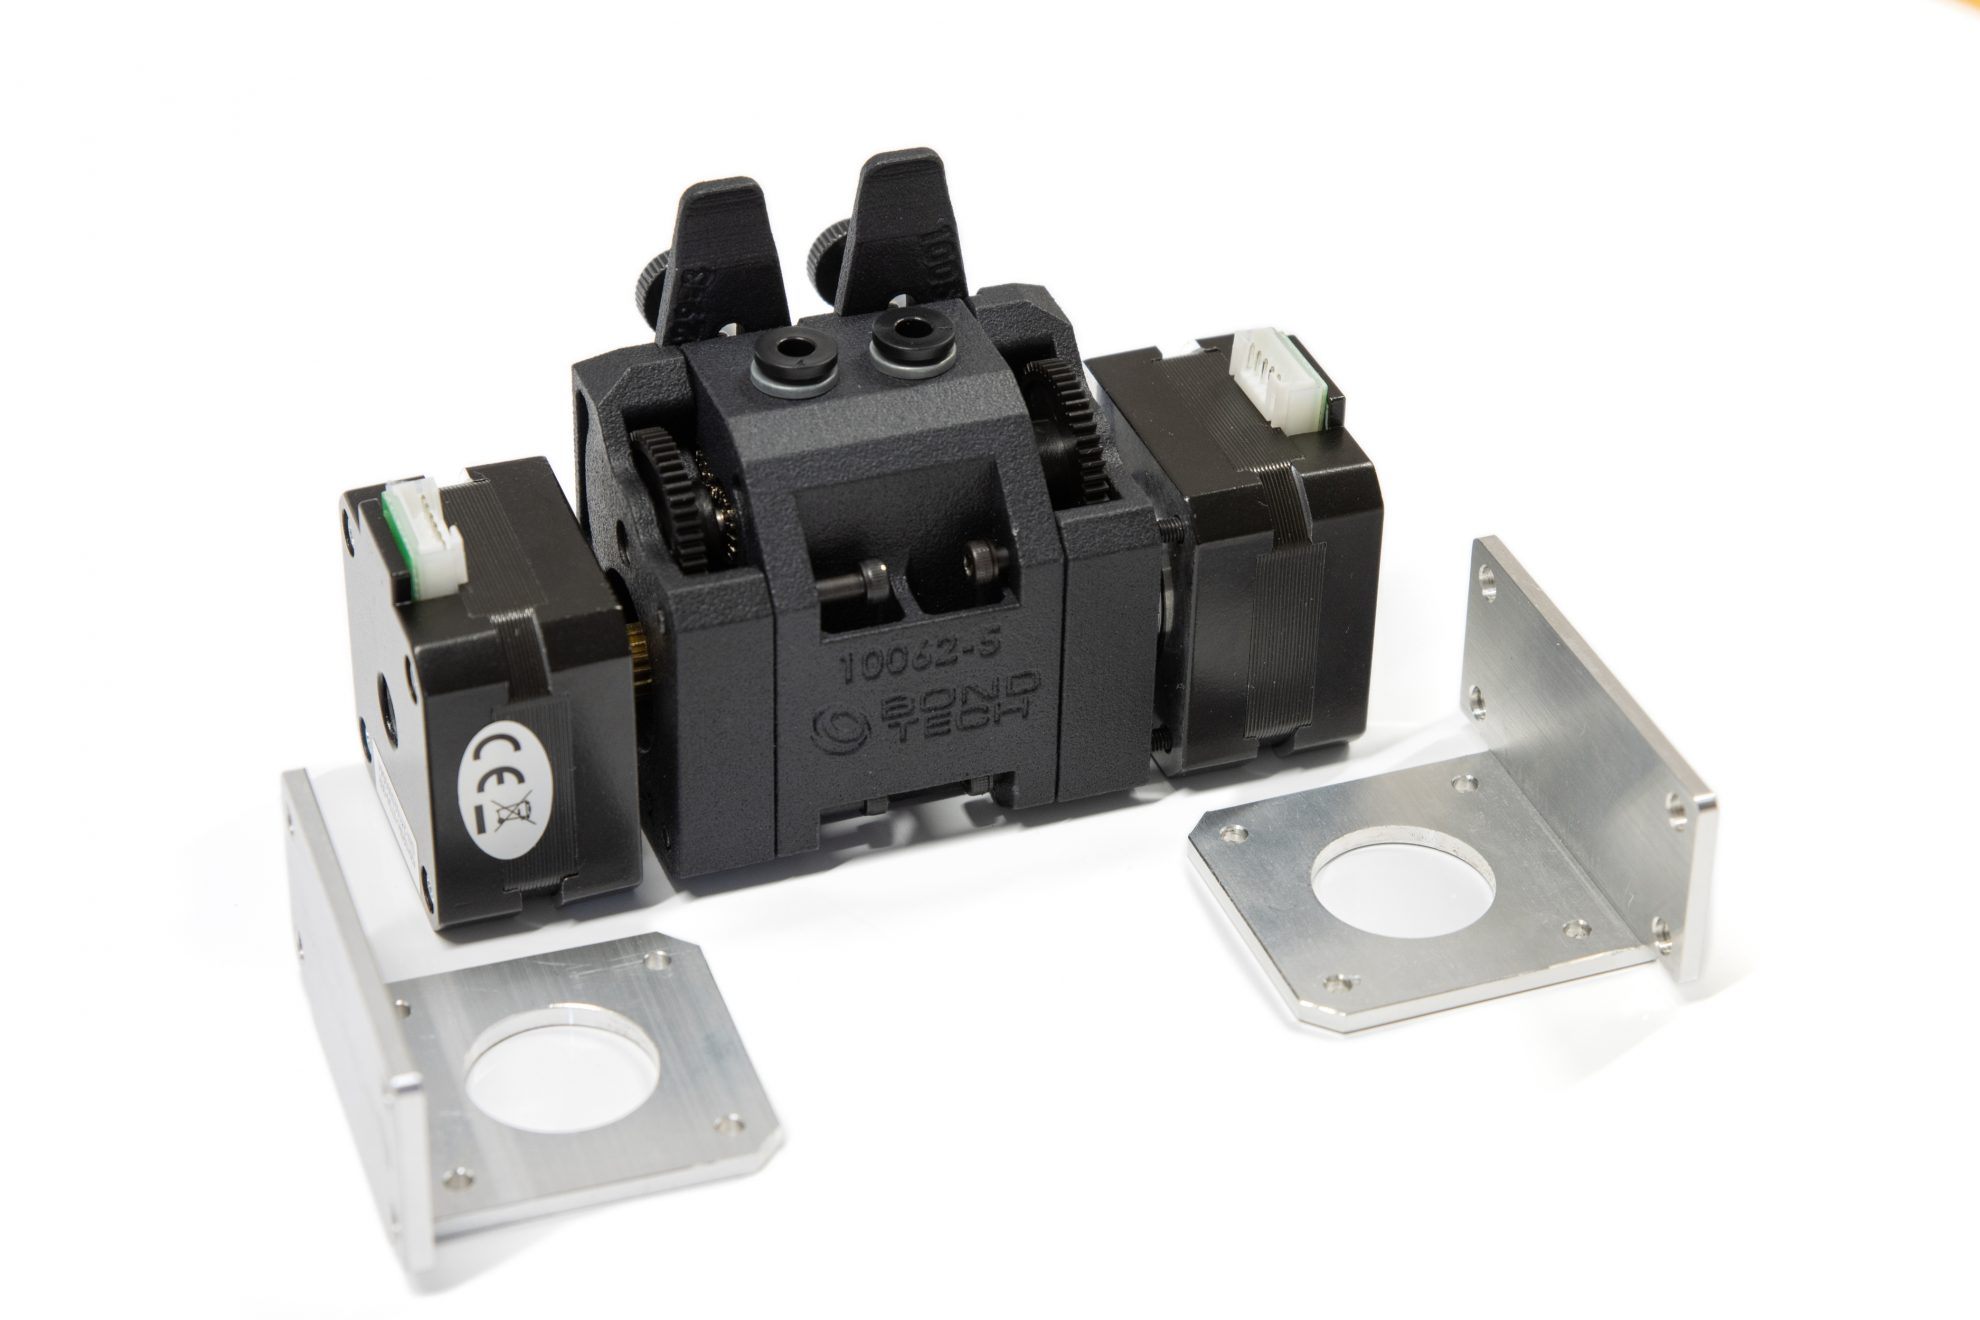
The Bondtech BMG-X2-M is based on our proven BMG™ design that utilizes an internal gearing ratio of 3:1 together with precision cnc-machined hardened steel drive gears to give you a compact powerhouse for all your multi extrusion applications. Whether you require high resolution prints with small nozzles or high-flow prints with big nozzles the optimized gearing ratio combined with our industry leading drive gears provides unparalleled pushing power and lightning fast retractions in a lightweight and compact dual extrusion package.
Fit For Mosquito Hotends
New version is dedicated to be used with Mosquito hotends. Attach Slice Engineering high performance hot ends to our high performance extruders and enjoy the best filament extrusion solution in the market.
NOTICE
The following parts are NOT included in this product: Alu Mounts; Hotends; Heaters, Thermistors, and their Cables.
To use this Bondtech Extruder, you will also need to buy the following
- a Mosquito Hotend or a Mosquito Magnum Hotend for higher material flow;
- the Boron Nitride Paste;
- the Mosquito Thermistor;
- the Mosquito 12v 50w Heater Cartridge or the Mosquito 24v 50w Heater Cartridge;
Optional items
- one or more Vanadium Nozzles;
- a Mosquito 12v fan or a Mosquito 24v fan to cool down the hotend;
- a 1.5Nm Torque Wrench to properly tighten the nozzle(s).
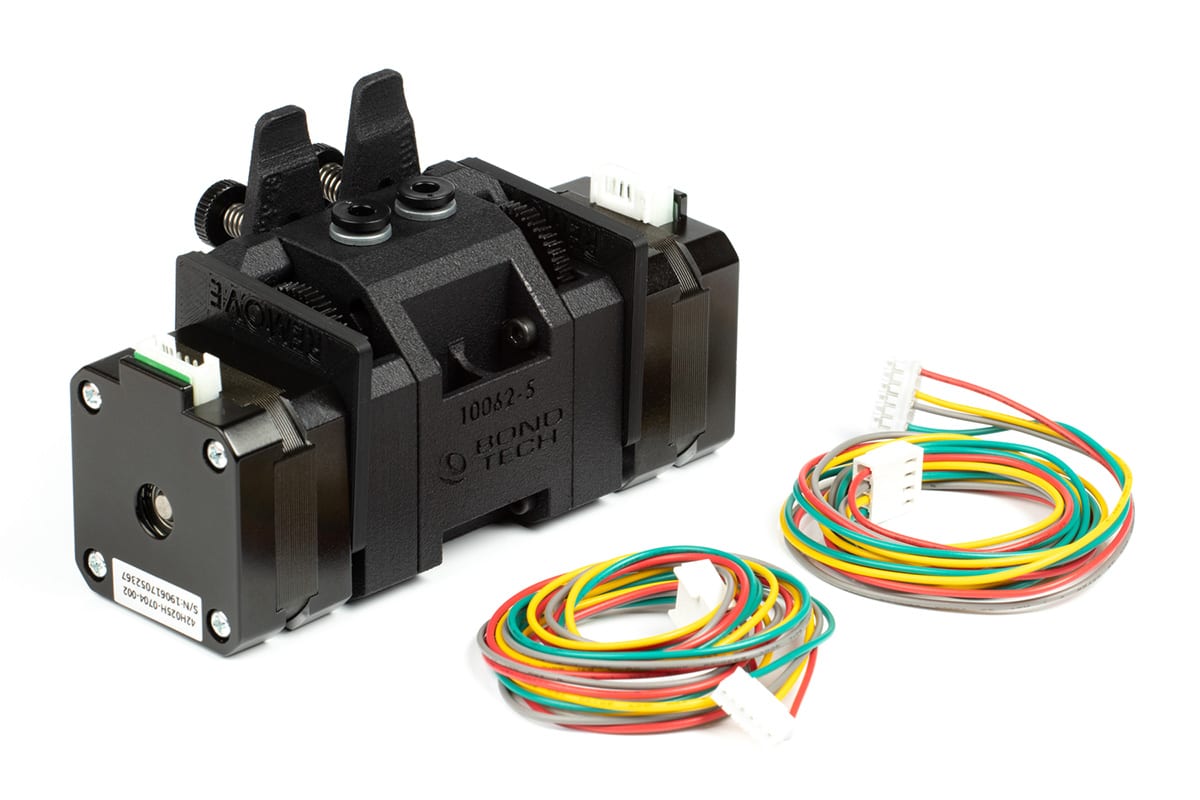
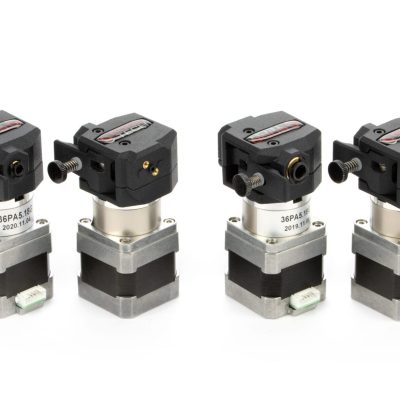
Included Stepper Motors
The included high power Nema17 pancake motors provides high torque and a low weight.
We use, and recommend using, the following stepper motor with this extruder:
NEMA17 Pancake Stepper Motor 25mm
Basic description and datasheet can be found in its page.
Bondtech Dual-Drive
Our unique Dual-Drive technology delivers uninterrupted material flow without fear of grinding or slipping in even the most demanding conditions. Bondtech users the world over will attest that even in prints with thousands of retracts our extruders perform flawless, with unmatched precision, and zero damage or degradation to the filament.
Multi-material Capability
Our new BMG™ extruder feeds all material with high reliability, from slippery nylons and soft TPU/TPE filaments to highly rigid and sometimes brittle carbon-filled high-strength materials. The extruder is designed for 1.75 mm filaments, but has been tested to ensure performance of filament from 1.5mm up to 2.0mm allowing for high reliability regardless of the tolerance of the filament used. The filament path is fully guided throughout the extruder body and the housing maintains tight tolerances to the drive gears mitigating the chances of Filament misfeed when the hotend experiences increased back pressure or highly flexible filaments are used.
Adjustable Tension
The thumbscrew tensioners allows the user to fine-tune the pressure exerted by the drive gears onto the filament. This gives you the power to adjust according to your preferences and to optimize for the type of material you are using.
Quick-Release
To be able to do material changes in a snap, simply activate the Quick-Release lever to release the tension and pull the material to be changed out of the extruder, keep it activated and insert the new material.
Flexible Mounting Options
Our standard mounting bracket in CNC machined aluminum can be used to mount the extruder as on the photos or a simple 3d printed bracket can be used. You can download a cad or stl-file of the extruder that gives you the dimensions you need in order to design your custom mounting bracket. The extruder is delivered without mounts. If you need the ALU mounts please remember to add them to your cart.
Additional Info
Total weight when installed (including Alu Mounts; Mosquito hotends, Thermistors; Heaters; Cables; Nozzles): 660g
E-step value: 415
Additional information
| Freight Weight | 565 g |
|---|---|
| Dimensions | 15.5 × 11.5 × 10.5 cm |
About the e-steps
About the e-steps
Important notice regarding e-steps
The value for the e-steps we present in the description tab is the most common scenario:
1.8°/step motors and 16 bit micro-stepping.
The e-steps depend on:
- the stepper motor angle per step. The most common is 1.8°. Some printers use other kinds;
- The mainboard micro-stepping setting. The most common is 16 bit. Some boards may use other bit settings.
There is a directly proportional relationship with micro-stepping bits:
If the micro-stepping is double, eg. 32bit, double also the e-steps value.And an inverse proportional relationship with angle per step:
If the stepper motor angle per step is half, eg. 0.9, double the e-steps value.
Klipper settings
Klipper settings
For Klipper users
rotation_distance = full_steps_per_rotation * microsteps / steps_per_mmrotation_distance = 200 * 16 / 415
rotation_distance = 7.71The above calculation assumes the following parameters:
- stepper motor is a 1.8 degrees motor hence 200 as full steps per rotation;
- If you are using a 0.9 degrees stepper motor, replace full_steps_per_rotation with 400;
- microsteps are set to 16;
- e-steps value recommended for the BMG / DDX is 415.
Although we recommend to use the rotation_distance instead of the gear_ratio, we inform the BMG / DDX gearing ratio is 50:17 .
Mounting Guide

Mounting Guide
BMG-X2-M
The BMG-X2-M is a dual BMG extruder compatible with Slice Engineering Mosquito hotends.

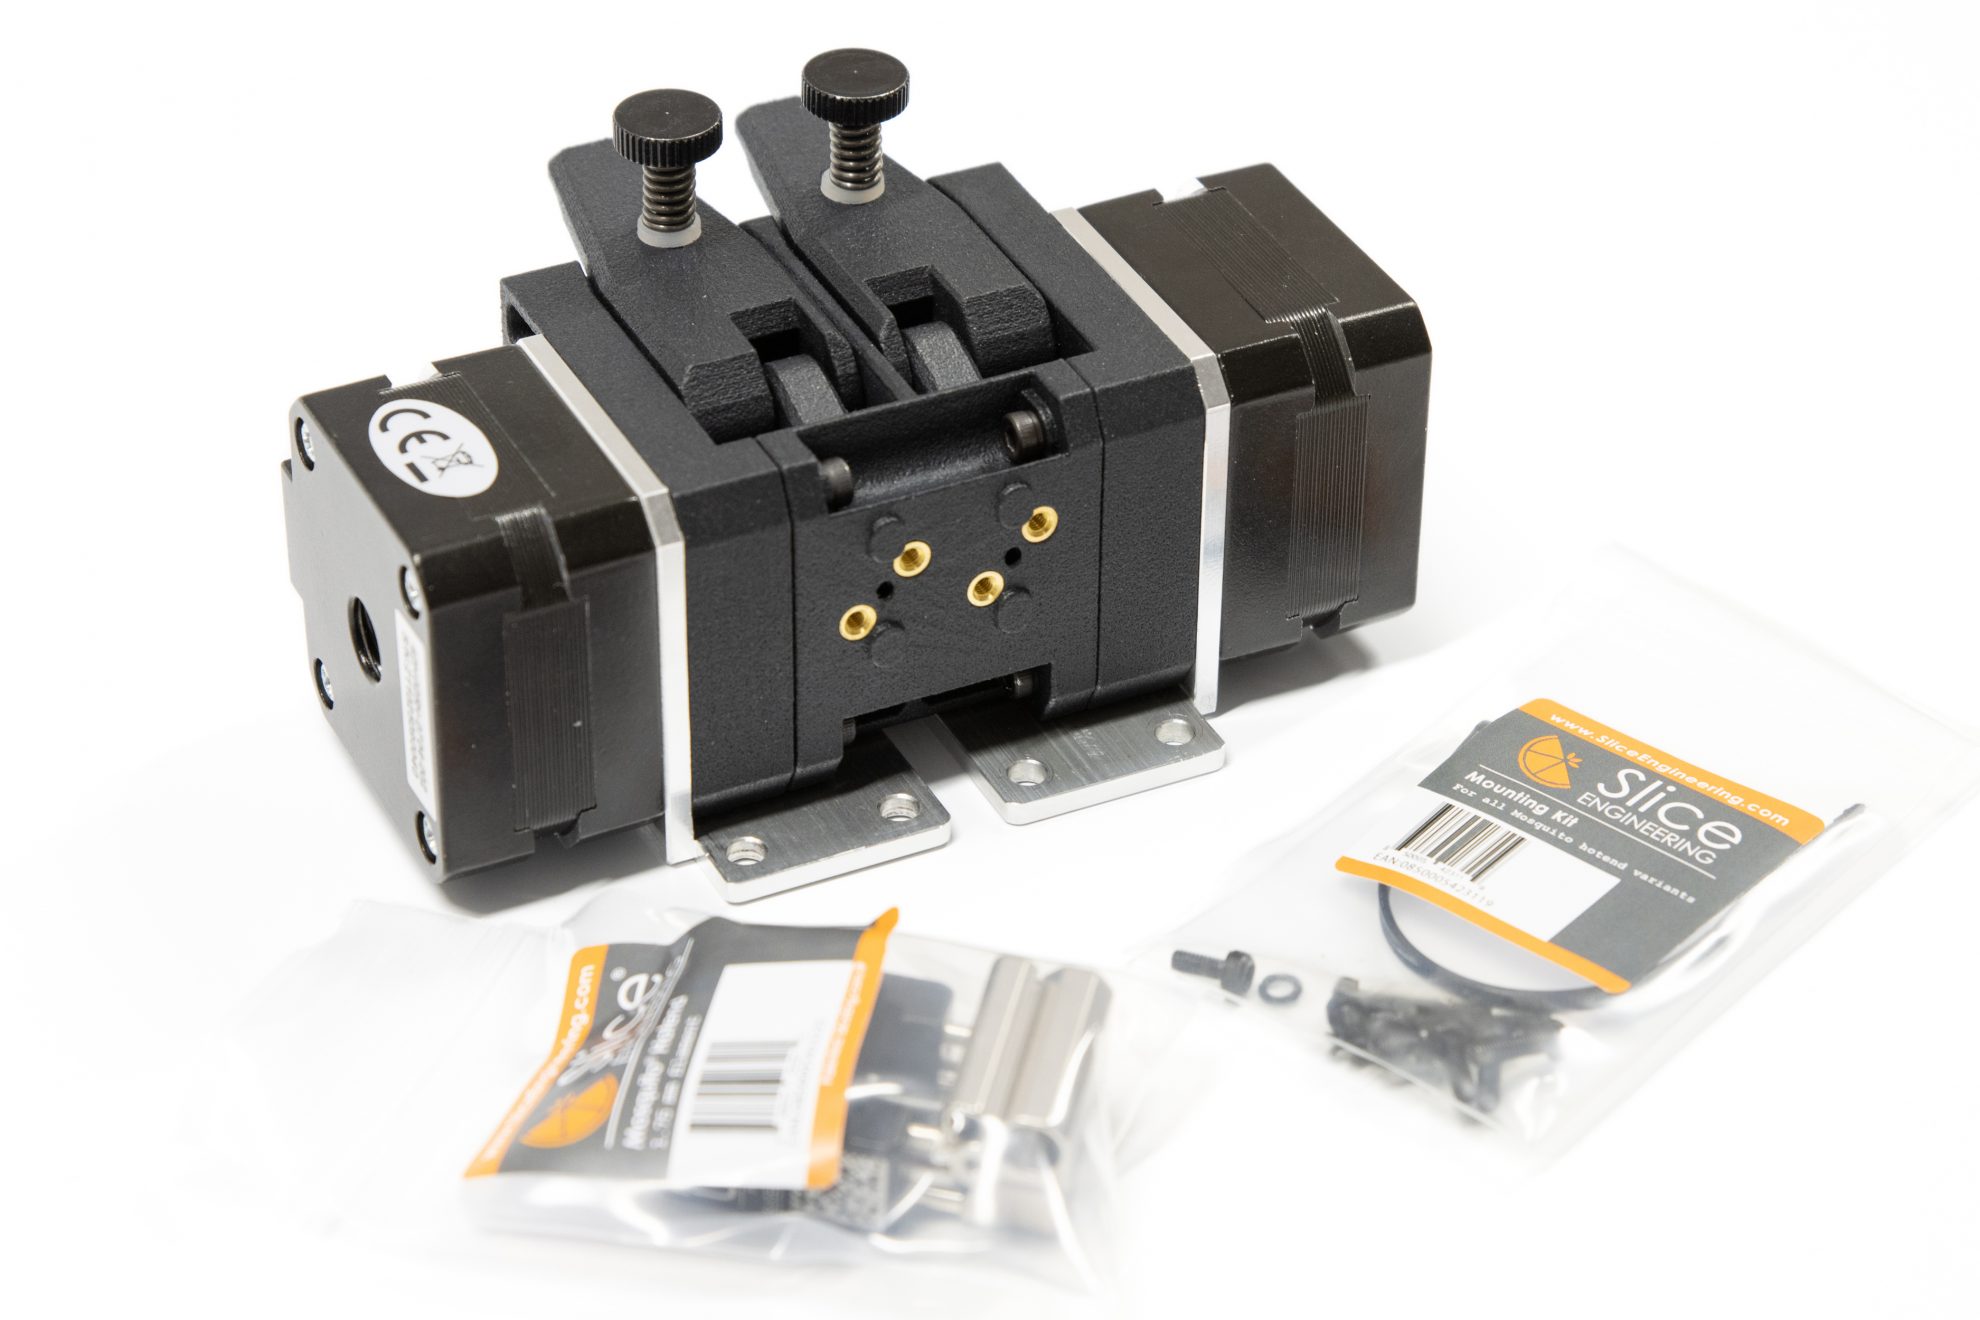
2 Mount Placeholders
The BMG-X2-M is supplied with 2 placeholders that must be removed and replaced with mount plates.
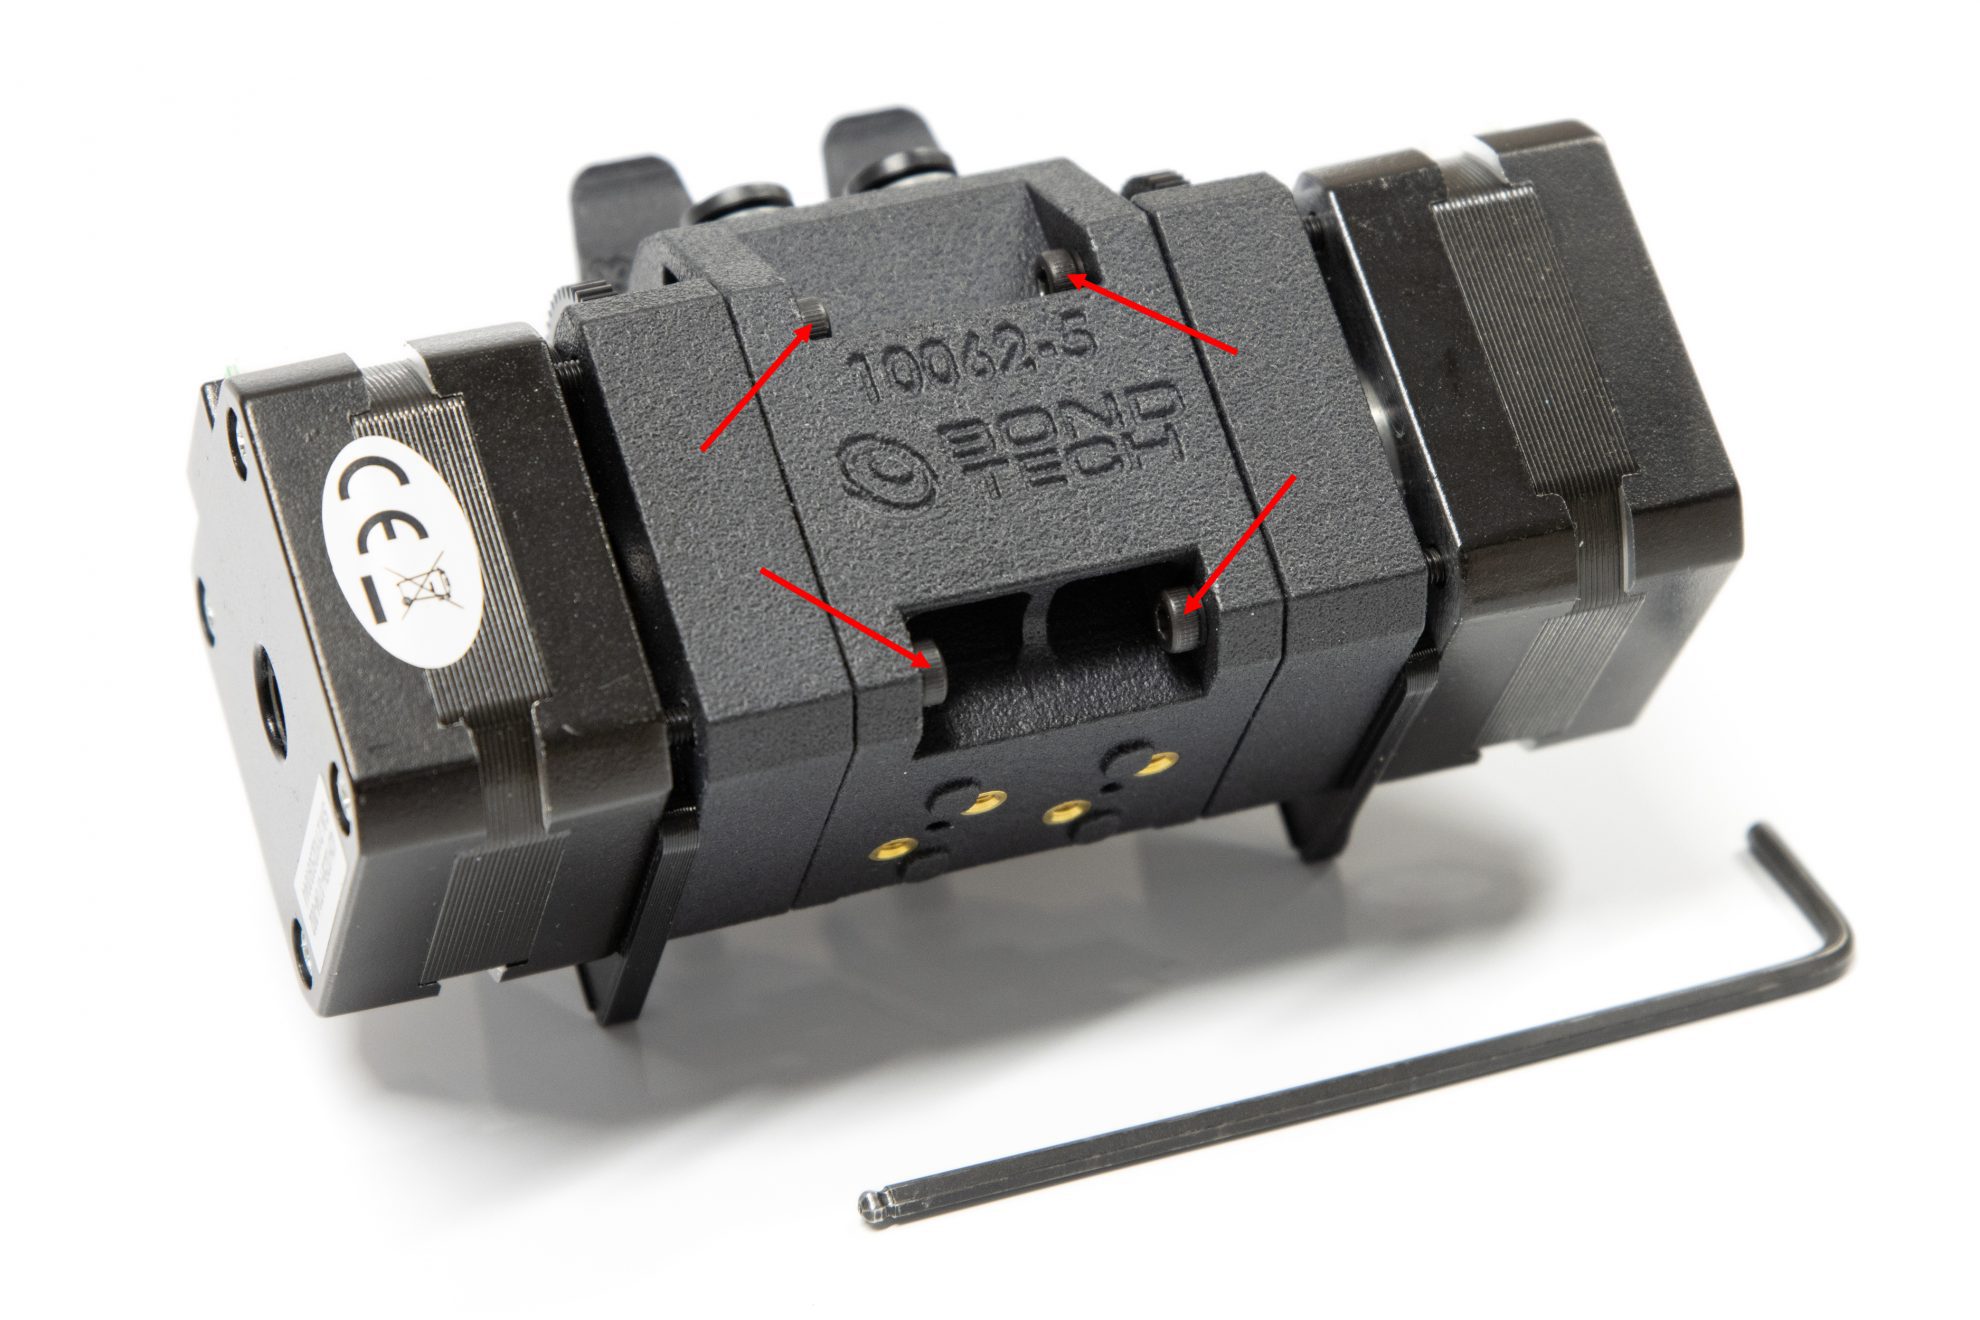
4 Front Holding Screws
Unscrew these 4 screws at the front to release the stepper motors and remove the placeholders. Use a 2.5mm Hex Key.
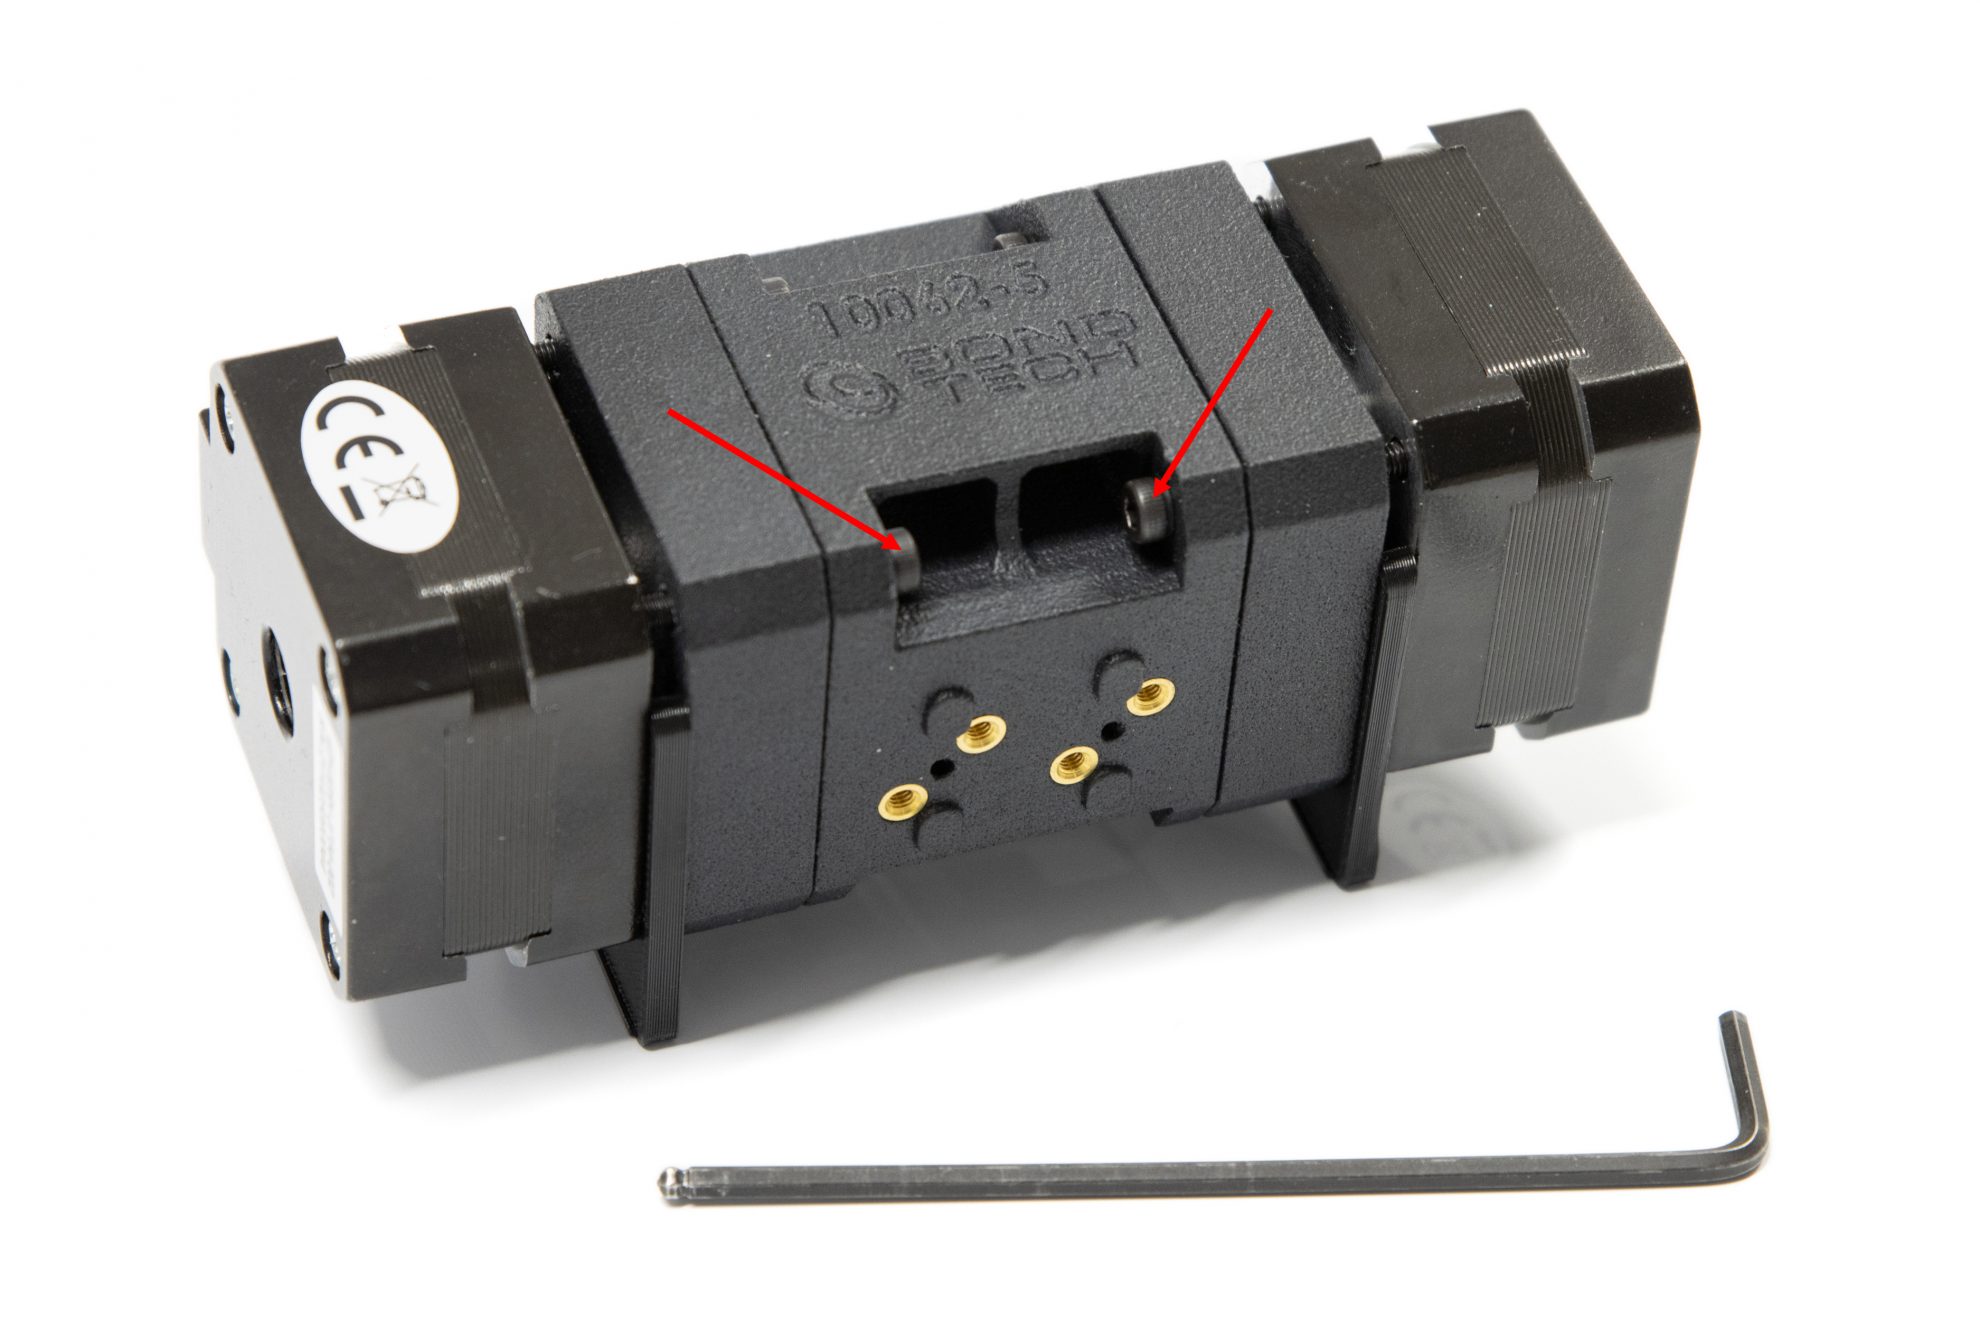
2 Rear Holding Screws
Unscrew these 2 screws at the rear to release the stepper motors and remove the placeholders. Use a 2.5mm Hex Key.
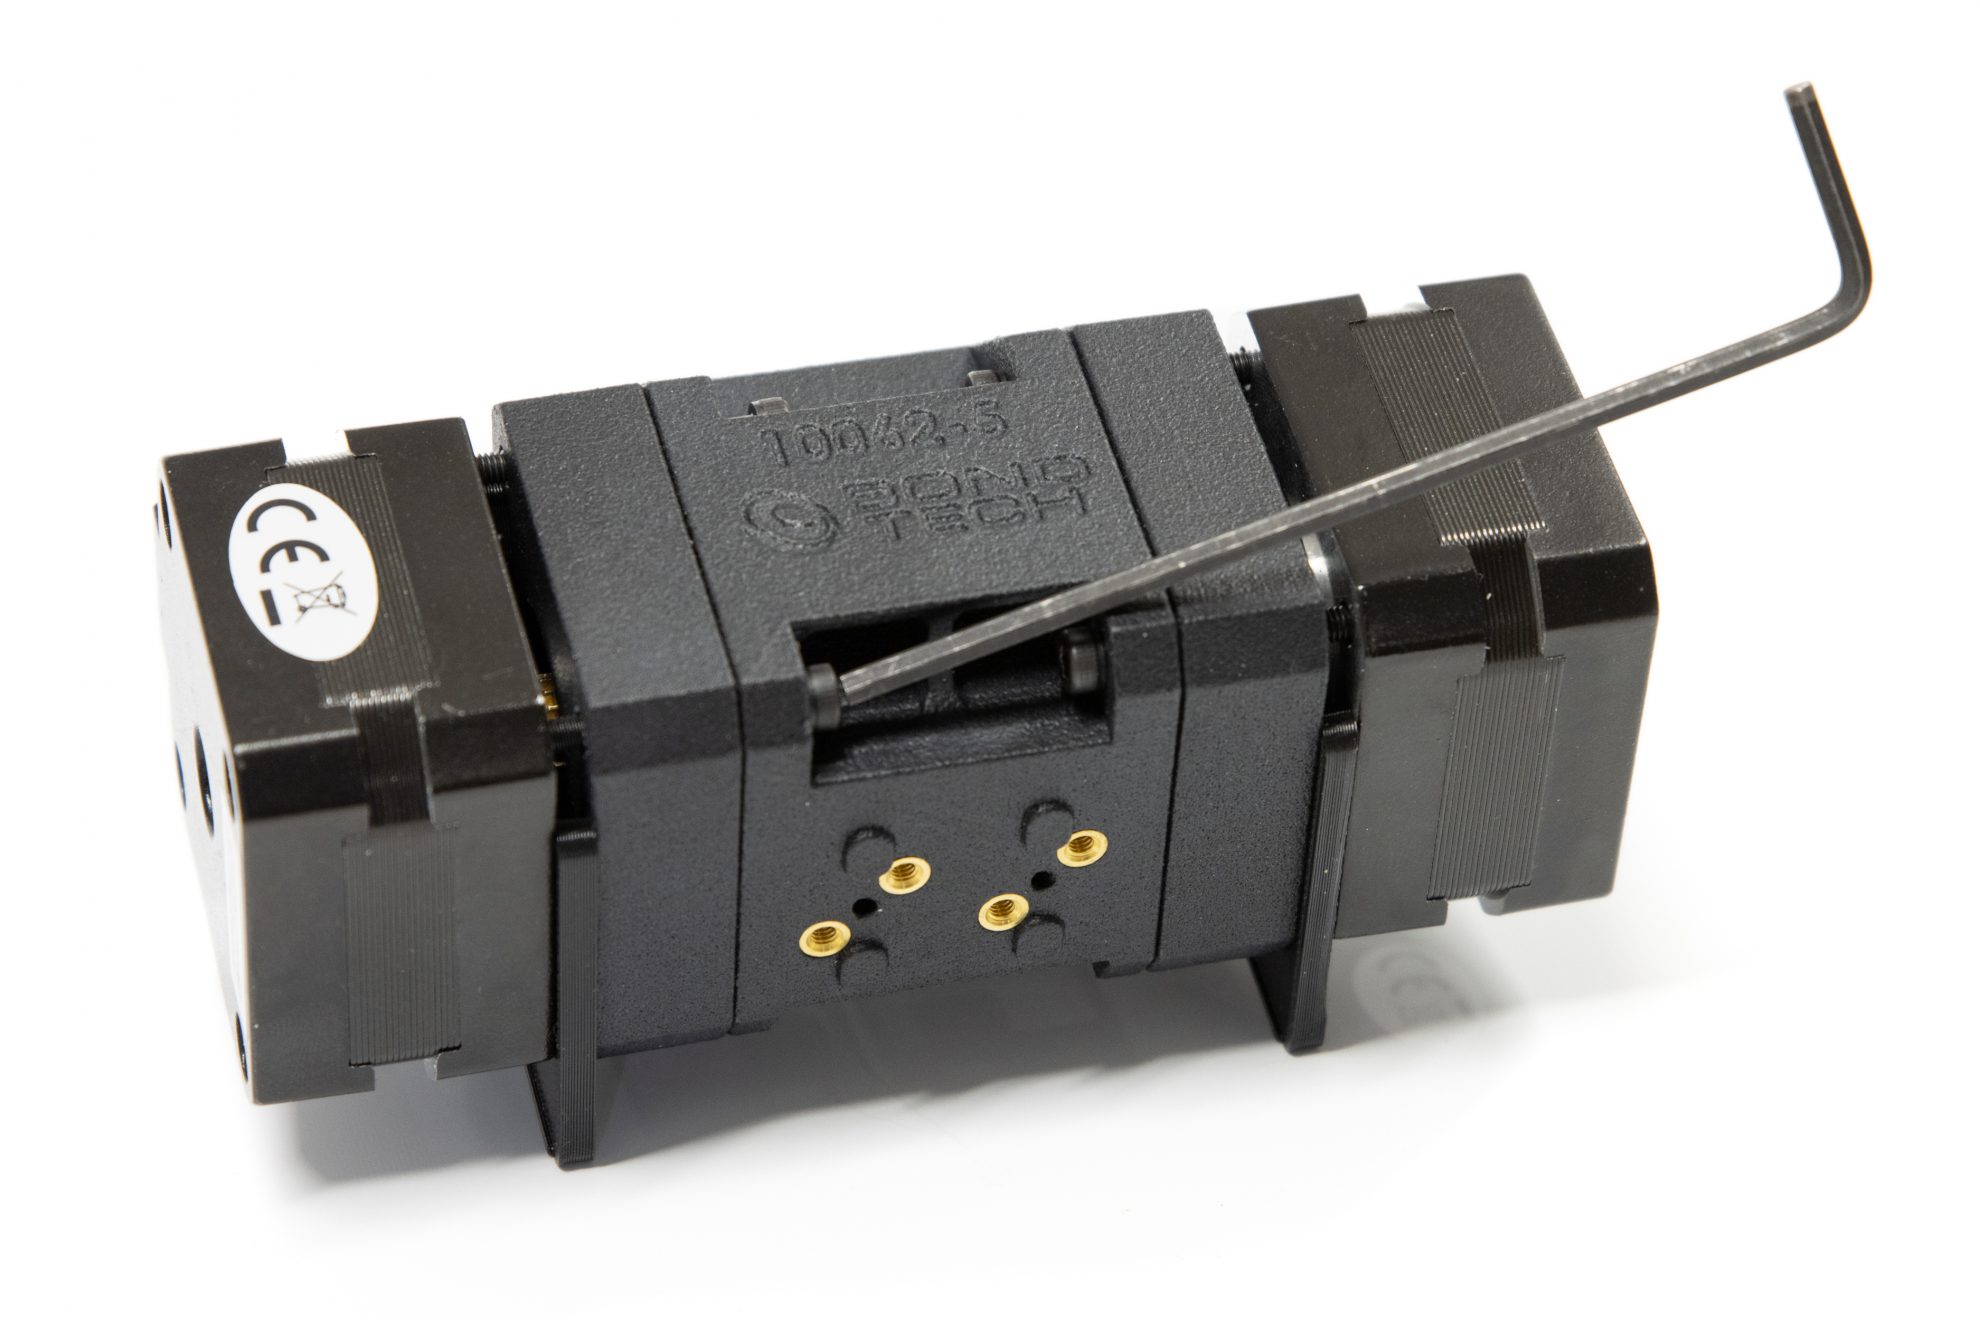
Ball Point Hex Keys
Access to all extruder and hotend holding screws on the assembly of the BMG-X2-M require Ball Point Hex Keys to engage the screws at an angle.
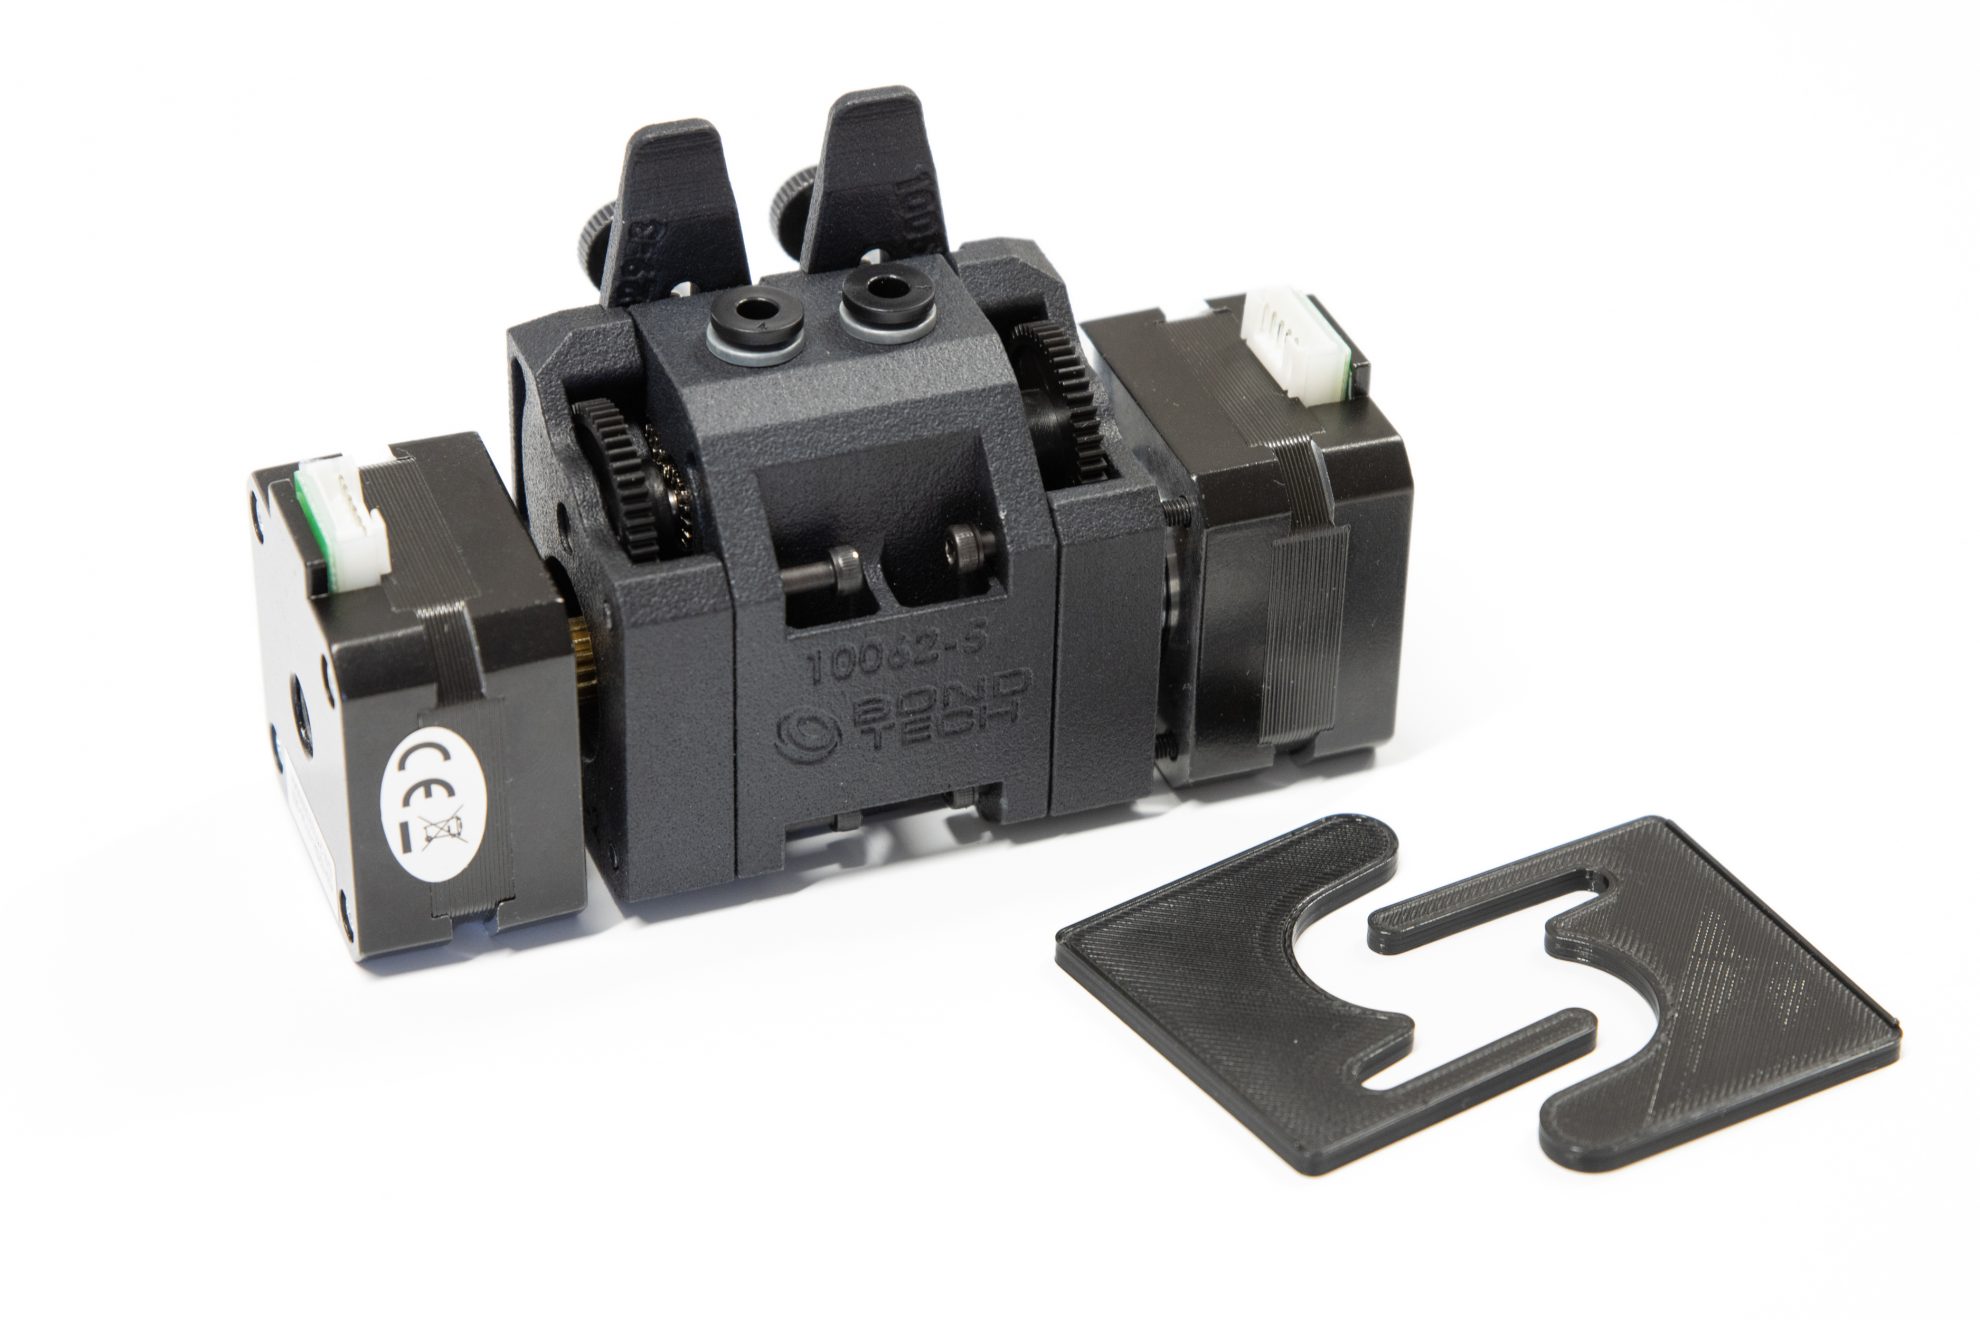
Placeholders Removed
By relaxing the holding screws, placeholders can be removed.
BMG ALU Mount Plates
Custom or pre-made mount plates can be used. The BMG ALU Mount Plate is the one we recommend to use.
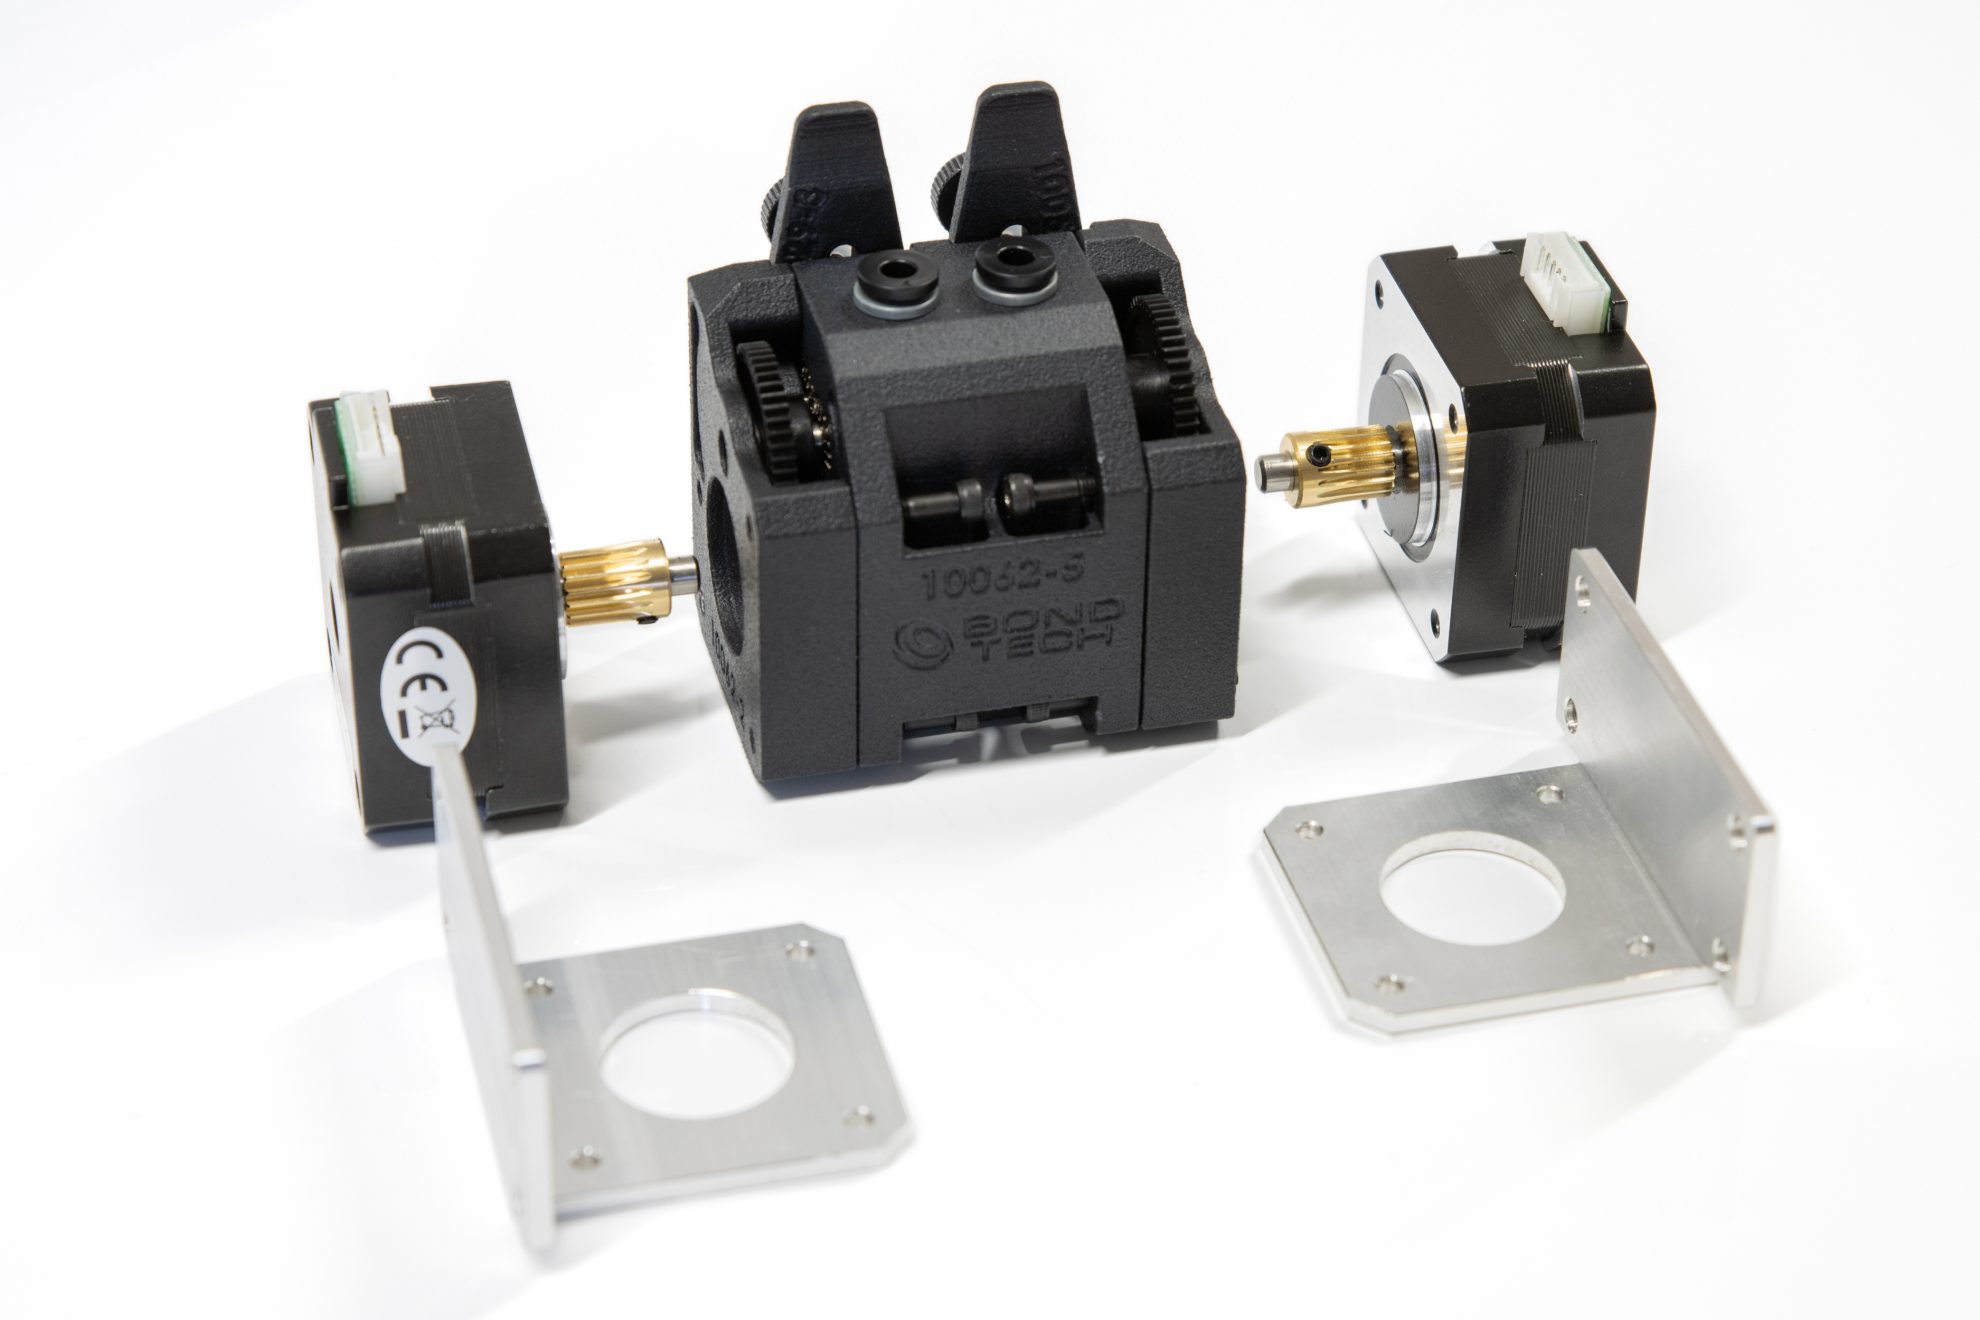
Release Stepper Motors
Before installing the BMG ALU Mount Plates, release the stepper motors from the extruder.
Keep the BMG-X2-M together while releasing the stepper motors.
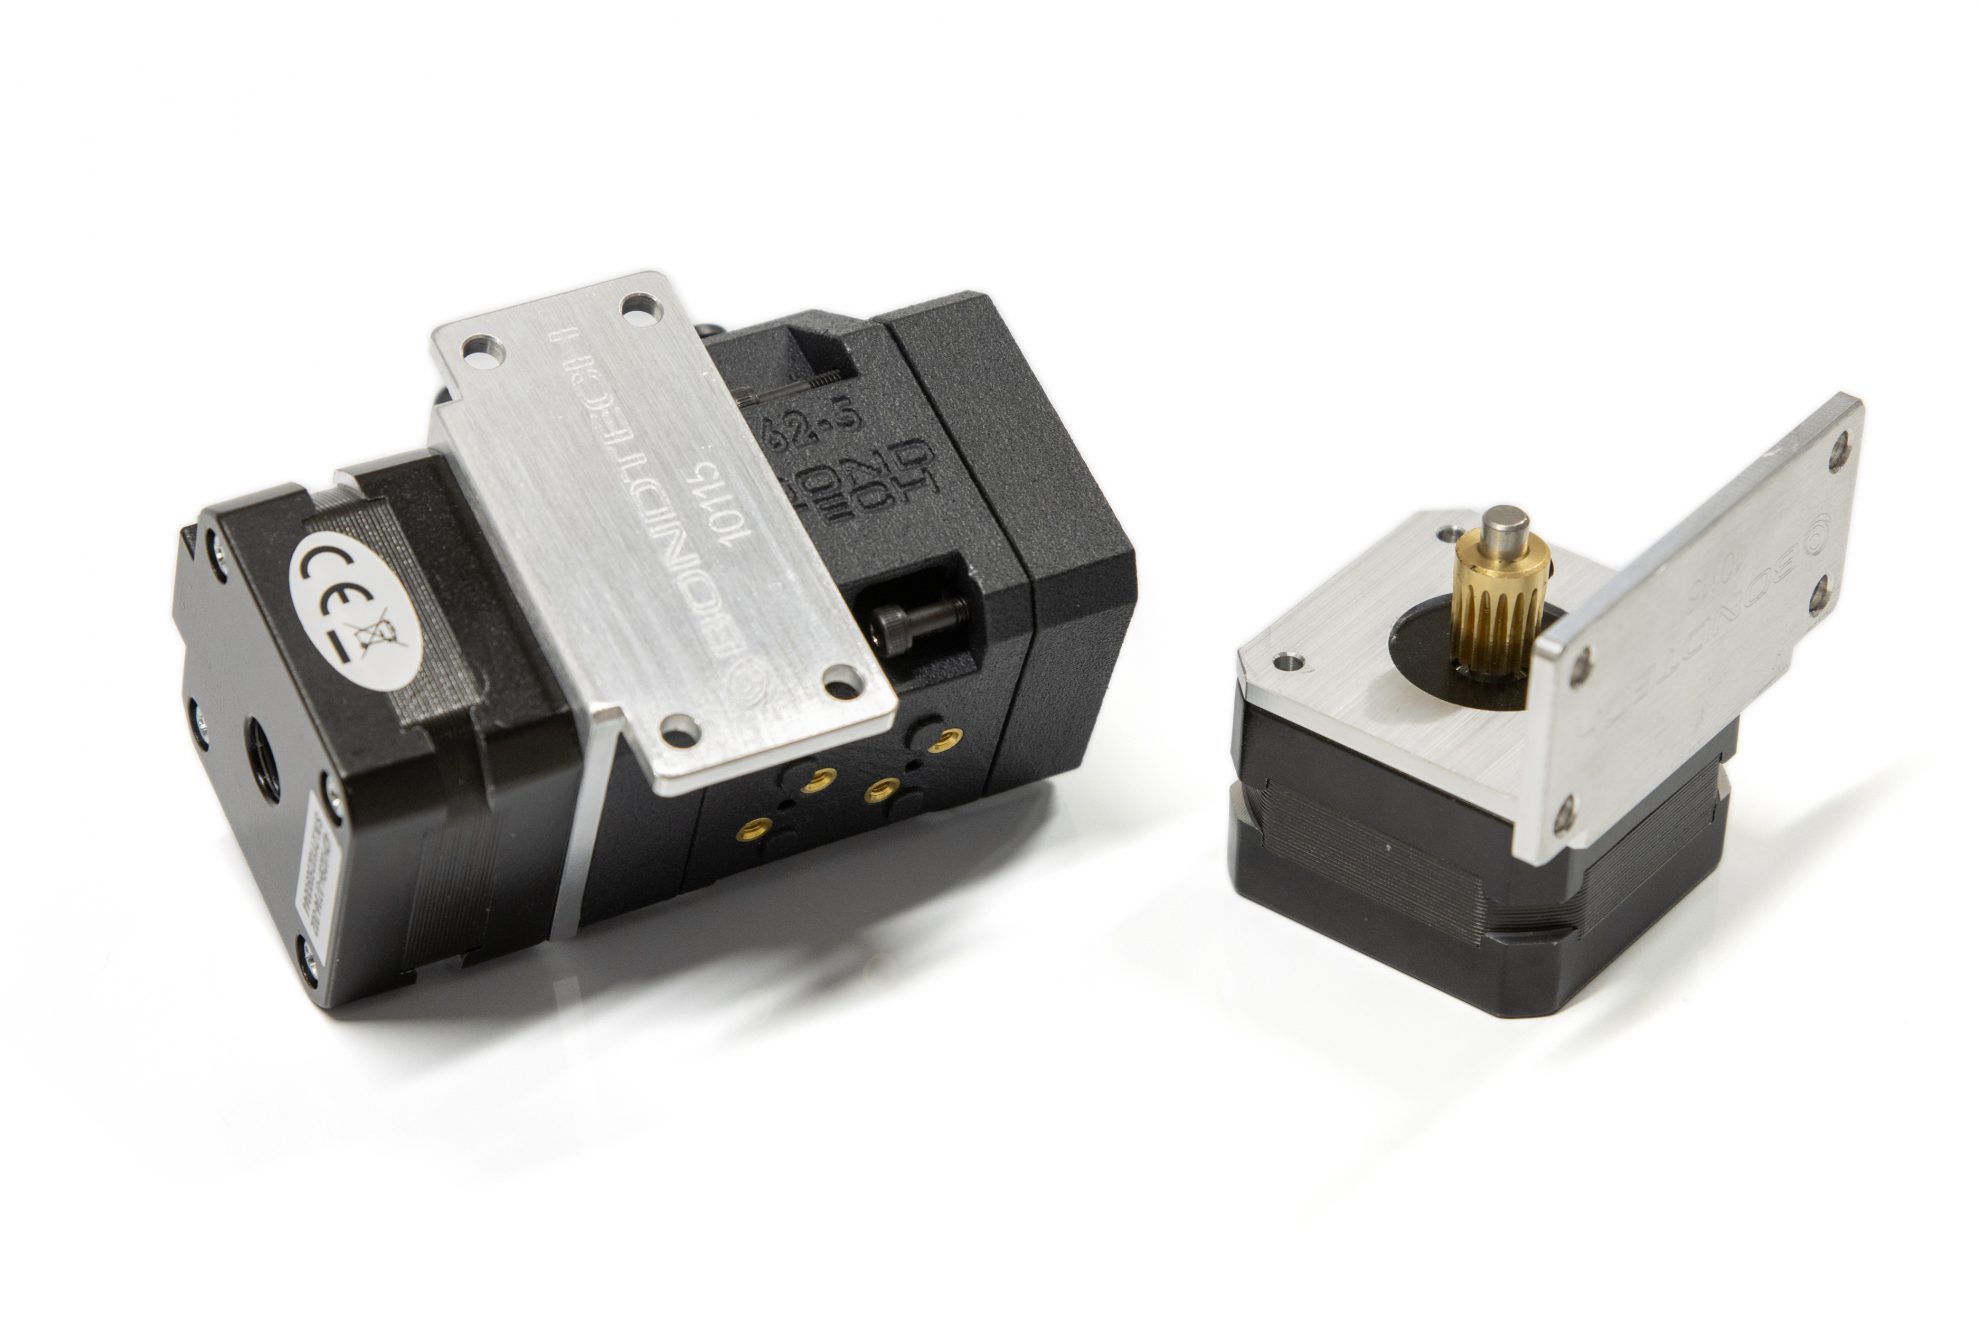
Installing The Mount Plates
Align the square face of the mount plate with the stepper motor, align the motor gear with the extruder gears and tighten them together with the holding screws.
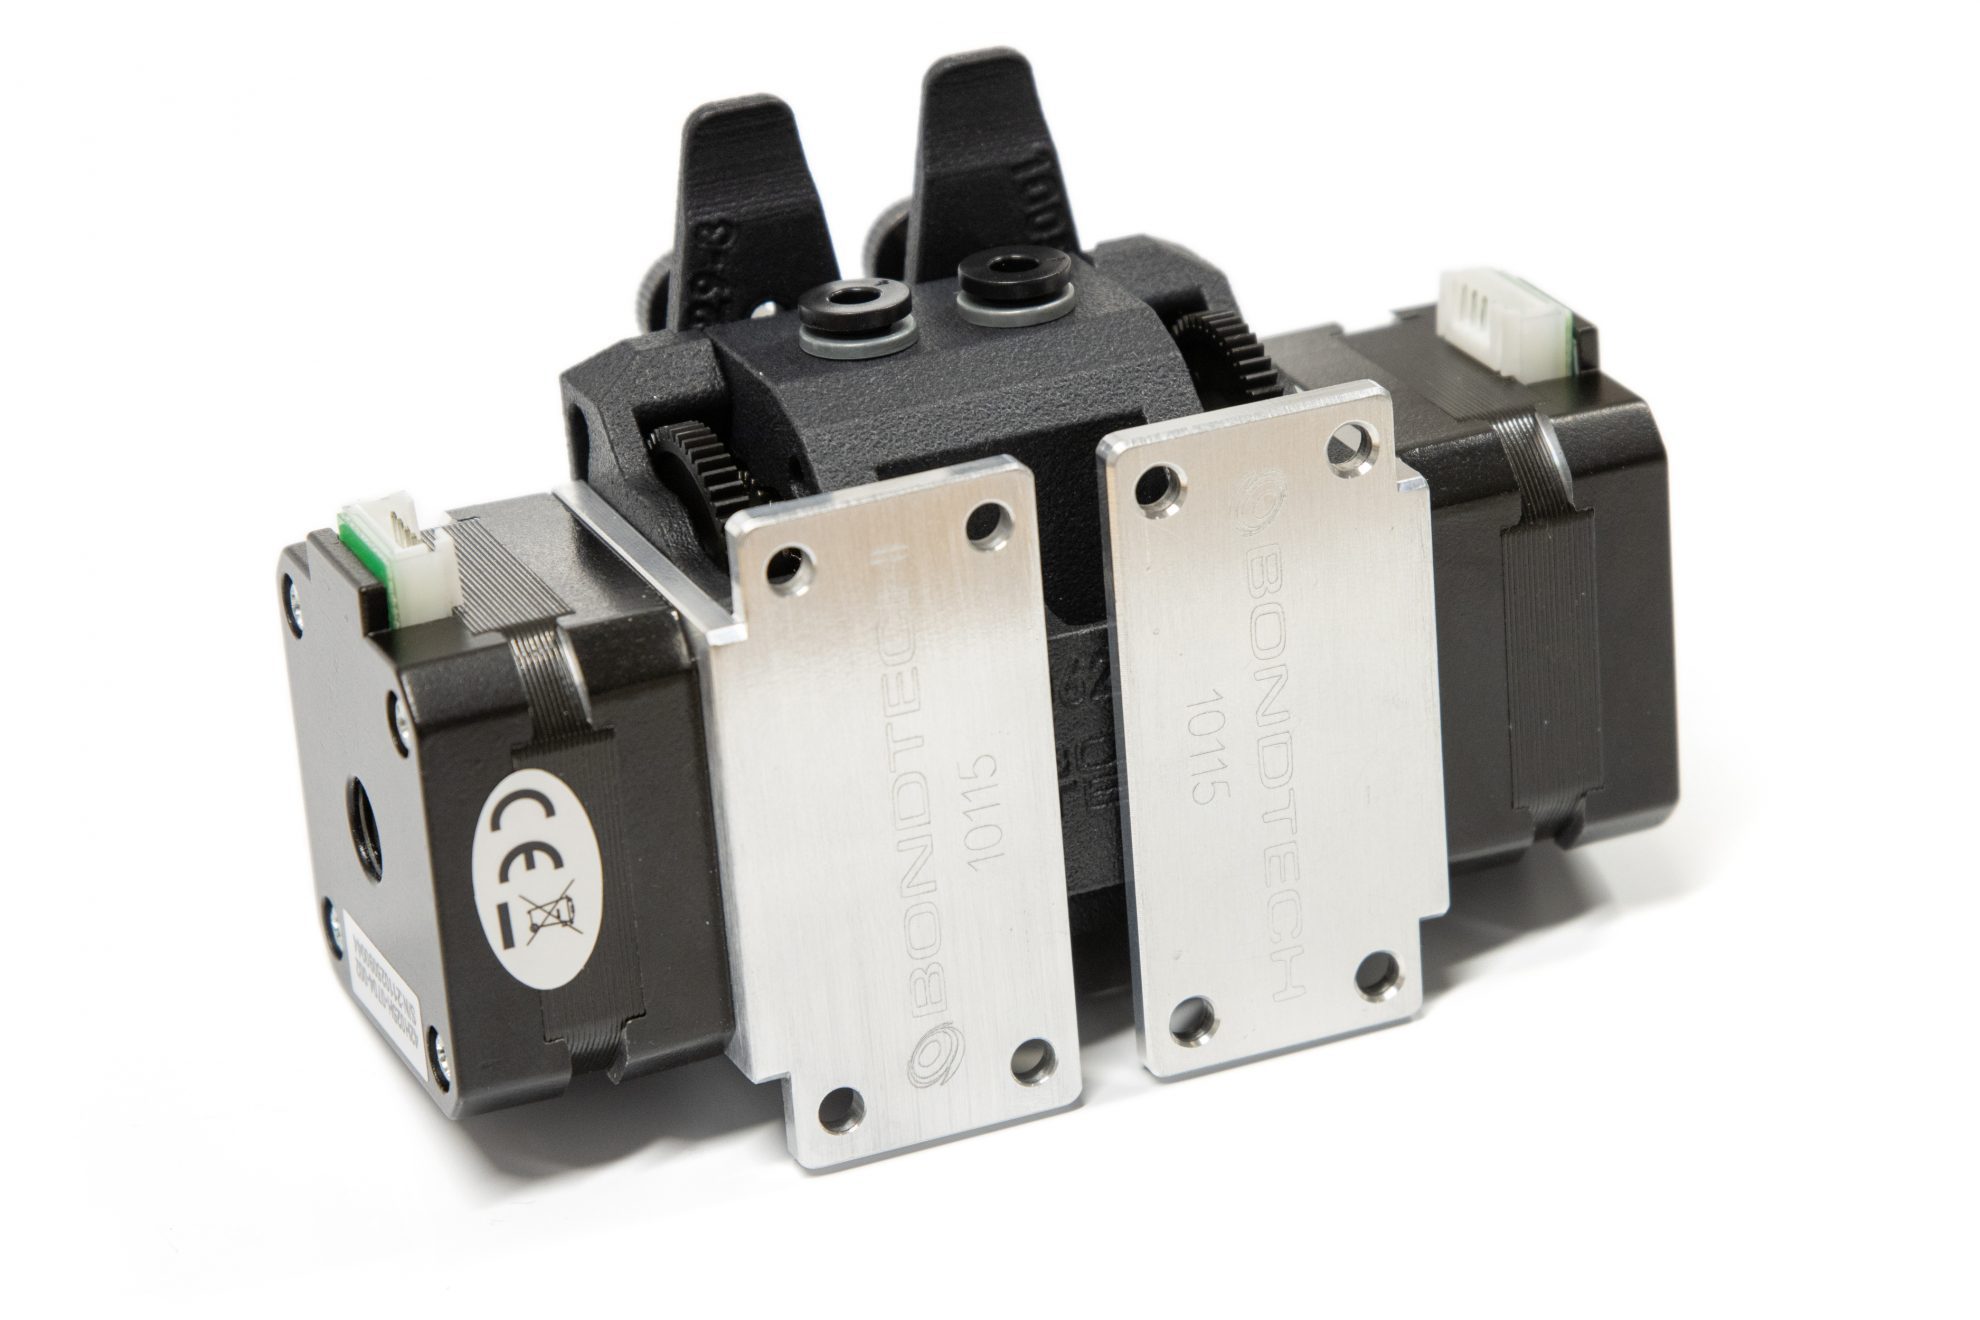
Mount Plates In Place
After installing the mount plates they should look like this, with the holding flanges turned towards the middle.

Top Carriage Mounting Holes
These 4 top holes will be used to mount the set onto a carriage plate.
15mm CC between inner holes. / 18mm CC between outter holes.
50mm CC from top to bottom.

Bottom Carriage Mounting Holes
These 4 bottom holes will be used to mount the set onto a carriage plate.
15mm CC between inner holes. / 18mm CC between outter holes.
50mm CC from top to bottom.
Installing the Mosquito hotends
The BMG-X2-M was designed to hold 2 Mosquito or Mosquito Magnum hotends.
More recent models, like the Mosquito Magnum+ Air, can also be installed in similar way.
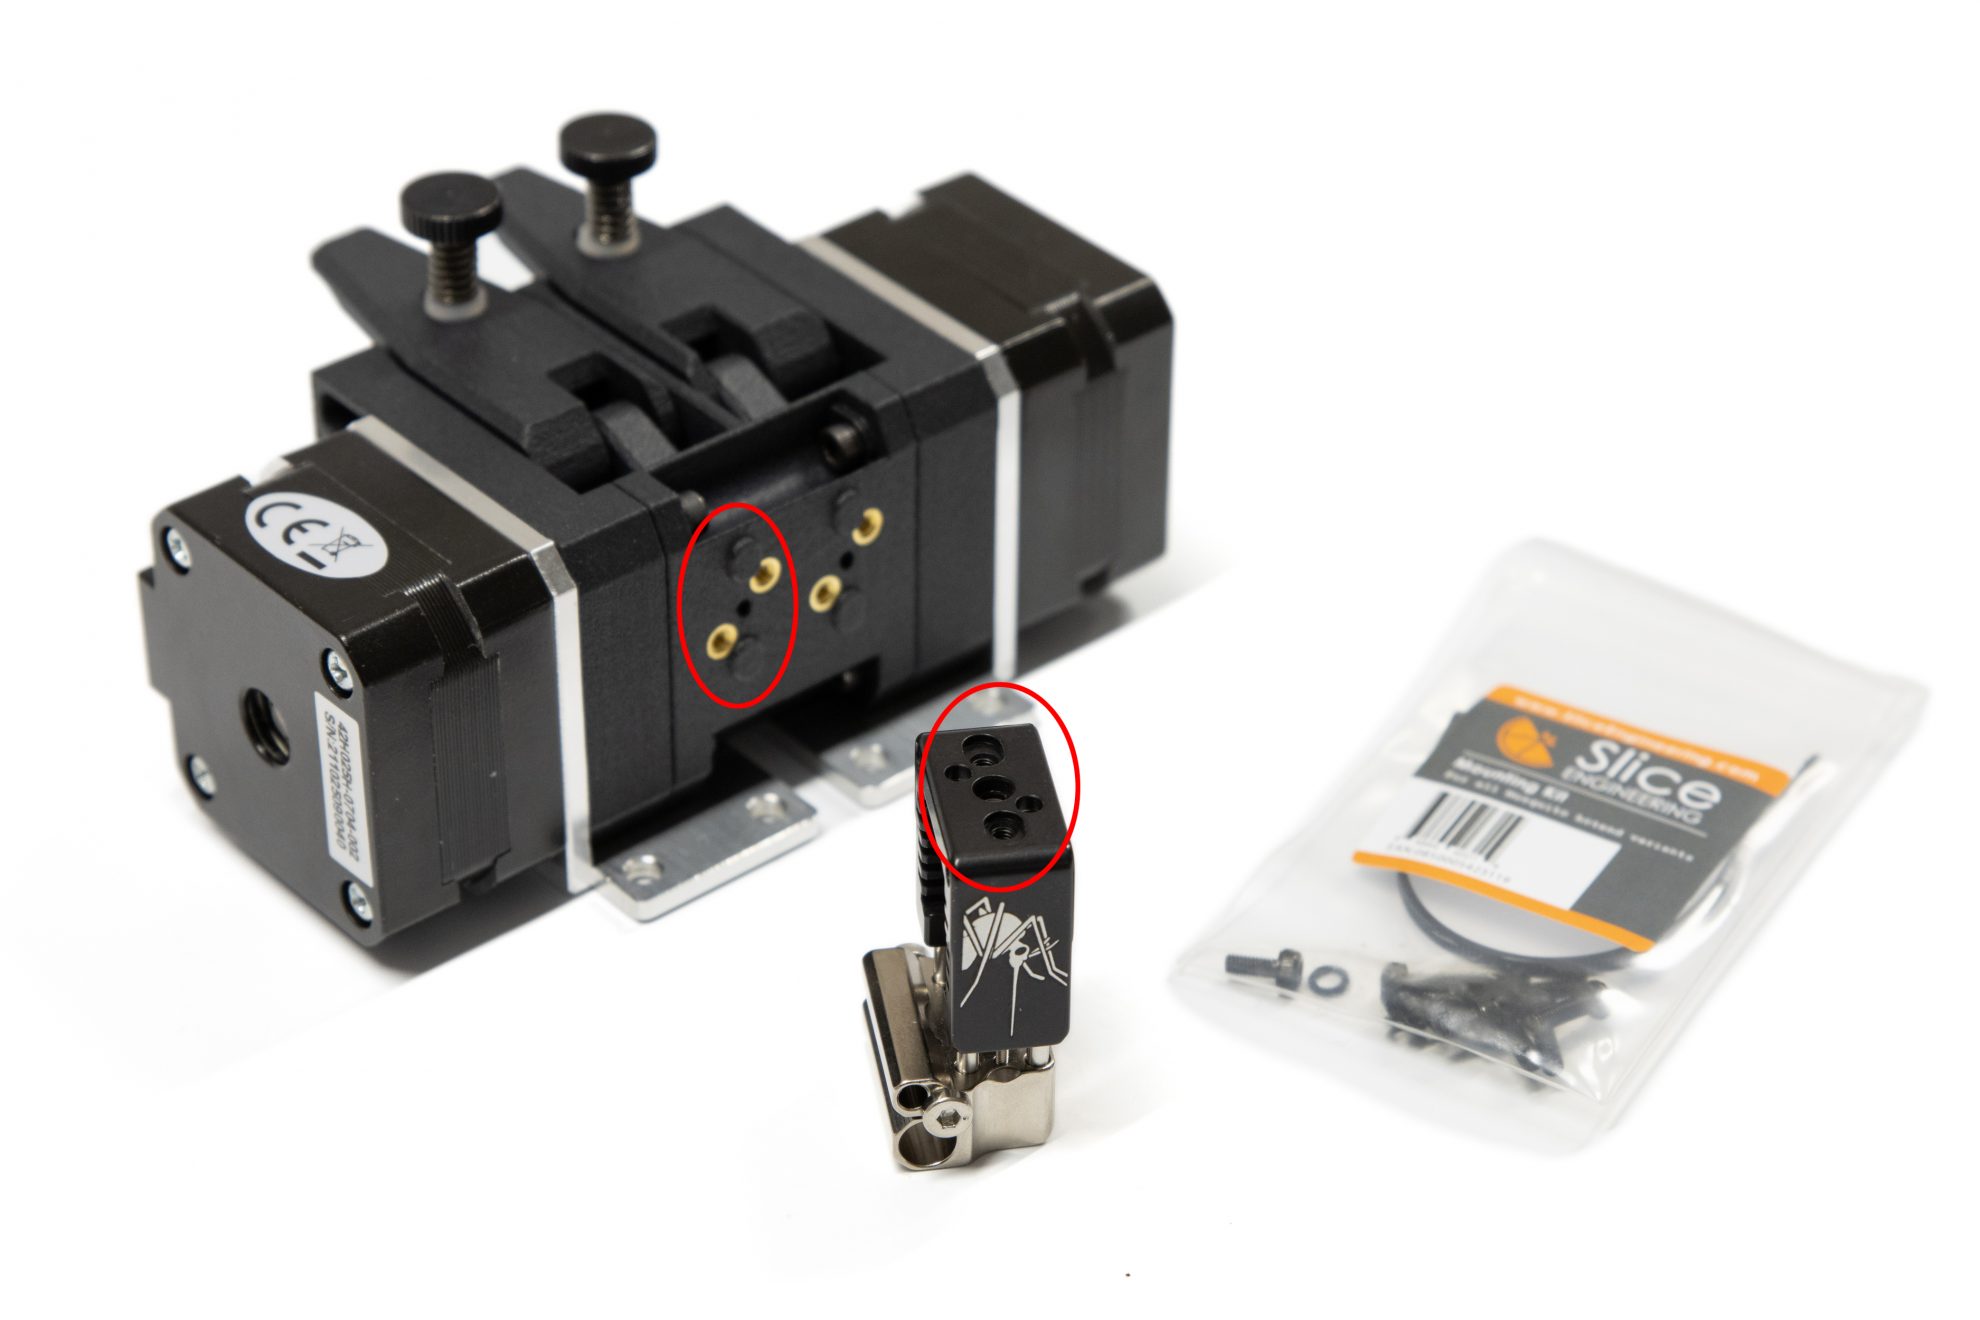
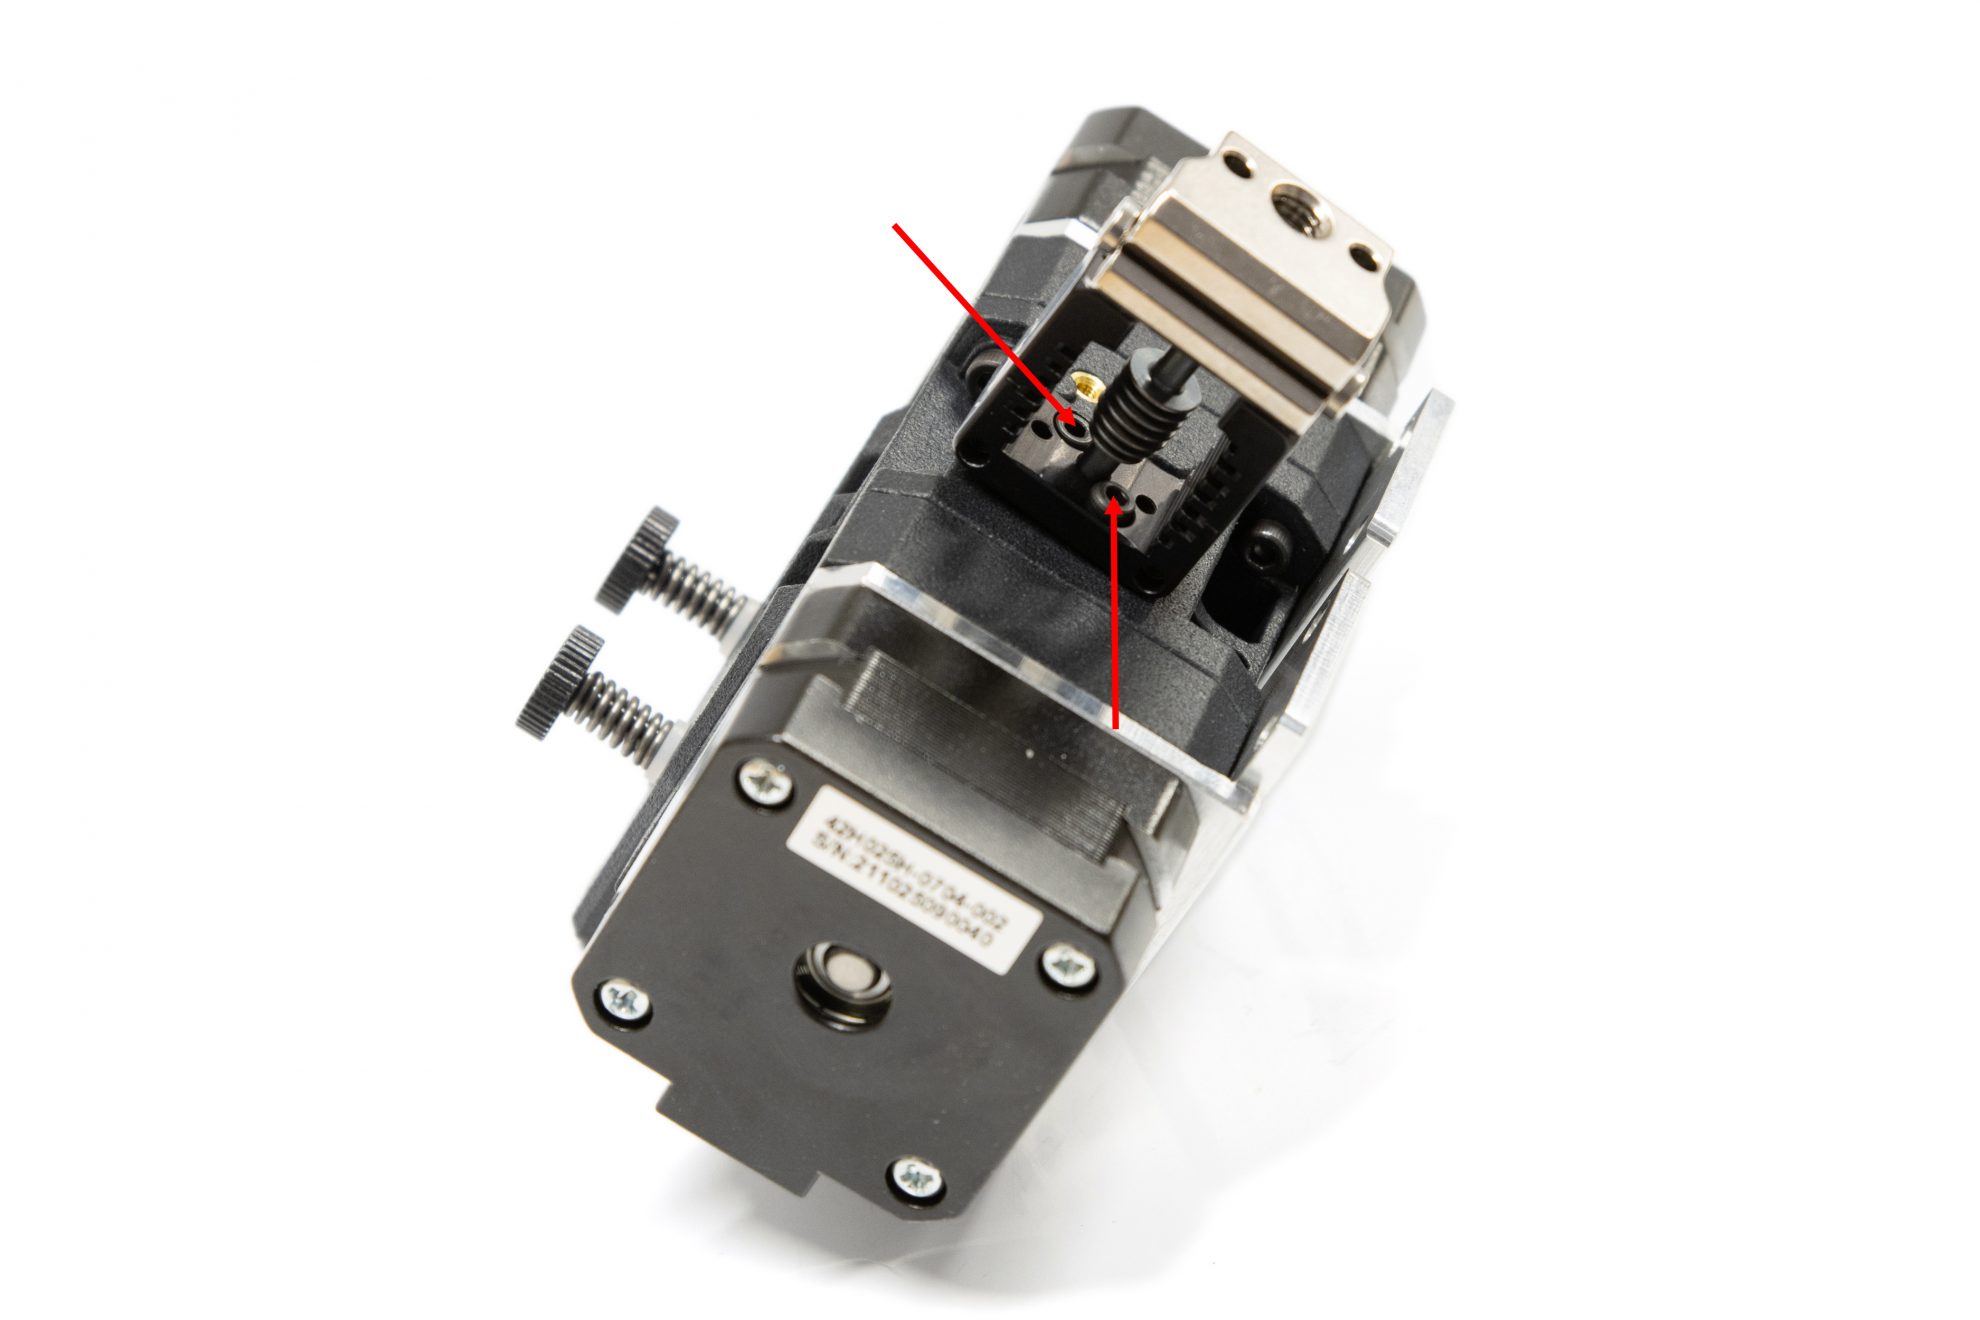
Mosquito Holding Pattern
The Mounting hole pattern of the Mosquito is replicated at the bottom of the BMG-X2-M
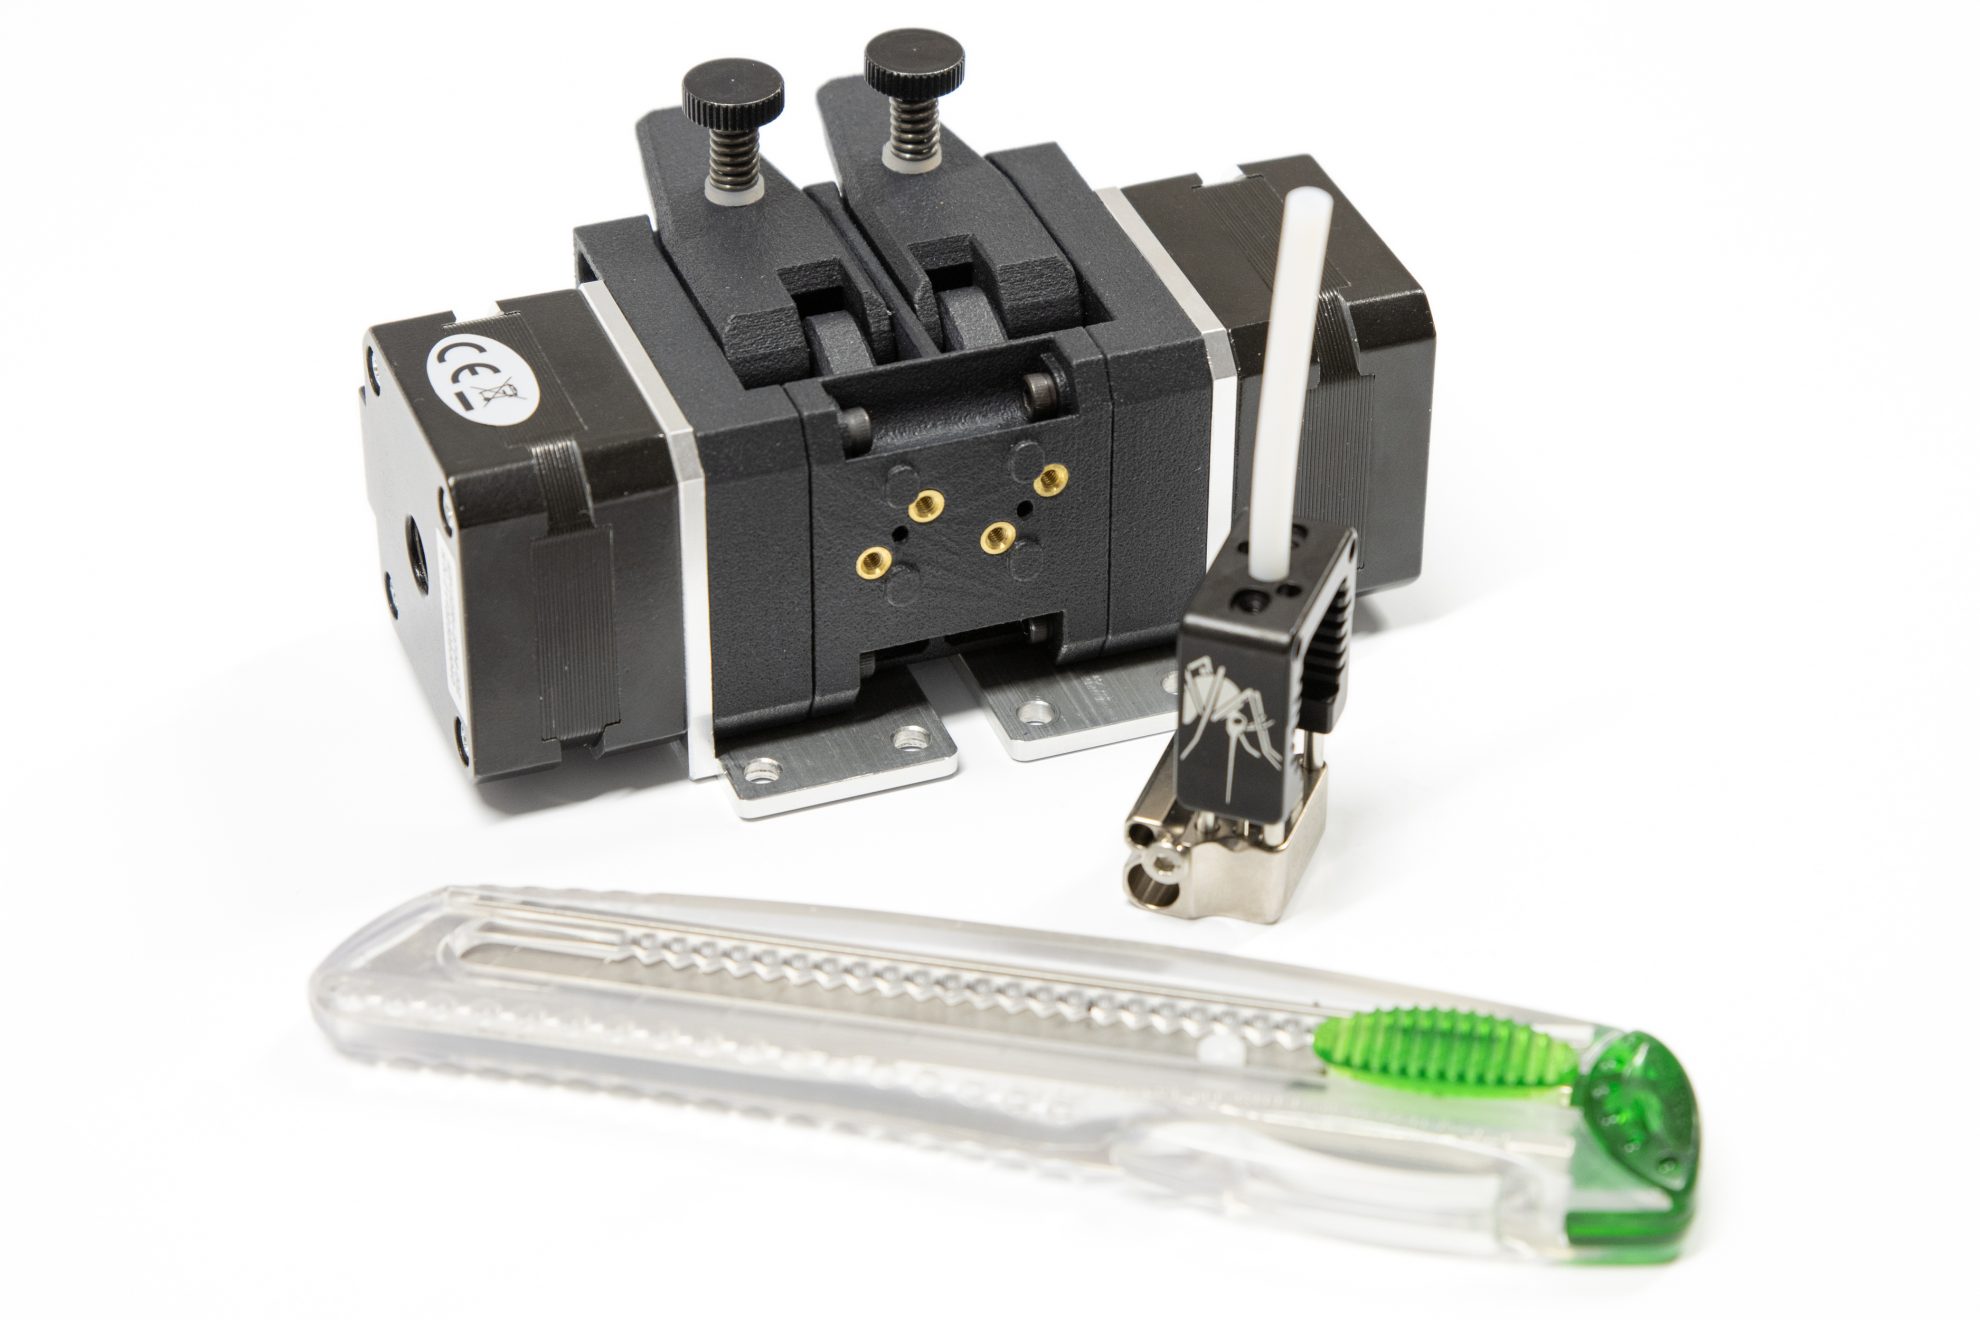
Short PTFE Tube Insert
Press a piece of 2/4mm PTFE tube into the top filament hole of the Mosquito hotend.
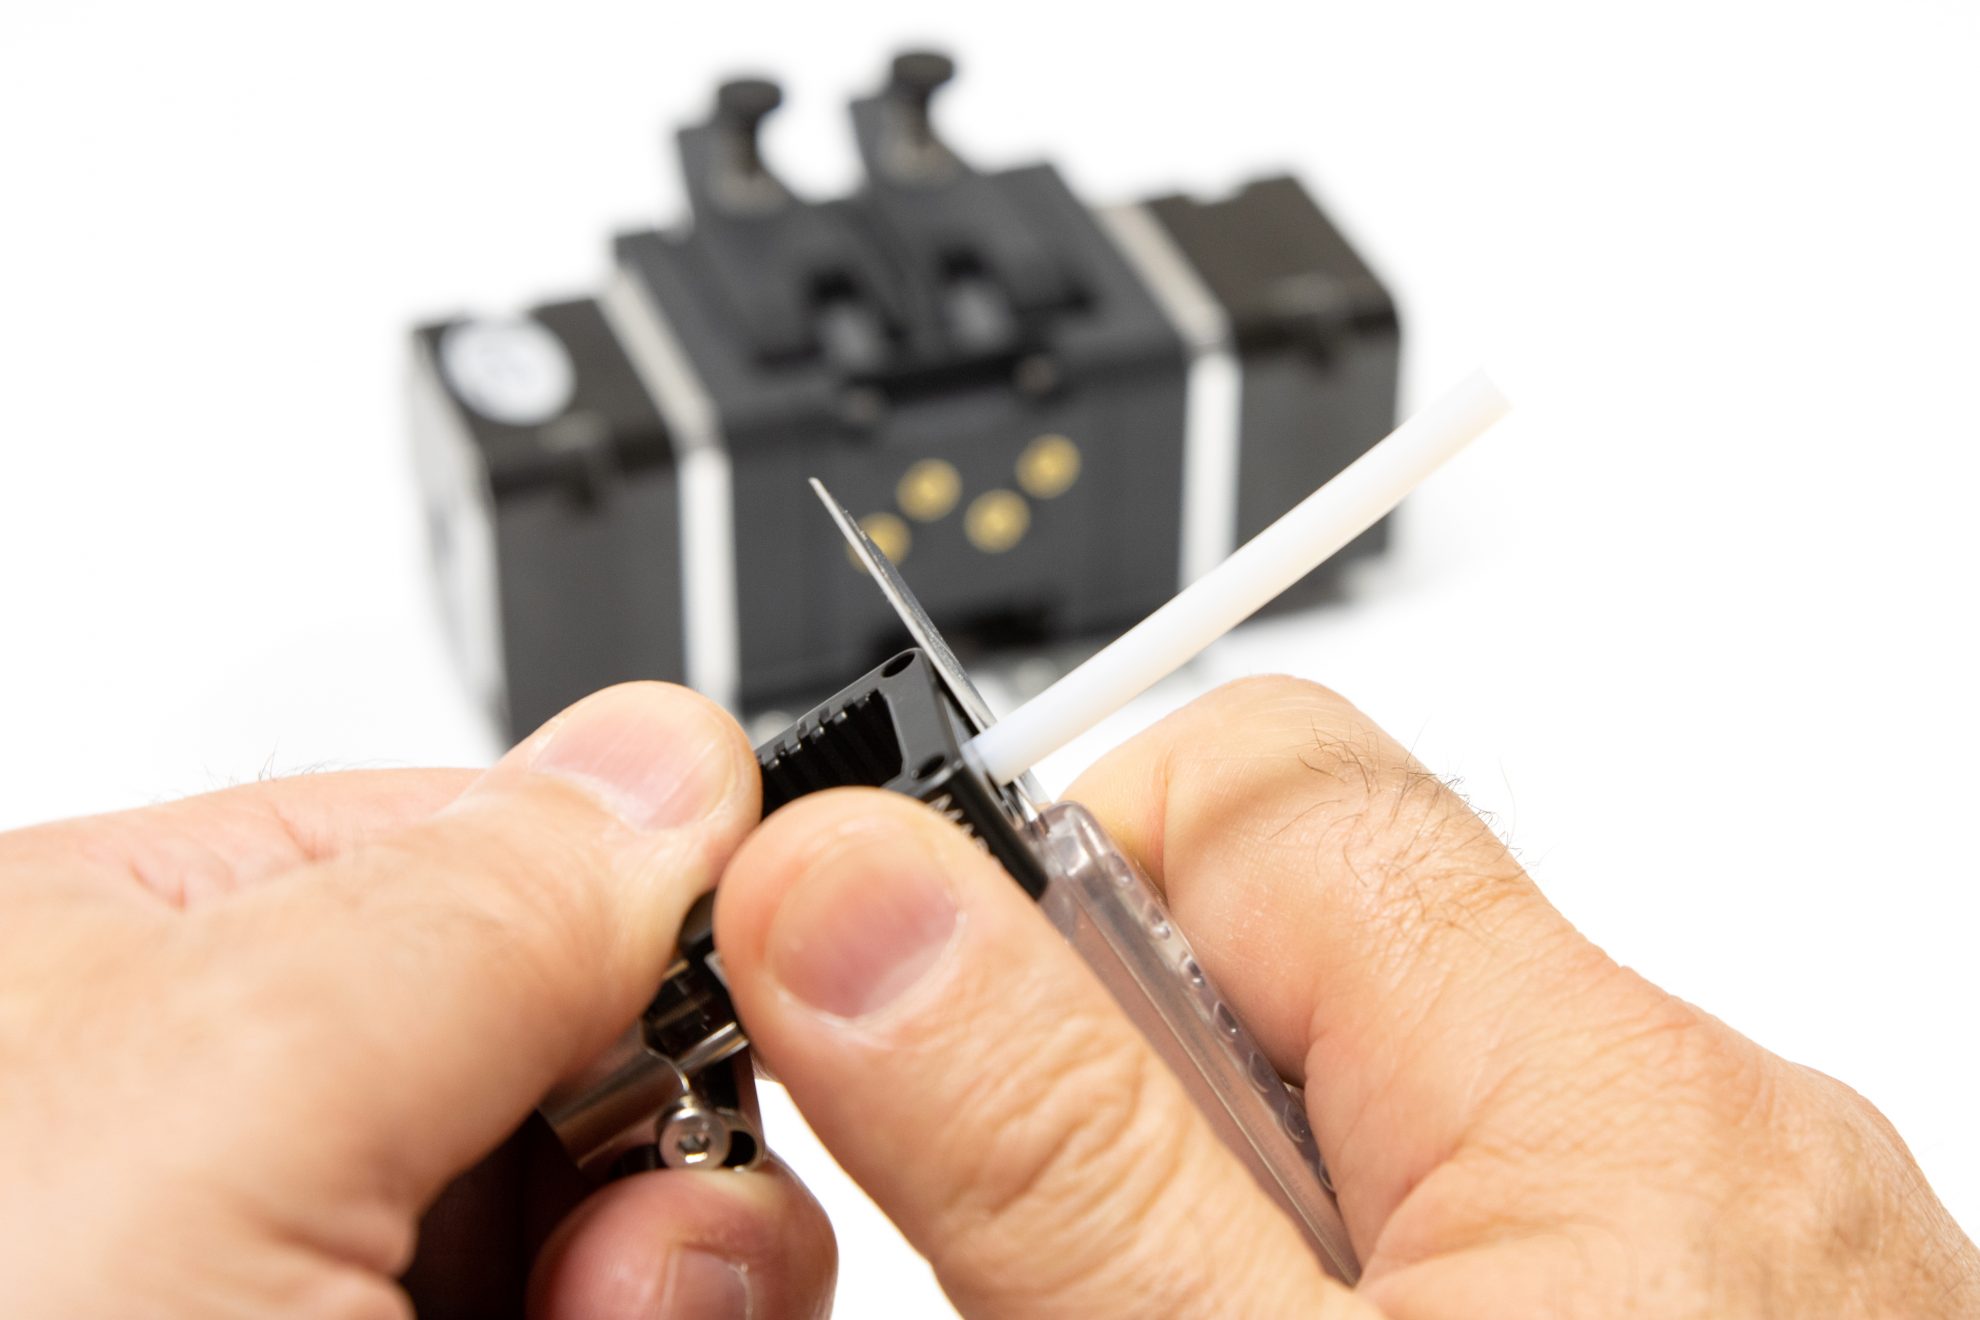
Trimming The 2mm PTFE Tube
Trimm the PTFE tube so it gets flush with the Mosquito's top face. About 2mm of PTFE tube are required.
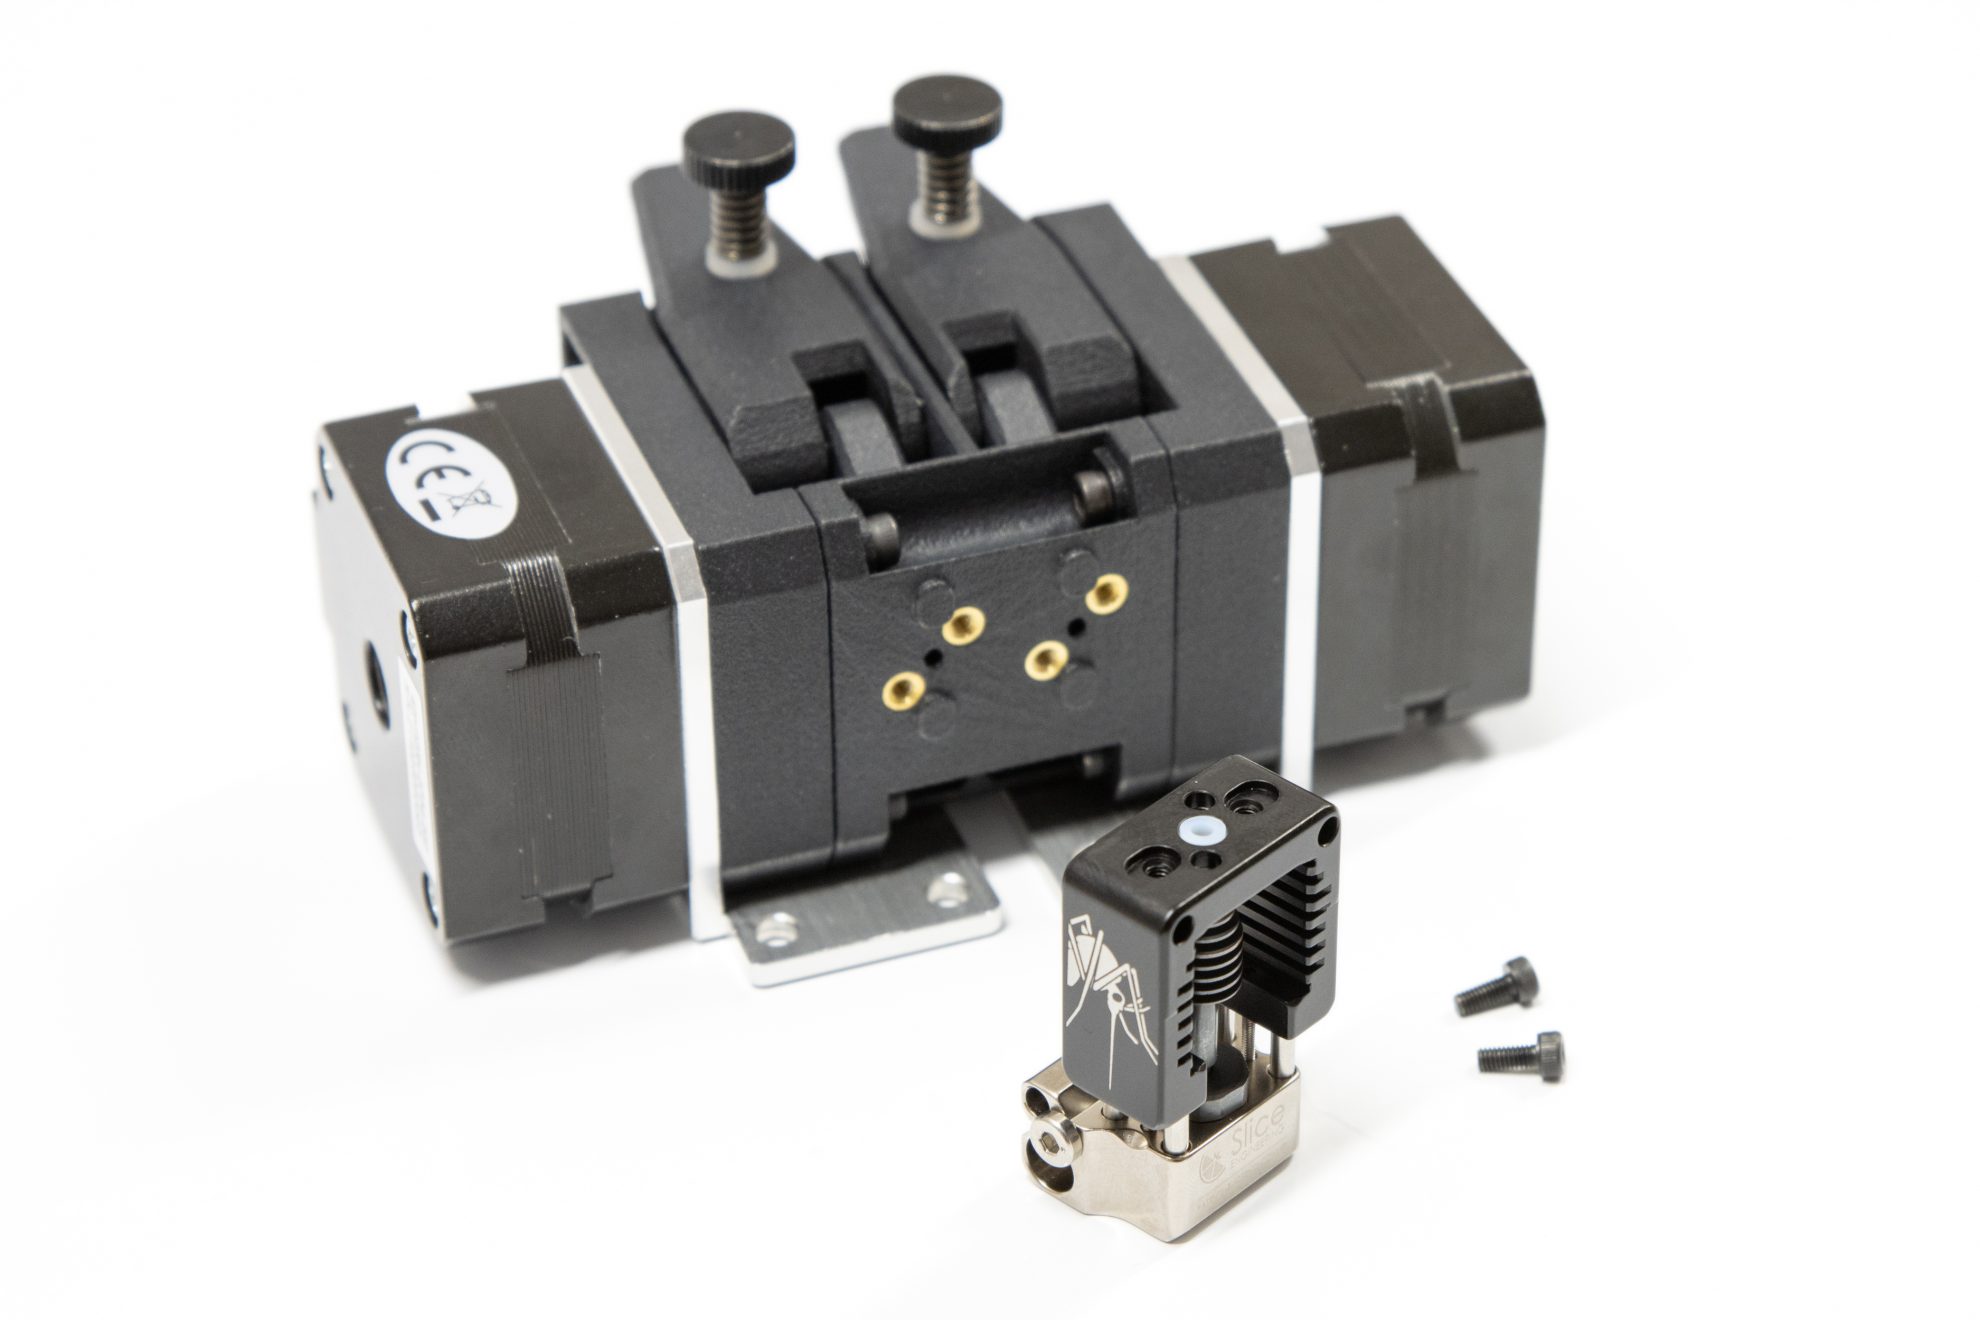
2x M2.5x6mm Screws
To attach the Mosquito hotend to the BMG-X2-M use 2 M2.5x6mm screws from the Mounting Kit
Holding From The Bottom
The M2.5x6mm screws grab the Mosquito hotend from the bottom and inside the Mosquito cage.
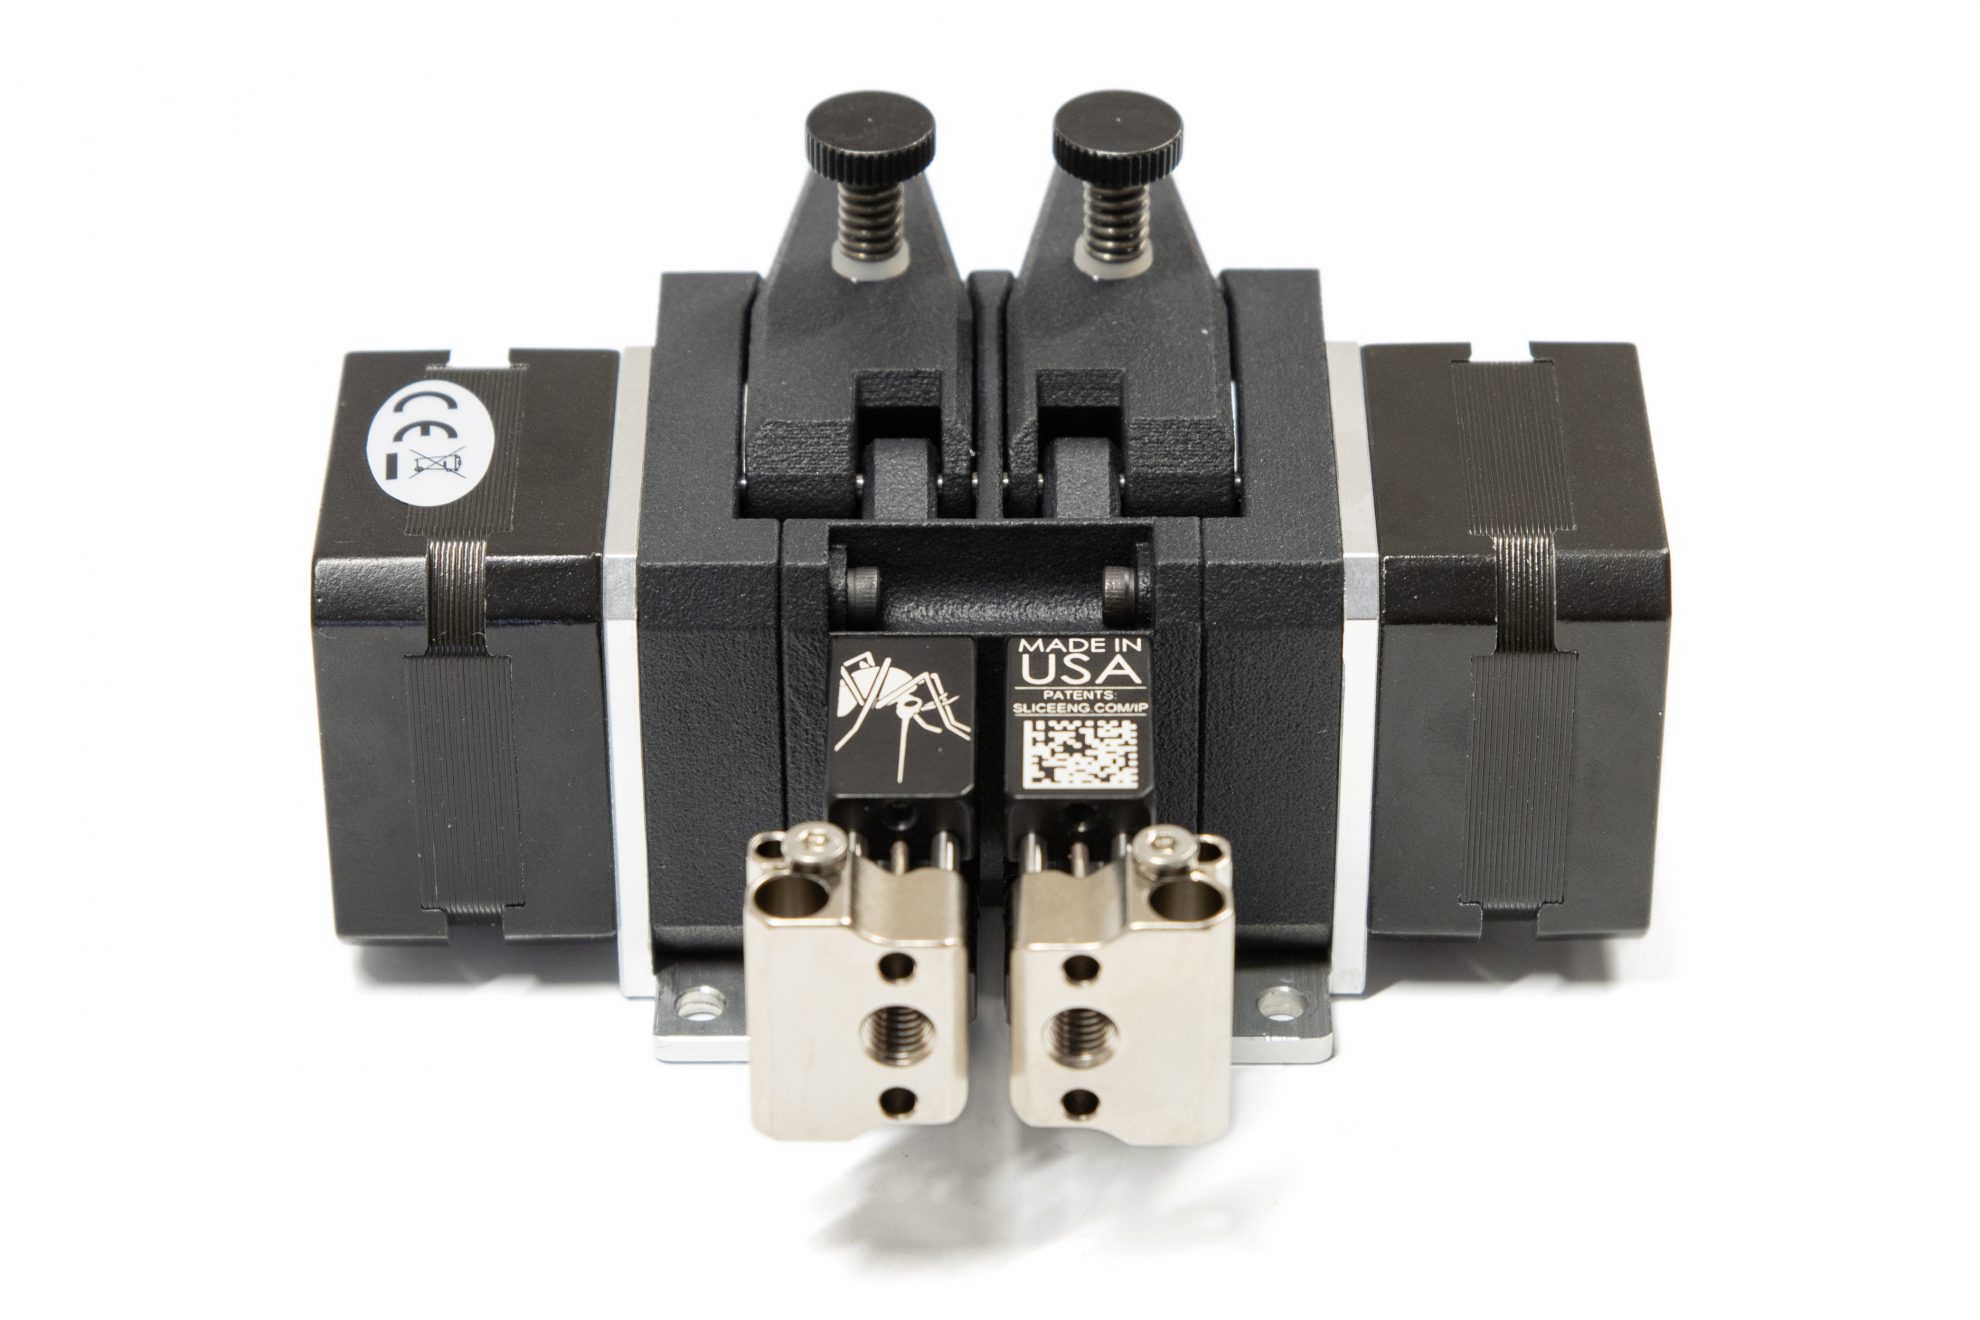
Back To Back
The Mosquito hotends are mounted back to back to allow only 15mm of CC distance between nozzle tips.
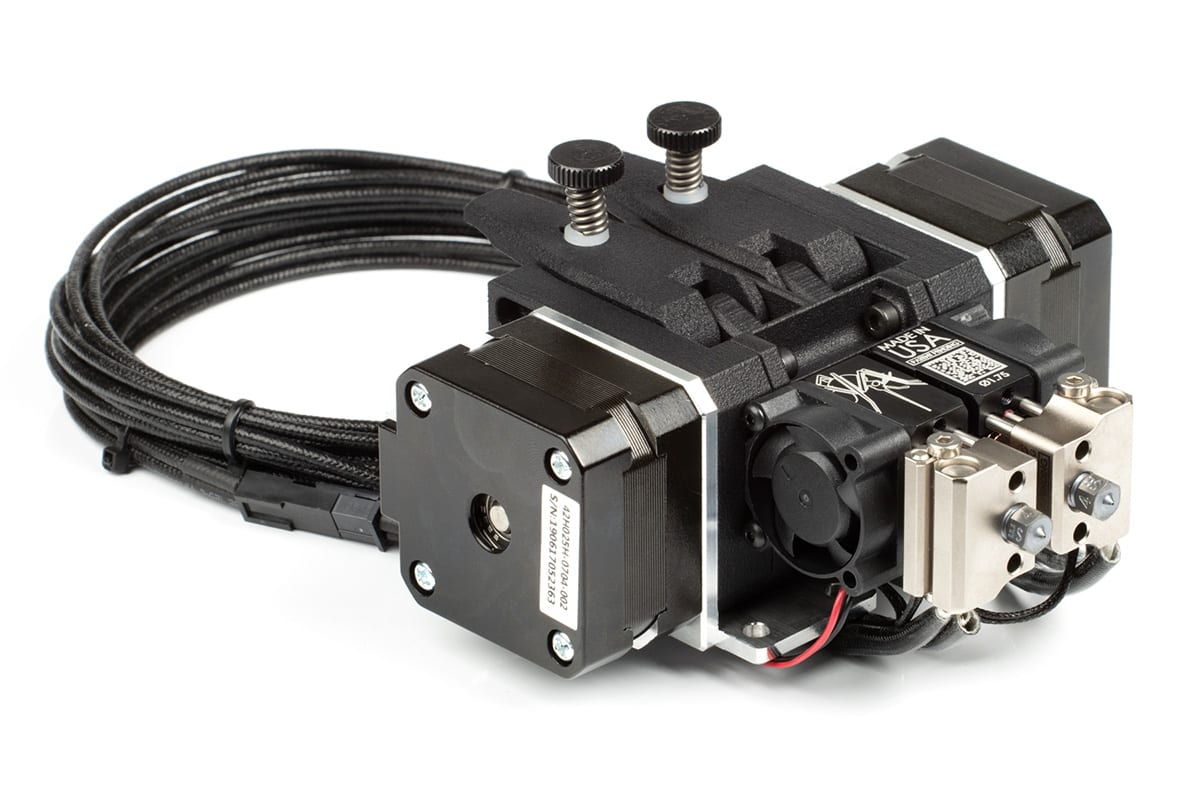
Full Assembly
A full assembly will include a couple of Mosquito fans, thermistors and heaters
Reviews (0)
Only logged in customers who have purchased this product may leave a review.
Related products
$155.00
New
$249.90
$145.00
$99.00
Reviews
There are no reviews yet.