LGX Lite Arrow for Creality
Upgrade kit compatible with LGX Lite only to use on:
- Creality CR-6 SE;
- CR-6 Max;
- CR-10 Smart.
NEW : The Bondtech black sleek look
The LGX Lite Arrow for Creality plastic parts are now stronger – made of PA12 GF Polyamide 12 Glass Filled – and look even better with the sleek Bondtech black dye.
Extruder not included.
A LGX Lite extruder is required to use this kit.
Price:
$59.90
In stock
Select Currency
Select Country
LGX Lite Arrow for Creality Advantages
- It converts the compatible printers from Bowden to direct extruder.
- Extra load on strain gauge is limited to the LGX Lite itself.
- Housing is light and insulated from the Extruder to allow for strain gauge levelling.
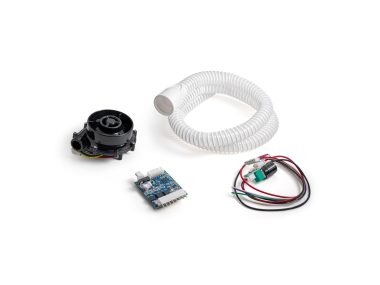
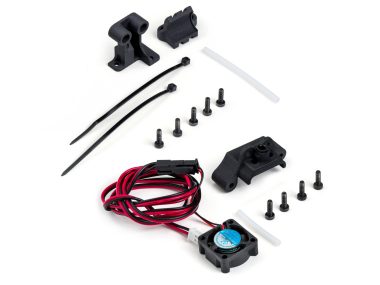
- It is compatible with all stock hotends and cooling fans.
- Housing is easy to remove for maintenance and service of the hotend and extruder.
- Z-position of the fan shroud may be adjusted.
LGX Lite Arrow for Creality Features
Weight: 65g.
E-steps : 562 @ 16 microsteps.
Klipper’s rotation_distance : 5.7.
Stepper motor current : 0.45 to 0.65A max.
Max operating temperature : 90°C.
It may be upgraded with Slice Engineering hotends:
- Copperhead Screw Mount;
- Mosquito;
- Mosquito Magnum;
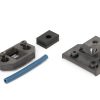
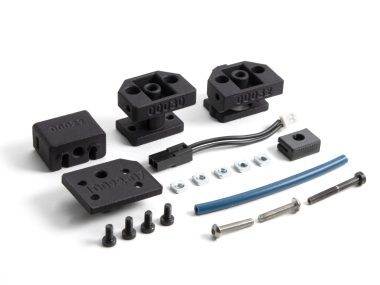
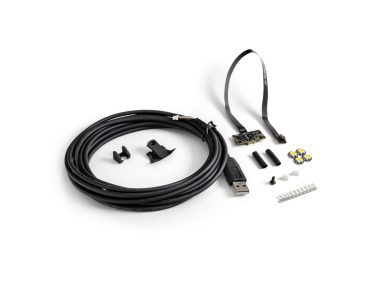
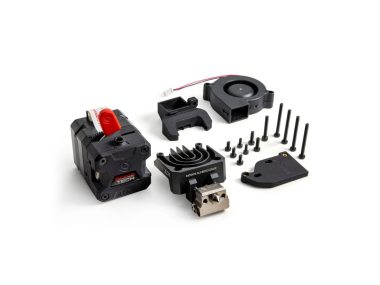
LGX Lite Arrow for Creality Includes
- 1x LGX Lite extruder mounting set
- 1x PA12 extruder mount
- 1x PA12 hotend mount
- 4x M3x6 button head screw
- 2x M3x10 button head screw
- 2x M3x8 button head screw
- 1x M3x30 screw
- 1x M3 square nut
- 1x Capricorn cutting fixture
- 1x 70mm Capricorn tube
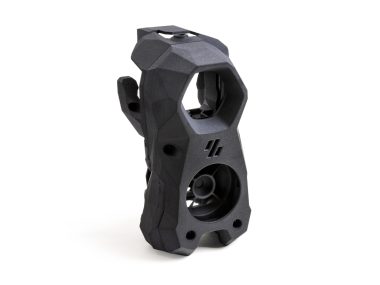
- 1x LGX Lite Arrow housing set
- 1x PA12 front housing
- 1x PA12 left wing
- 1x PA12 right wing
- 1x PA12 top lid
- 1x PA12 fan shroud
- 1x PA12 (breakout board/cables) cover
- 2x M3x8 button head screw
- 1x M3x16 screw
- 2x M3x20 MC6S screw
- 3x M3 square nut
- 1x Powered by Bondtech sticker
Freight Weight | 179 g |
---|---|
Dimensions | 12 × 11 cm |
Setup Guide
In case you lost or miss this cutting fixture in your LGX Lite Arrow package, download and print its STL model. Click the following link to download: LGX Lite Arrow Capricorn Cutting Fixture
You can also cut the Capricorn tube without the fixture. Find instructions at step #4.
To use the LGX Lite Arrow on your CR-6 SE, CR-6 Max or CR-10 Smart, there is no need to remove the stock filament sensor or extruder out of place.
You can, and should, feed the LGX Lite Arrow using the same filament path as before upgrading.
Just unlock the stock extruder. Open the extruder lever and feed the filament through it and through the bowden tube.


Then connect the bowden tube to the LGX Lite push-fit collet.


If you have a CR-6 SE or CR-6 Max, you may move the filament sensor and flat cable to the front of the gantry.
Click the link below to check how we did it.
How To Install a LGX on the CR-6
And partially follow this video that shows the removal of the extruder and installation of the mount:
Before installing the LGX Lite, place the four M3 square nuts into its bottom pockets, then assemble it back again.
How to do it
Check this animation to see how to insert the square nuts.
To cut the Capricorn tube without a fixture, follow the instructions above and mark the tube outstanding 3mm above the extruder mount. Then on a flat and even surface use a hobby knife to cut the tube as perpendicular and straight as possible at the mark.
If you prefer and can use the cutting fixture, proceed as shown below.
For ease of visualization, check below the differences regarding the cable setup between the CR-6 and the CR-10 Smart.
In the CR-6 setup presented below, we moved the filament sensor to the front of the gantry, using the method and STL models available here:
How To Install The LGX Lite On Creality Strain Gauge Carriages


CR-6
Breakout board, cables and connectors before closing the cover.


CR-6
Breakout board, cables and connectors after closing the cover.


CR-10 Smart
Breakout board, cables and connectors before closing the cover.


CR-10 Smart
Breakout board, cables and connectors before closing the cover.
Connecting to the frame's breakout board
The stepper motor cable of the LGX Lite will be connected to the breakout board attached to the printer frame at the left hand side of the gantry.
Swapping wires of the stepper motor cable
All generic Bondtech extruders are geared. When a geared extruder is used to upgrade a non-geared extruder printer, the feeding direction will reverse.
For that reason, it is necessary to invert the stepper motor rotation by swapping a couple of wires.
On the LDO motors we supply with the LGX Lite, you must swap the left hand-side or the right hand-side pair of wires. Check the LDO stepper motor TDS here if you need to.
Using the image as guide, swap the green wire with the red. Here is how to do it:
- push the red wire further into the connector
- push down the metal tab (where the arrow is pointing to)
- pull the red wire out
- do the same with the green
- lift the tabs back up (using a sharp tool)
- now push the red wire into the 2nd slot
- push the green wire into the 1st slot
Done : )
you may know connect the stepper motor.


Set the proper e-steps value
The LGX Lite uses an e-value equal to 562 when using 16 microsteps;
"Print" the following g-code file to set the e-steps value to 562 : click here to download
This file uses the M92 command to change the e-steps value and saves it with the M500.
Mind that we have this also set on the Start G-code we supply below.
Set the proper Stepper Motor current
The LGX Lite's stepper motor must be fed with current below 750mA.
500mA is the recommended value.
The file linked above includes 2 sections of text each named Start G-code and End G-code respectively.
Copy the code of each(from the .txt file linked above) and paste it to replace the whole slicer's Start or End G-code associated with your printer using this upgrade.


Check the “Print Profiles” tab to download ready to work print settings for PLA.
Print Profiles
We currently have the following Print Profiles to use the LGX Lite Arrow:
The profile above can also be used on the CR-6 Max and CR-10 Smart, just by adding these new printers to the Printer Settings list.Change the bed shape and Z-height and save the Printer Settings with a new name.
Only logged in customers who have purchased this product may leave a review.
Reviews
There are no reviews yet.