
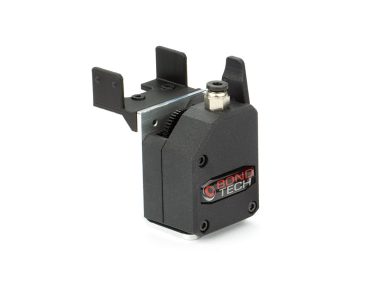
Bondtech LGX Shortcut Mosquito For Prusa MK3S
This is a LGX Shortcut Upgrade Kit to use on
Prusa MK3S and MK3S+.
It uses a short Mosquito hotend from Slice Engineering with a Bondtech heatsink.A compatible X-carriage is required and is not included in this product.
If you don’t have it yet, check and add the item below or find it in the “You may need” section.
Price:
From: $362.50
Select Currency
Select Country
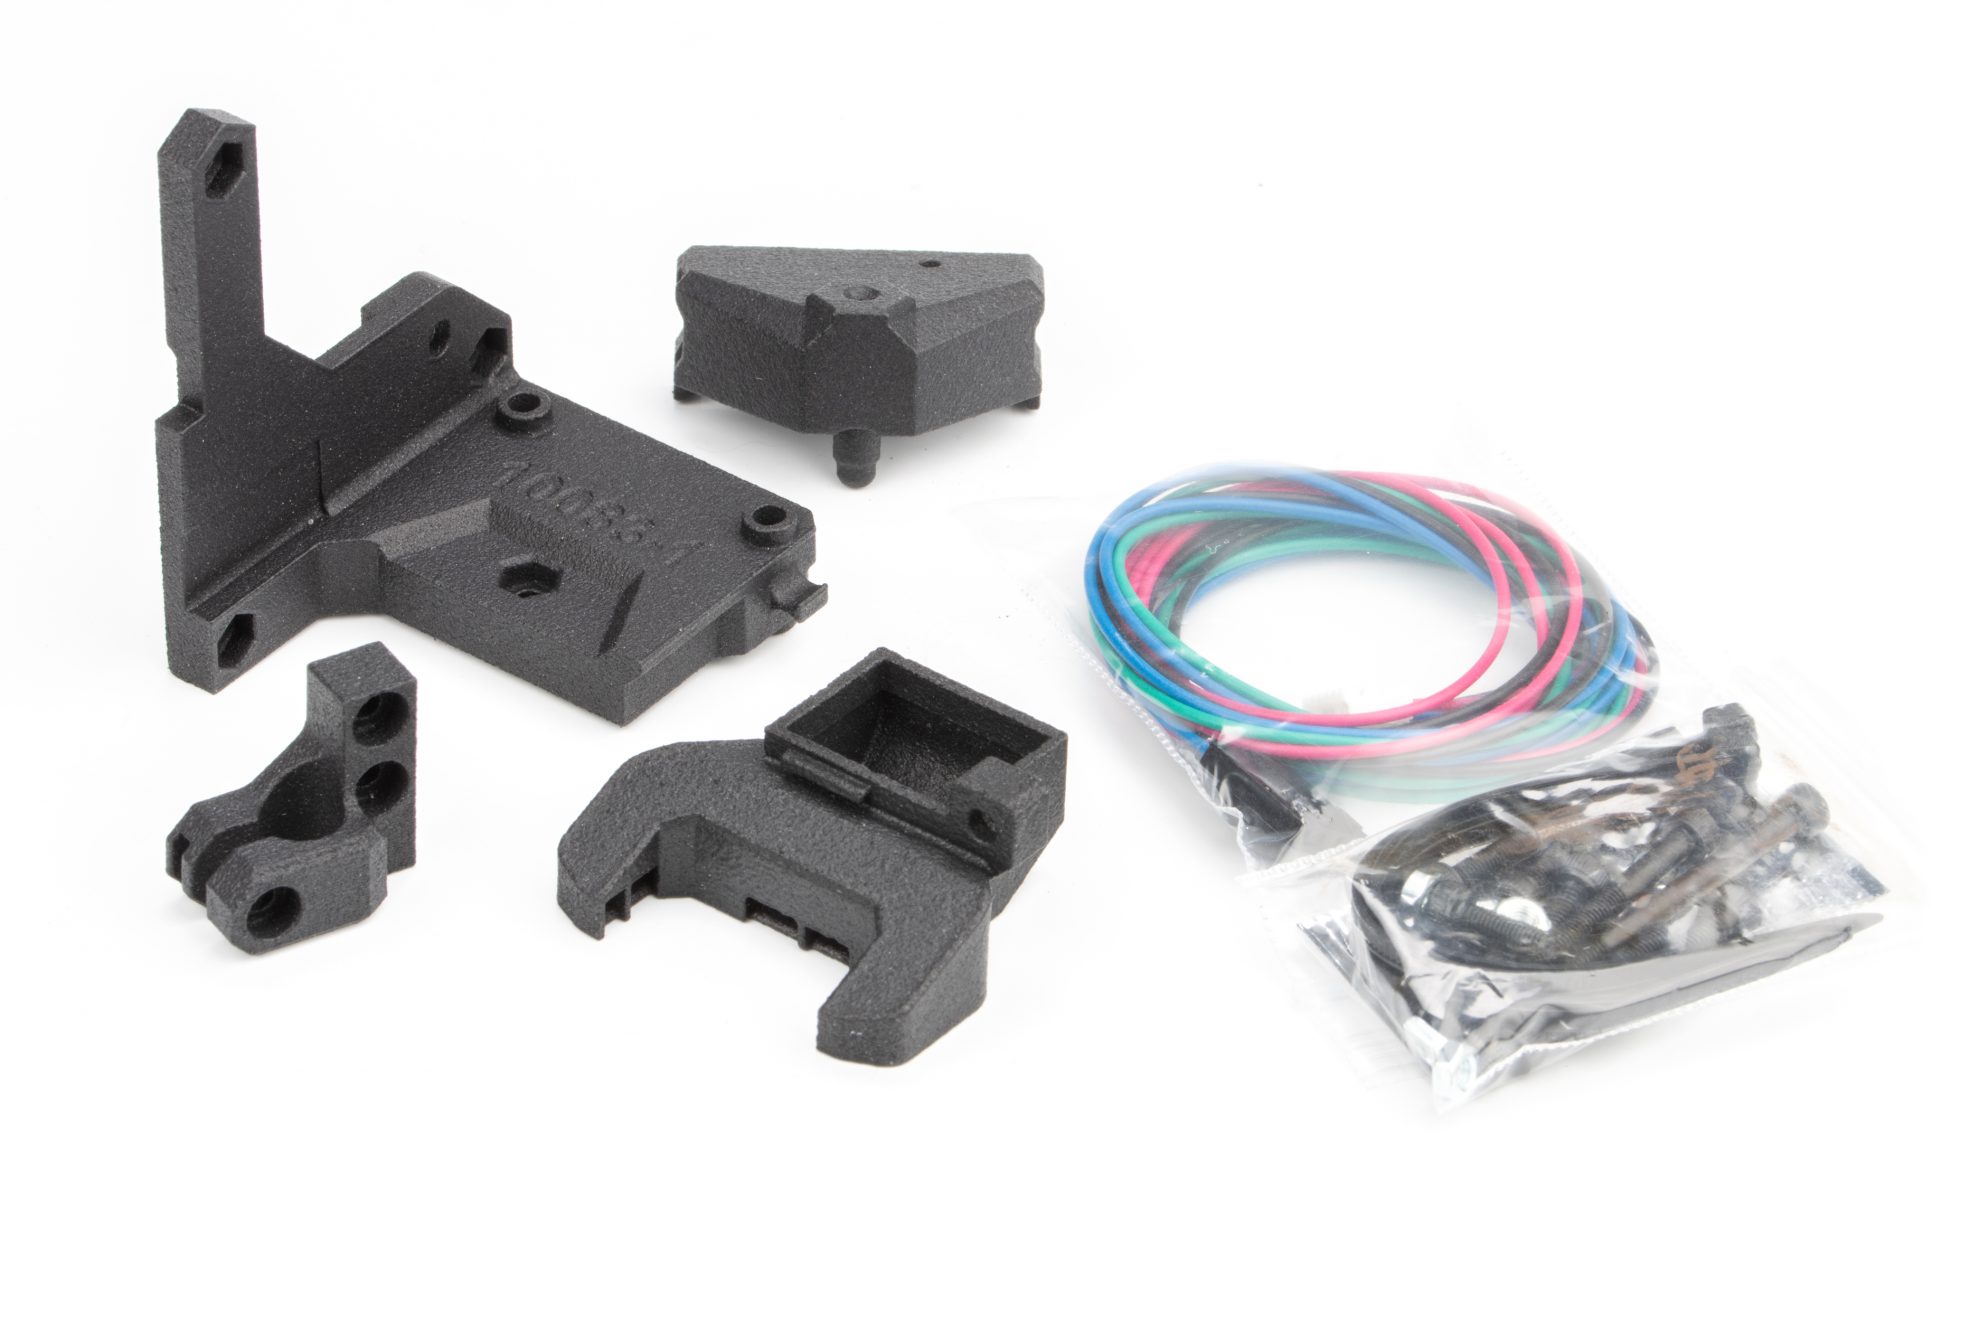
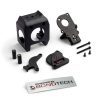
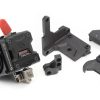
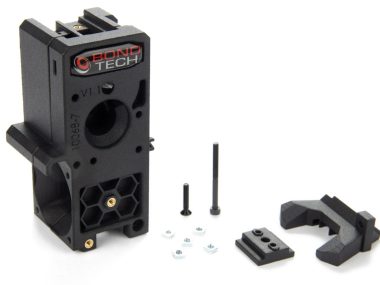
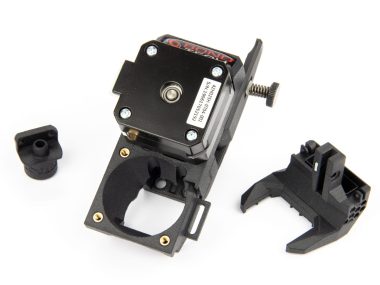
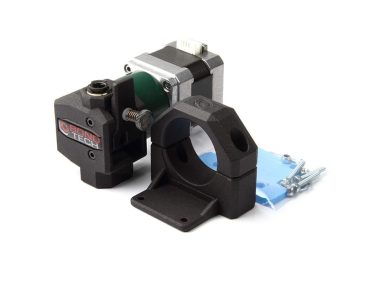
Product Includes:
Master All Materials * Excel With Flexibles
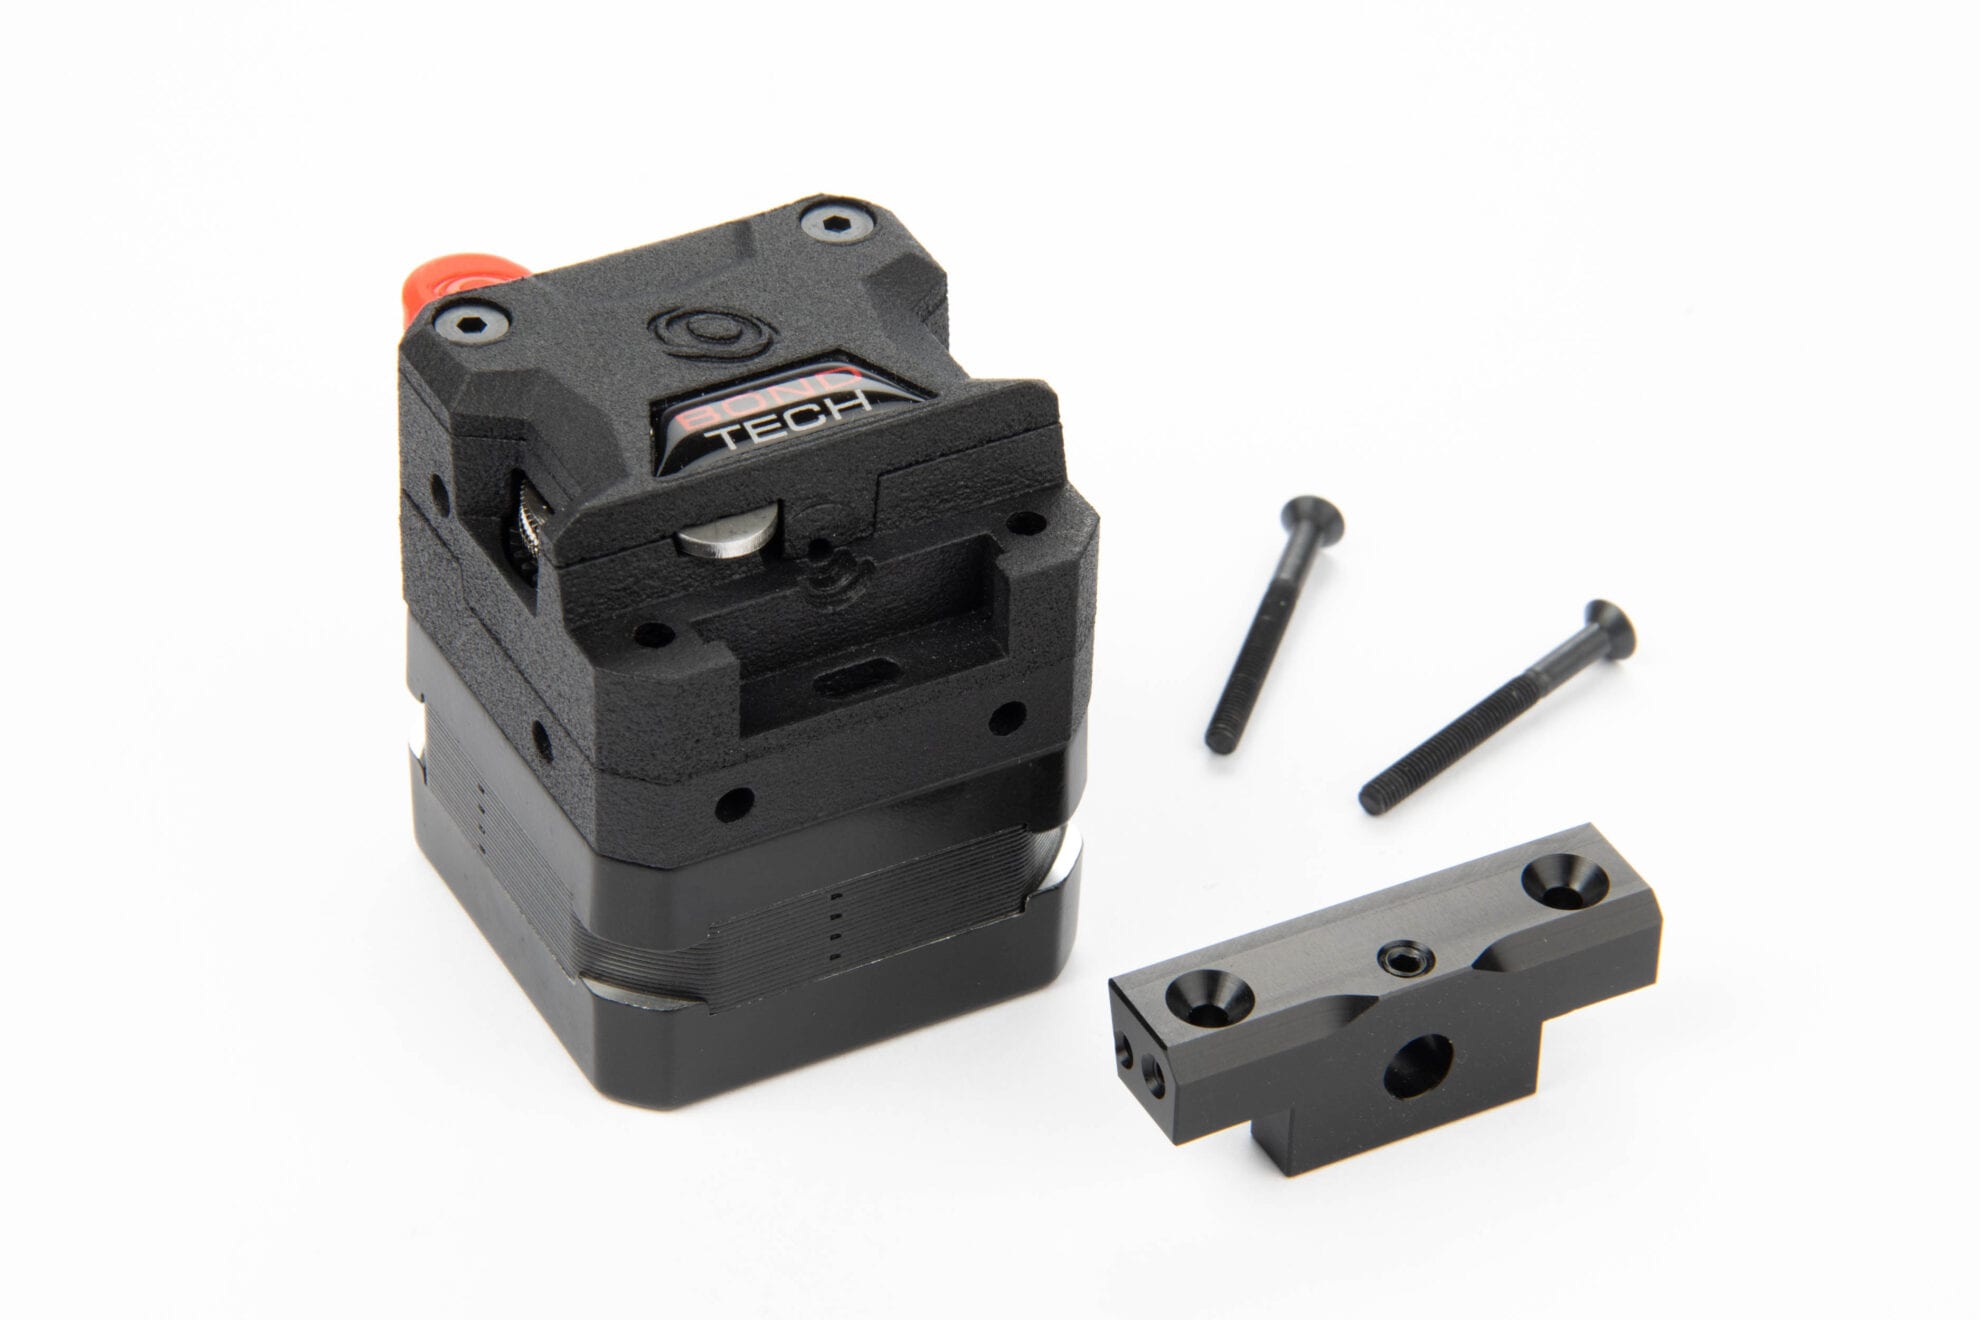
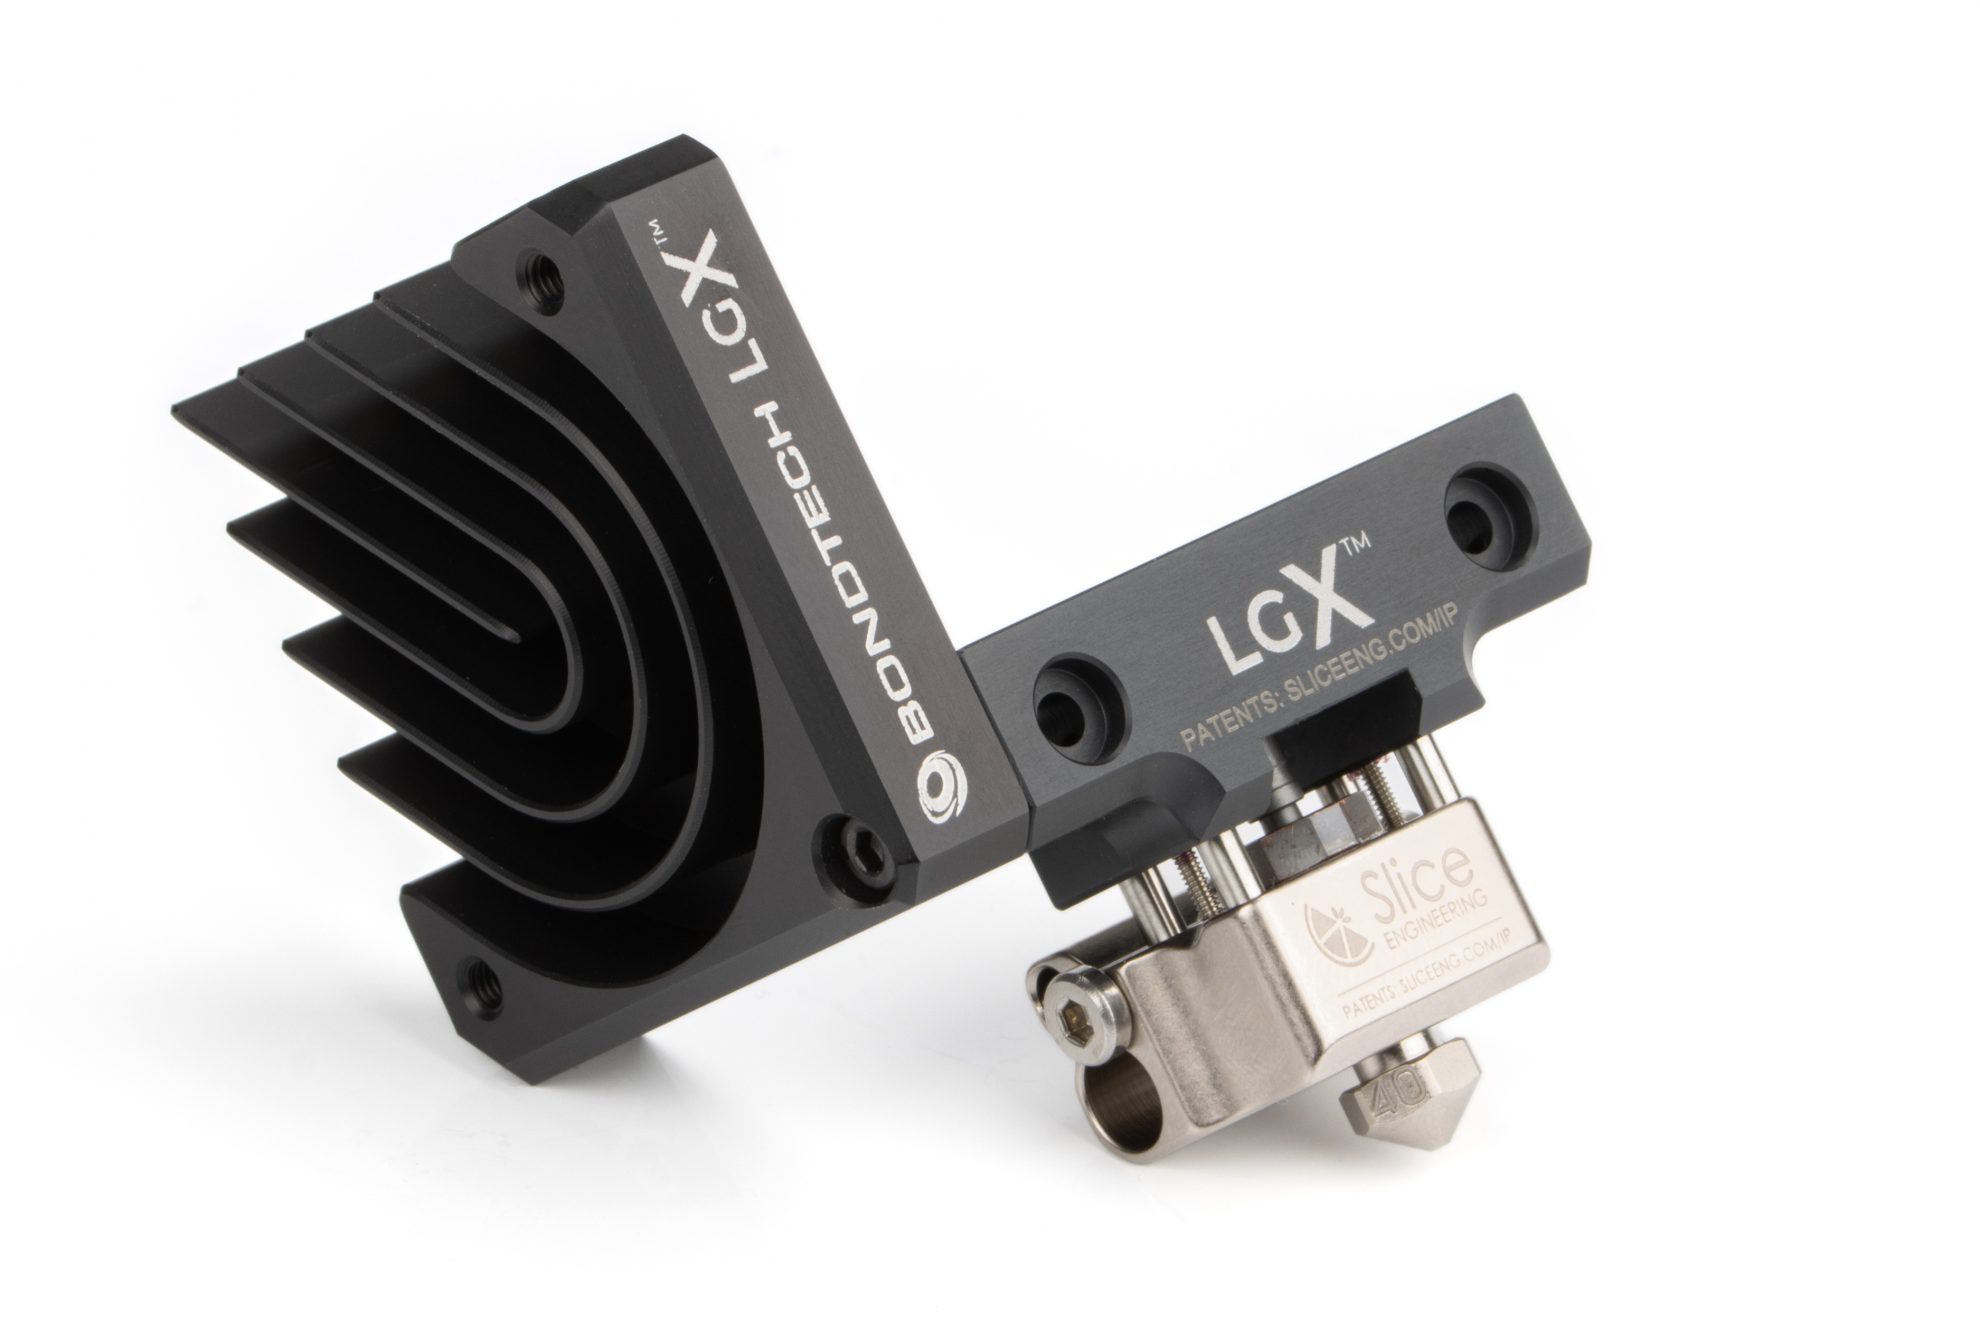
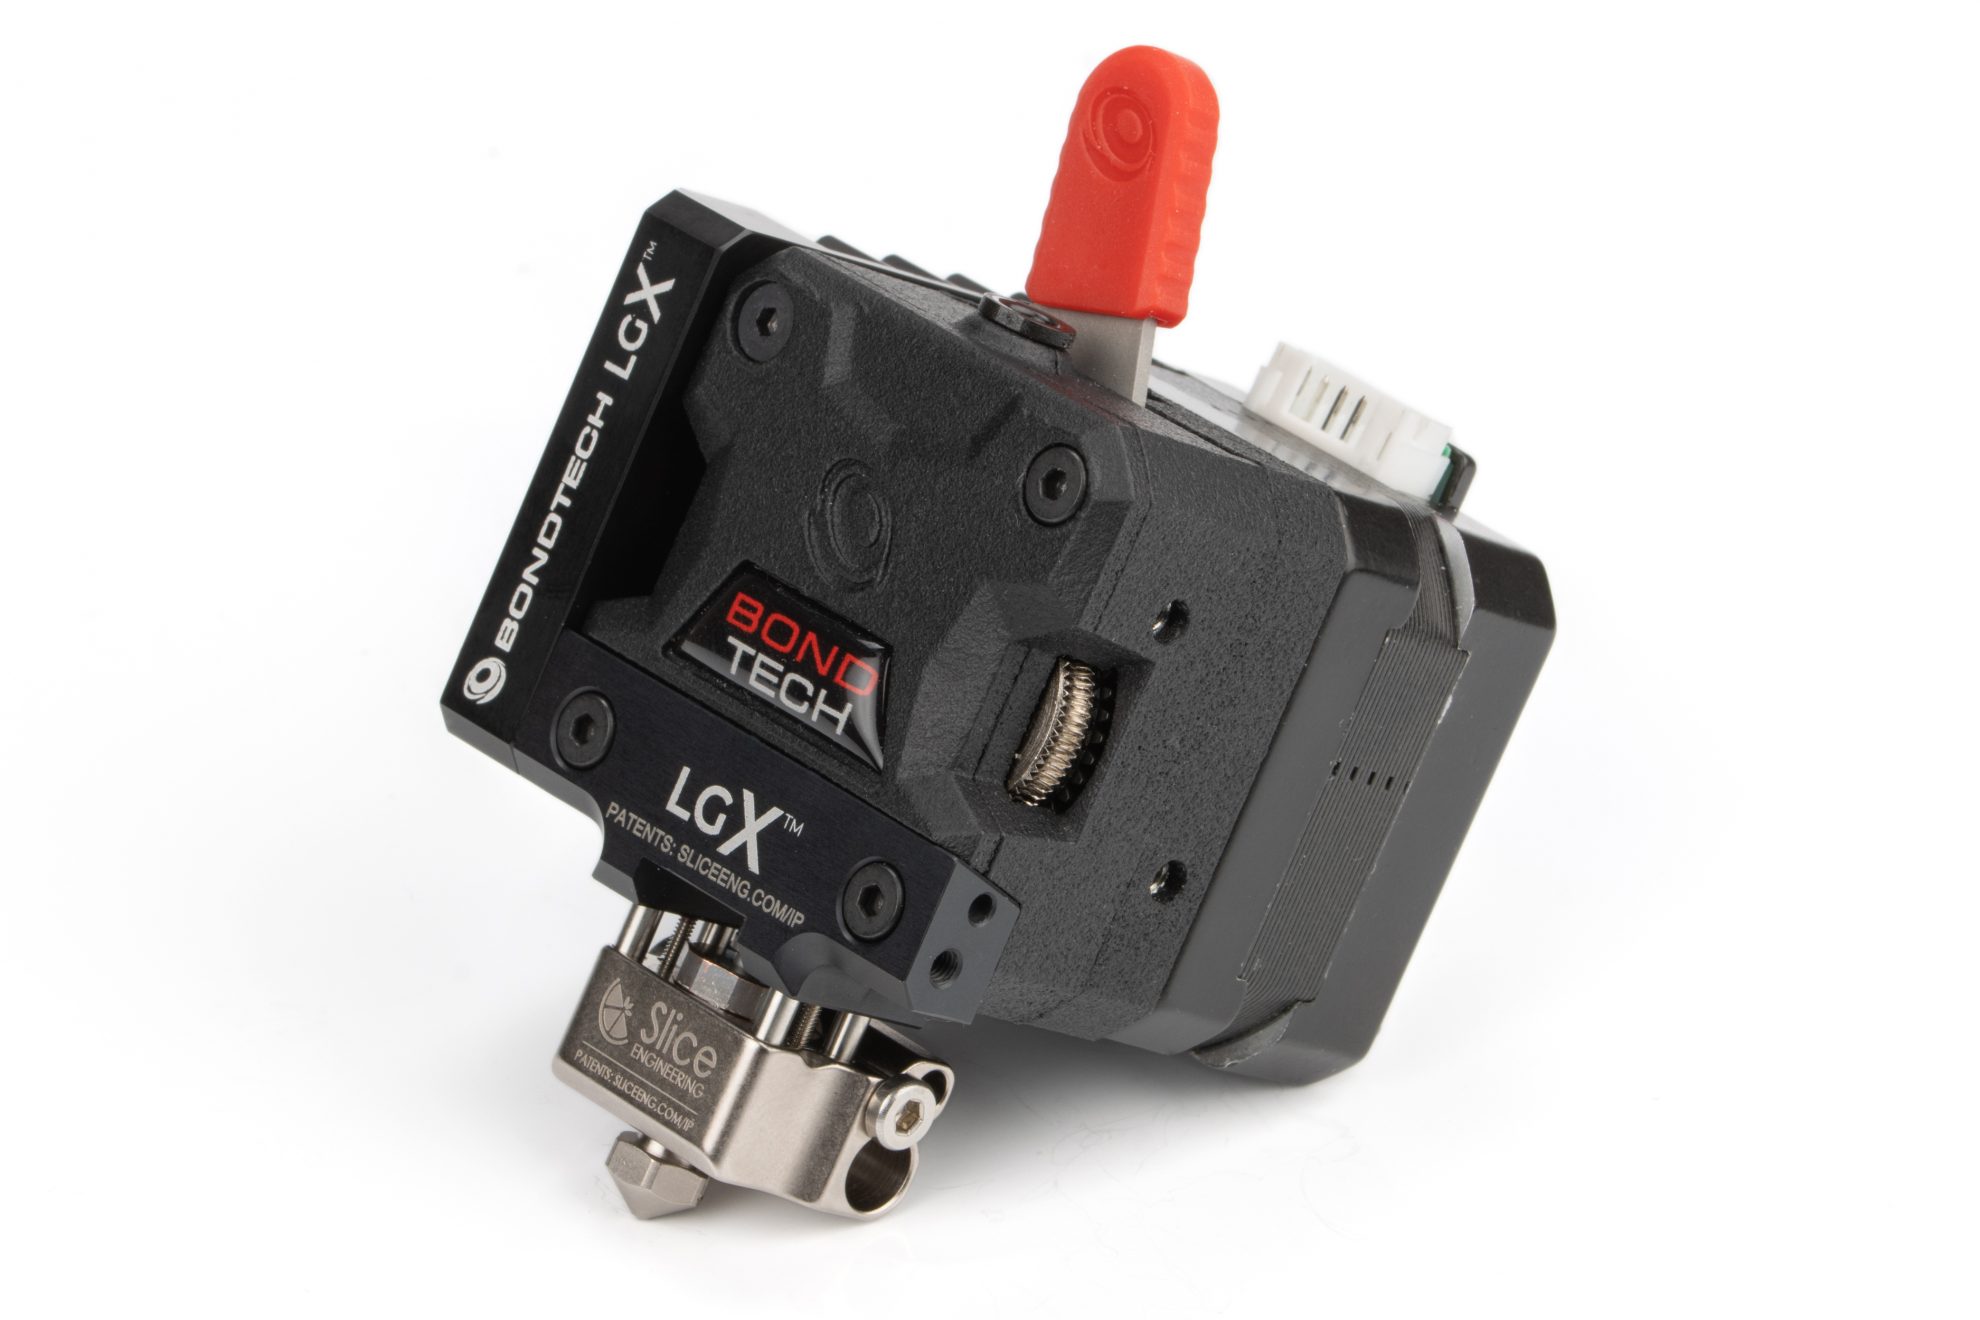
The LGX Shortcut Mosquito Print Head is a special unit that includes the LGX™ Large Gears eXtruder and the LGX Shortcut short filament path Mosquito hotend, that will master all materials and excel with the soft and flexible.
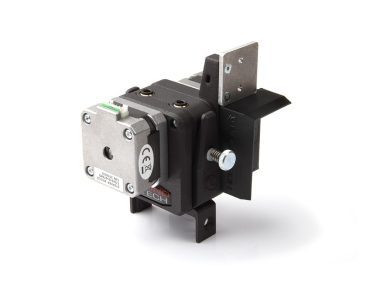
Direct Drive Upgrade
This LGX based upgrade kit is a easy to install replacement of the stock direct drive extruder. It requires the accessories included in the LGX Shortcut Mosquito Accessories for Prusa MK3S package and the LGX Shortcut Mosquito hotend.
Easy To Install
Very intuitive and easy to install upgrade kit where the extruder faces the X-carriage reducing the distance between the nozzle and the x-axis.
Leading Grip Power
The LGX is the Bondtech extruder with the highest filament grip due to its new large drive wheels that put more teeth engaging the filament.
MMU Compatibility
This upgrade kit is not compatible with any MMU version.
Custom Firmware Required
You need to update your Prusa’s firmware to use this product.
New Firmware Available.
Open the Firmware tab to download.
Enjoy Bondtech’s Evolved Dual Drive Technology
Start using our newest extruder with our new Dual Drive Technology based on larger drive gears. This is only one of the 7 new features Bondtech implemented on an extruder.
7 new features on a Bondtech eXtruder:
- Larger drive wheels, for increased filament grip;
- Filament pre-tension lever, for repeated results;
- Multi-function interface socket, for tool or application quick swap;
- Drive wheels’ maintenance windows, for easy cleaning;
- Compact, light & symmetric design, for increased performance and compatibility;
- Multiple mounting hole patterns, for easy and flexible setup;
- A small step for a greener Future, craft boxes without bleaching & no coating.
You can read more about the new features by clicking here.
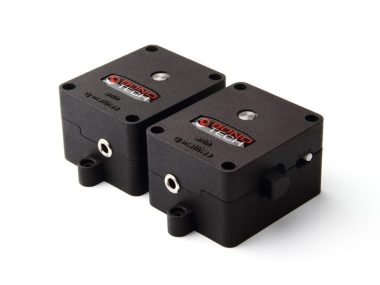
3D Printed Housing using PA12
The housing parts are professionally printed with nylon for maximum strength and precision and higher temperature resistance.
Compatible nozzles
The hot block included in this product is compatible with the RepRap standard of nozzles. Below is a list of compatible versions.
Click each link to open the related product page.
- From Bondtech
- From Slice Engineering
| Freight Weight | 525 g |
|---|---|
| Dimensions | 21 × 8 × 11 cm |
LGX Shortcut X-carriage for MK3S(+)
| Freight Weight | 54.7 g |
|---|---|
| Dimensions | 12 × 8 × 3 cm |
| EAN code | 7350011410743 |
Technical Specification
LGX™ extruder
- e-steps value : 400 using 16 microsteps;
- Drive wheels : hardened steel;
- retraction speed : 35 mm/s
- retraction distance (direct drive) for rigid materials : 0.4 mm
- retraction distance (direct drive) for soft materials : 3 mm
- Max operating temperature : 70°C
- Max tightening torque on the extruder screws is 0.3 Nm
- Max tightening torque on the heatsink/cold block screw is 0.6 Nm
- LGX™ DD net weight : 218.6 g
- Package measurements : 80x103x73 mm
- Package weight : 269 g
Custom Stepper Motor for Bondtech LGX™
- Requires cable with PHR-6 connector
- 2 phases
- DC 3.1 V
- Max 0.7A / phase
To use the LGX®, run the stepper motor with currents between ~0.45 and ~0.65A:
Be vigilant regarding the stepper motor surface temperature.
Keep it cool enough to touch. Lower Vref otherwise. - Class H motor, rated up to 180°C
- Max recommended environment : 70°C
- Max temperature at this environment temperature can go up to 130°C on account of the self heating.
- Download the stepper motor Technical Data Sheet here.
How to change the Current using Vref
It is very hard to read the current being fed to stepper motors. To determine that current we rely on the Vref value. The Vref value is a voltage reference measured in VDC that can be read using a multimeter. It helps us setting the current output of the stepper motor driver.
Different 3D printer mainboards use different stepper motor drivers. Each type of stepper motor drivers has its own formula to calculate the required Vref to get a specific current. Here are some examples:
- TMC stepper drivers.
The formula for these drivers is Vref = ( I * 2.5 ) / Imax
Where I is the target current value measured in A; and Imax is 1.77 on regular mode and 1.2 on SilentStepSticks mode. - Pololu A4998.
The formula for these drivers is Vref = I * 8 * R
Where I is the target current value measured in A; and R is the Sense Resistor value, that depends on what board are you using. Melzis use 0.1. The Creality Silent boards use 0.15, ...
Video Guides
In case you need guidance to strip down the printer, use the following “Strip down Prusa MK3S” guide.
01 – Required for the setup:
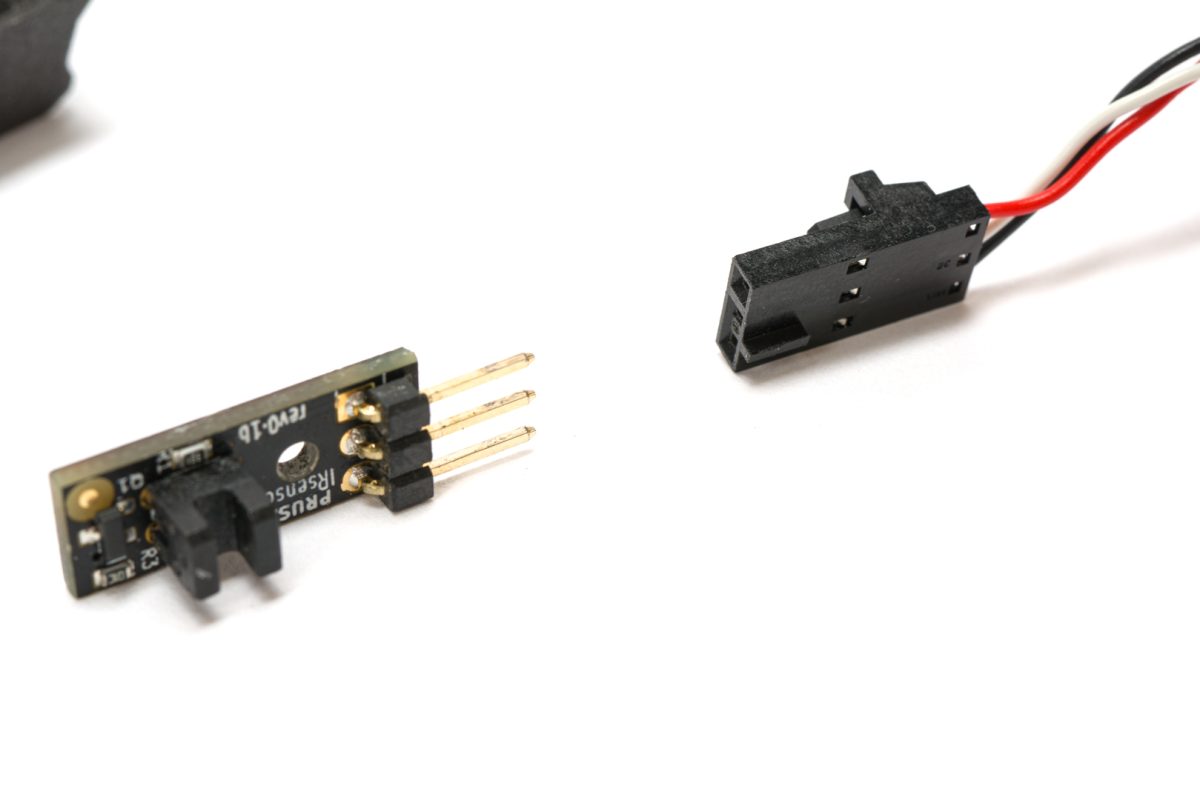
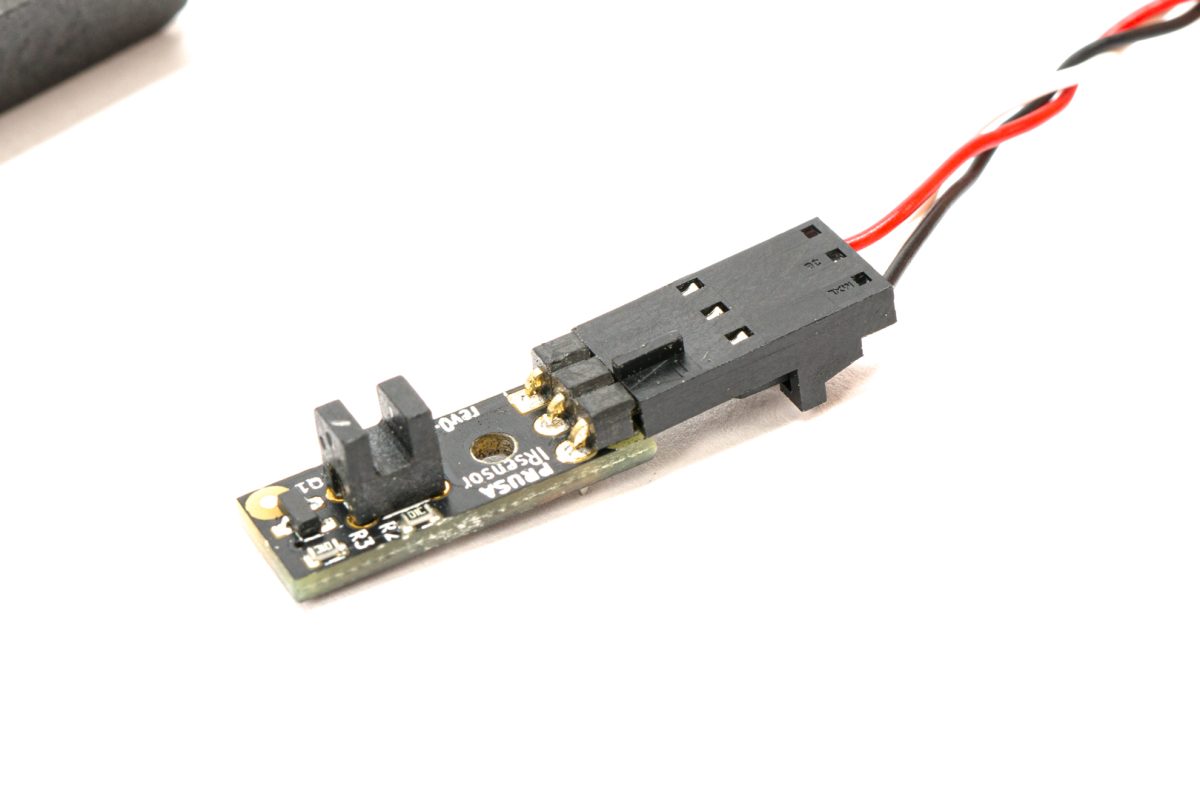
- Prusa i3 MK2.5S/MK3S/Mini Extruder Filament IR Sensor
- 10x6x2mm magnet from Prusa i3 MK3S
- 2.5 mm hex key
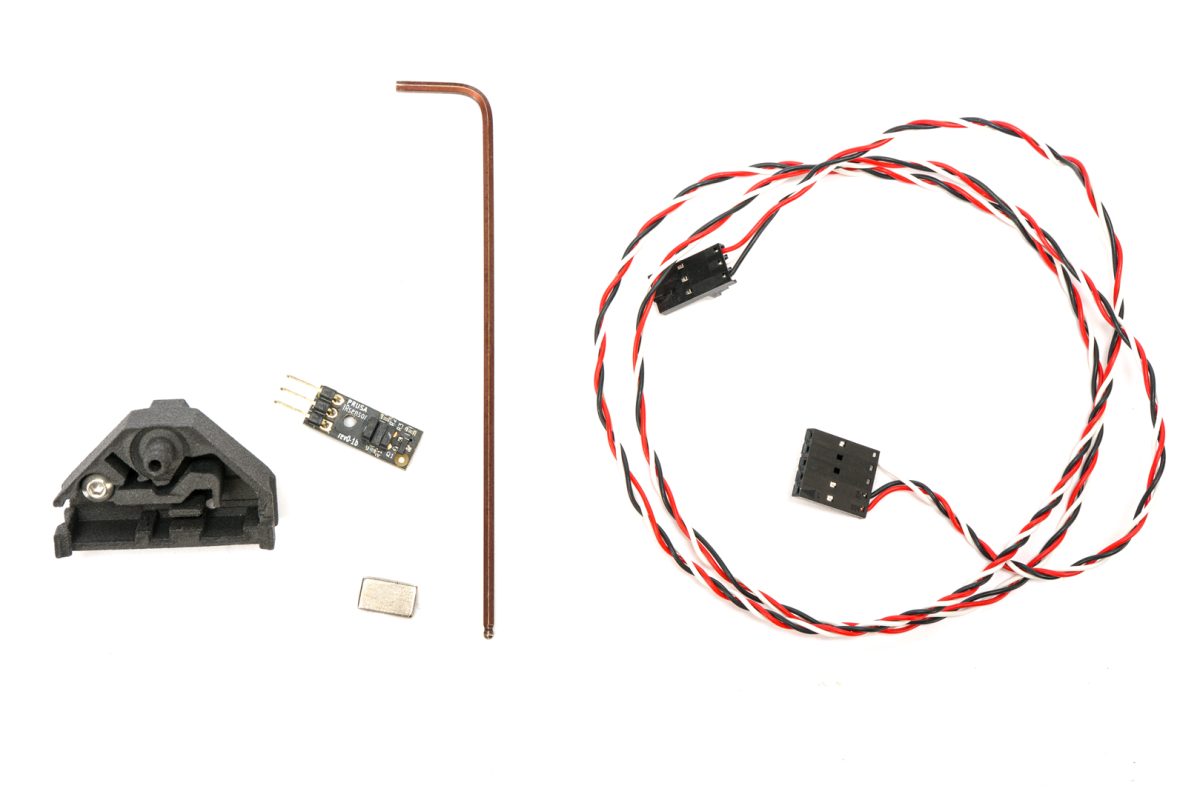
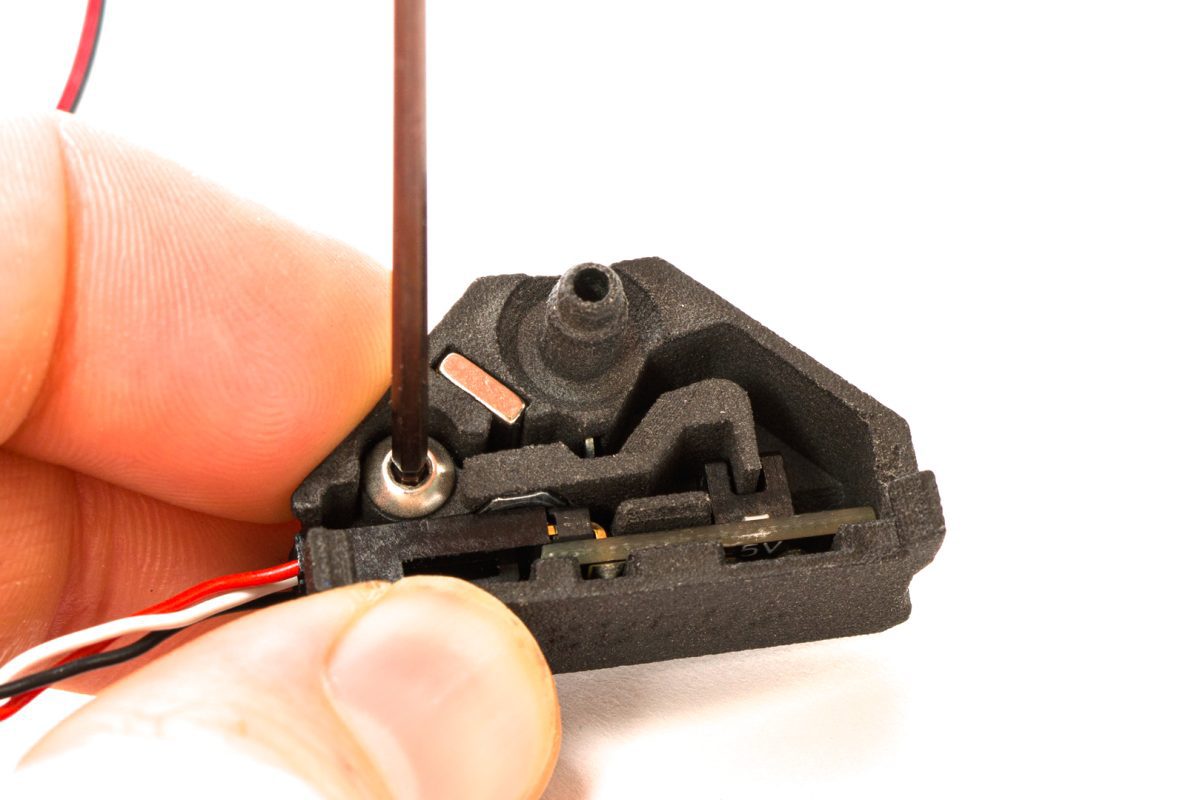
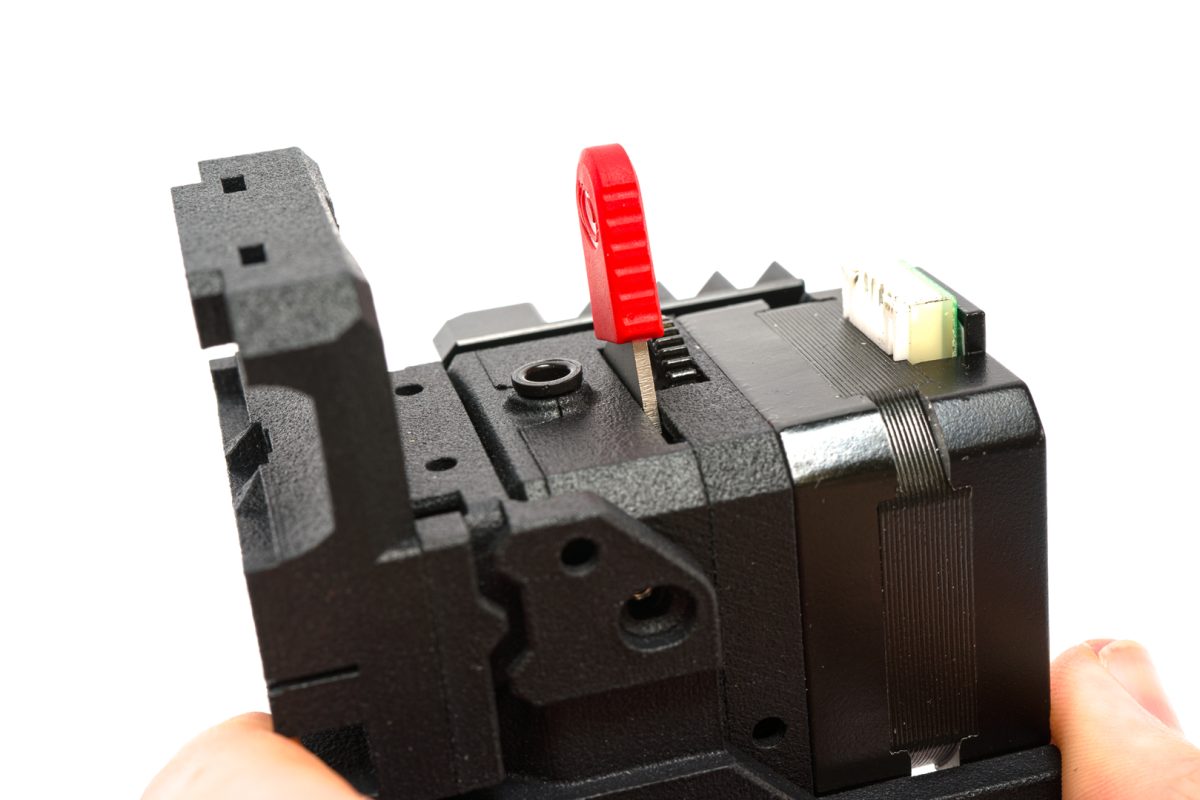
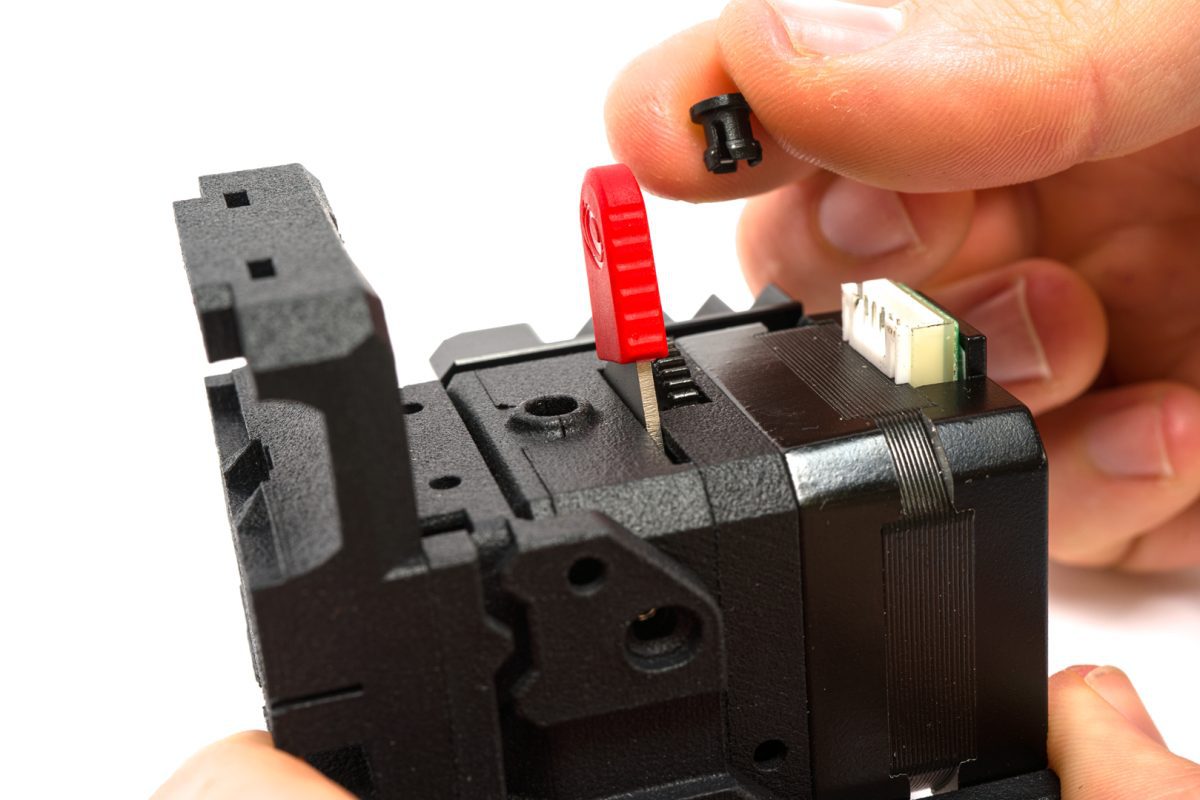
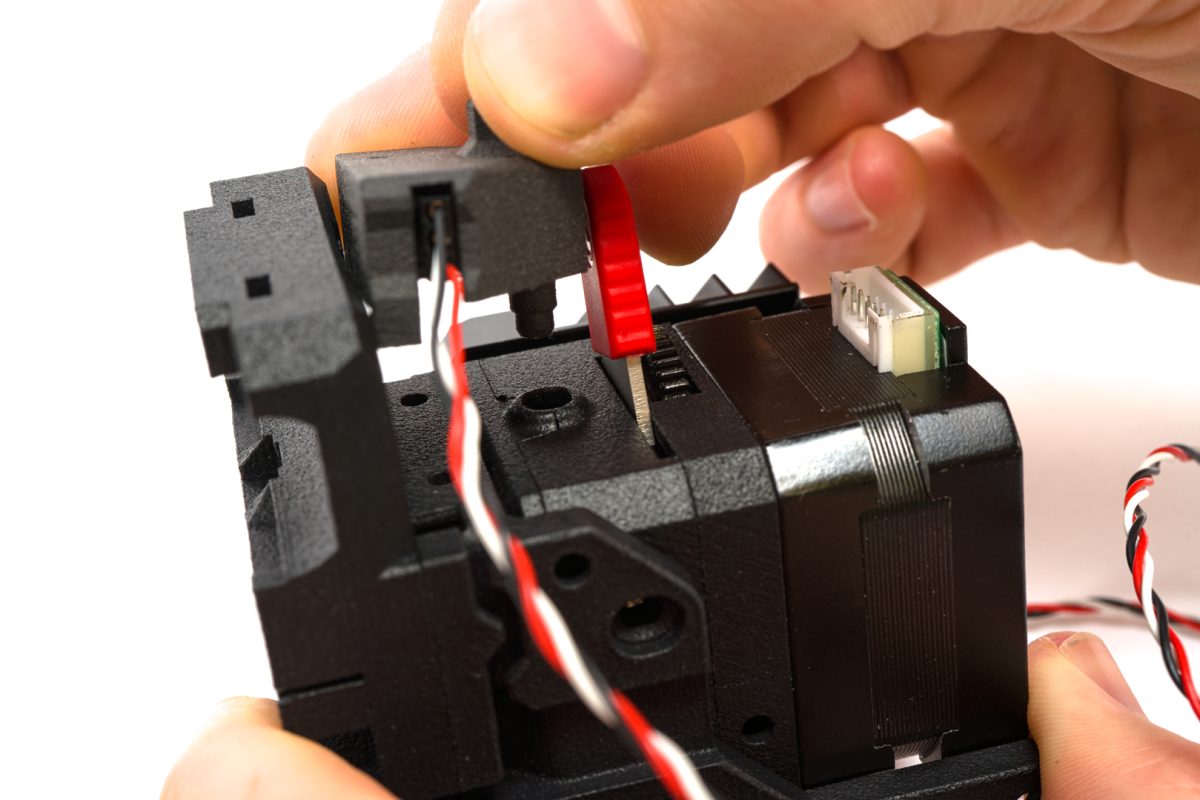
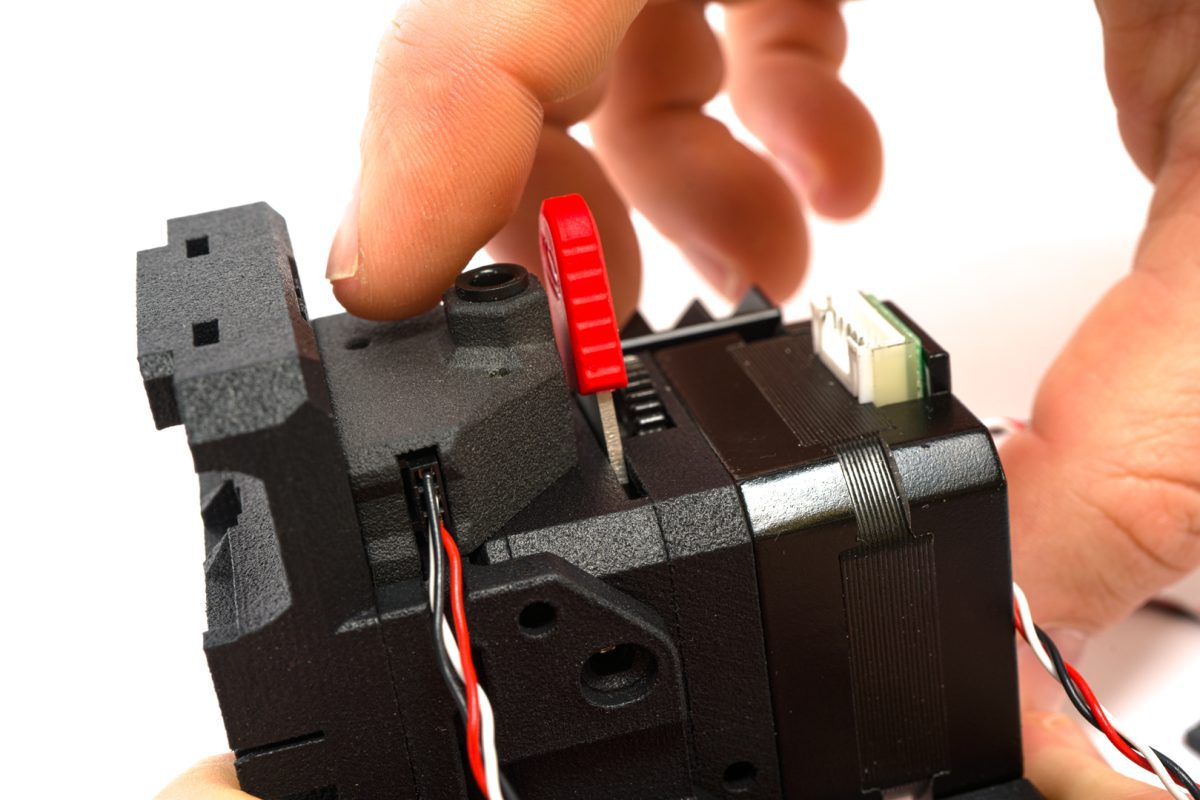
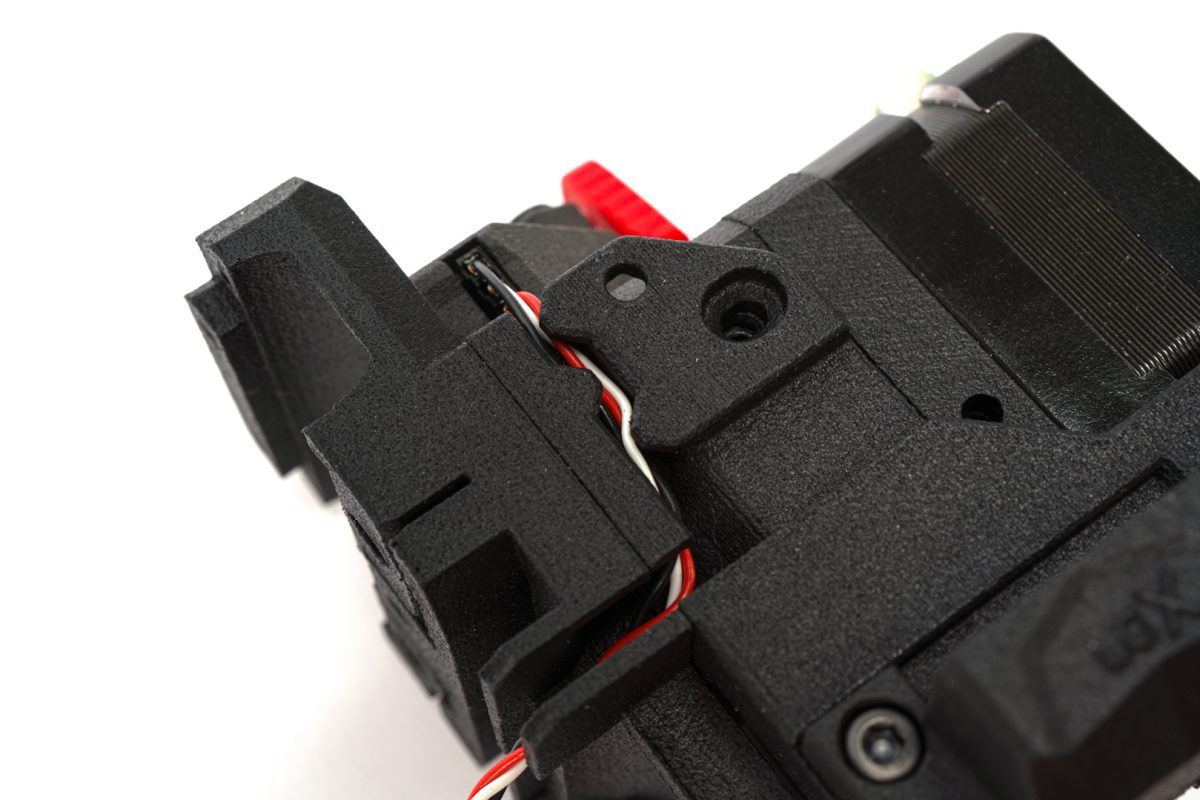
Click the arrow below to learn how to install the Filament Sensor on the new housing
1: Insert 10mm magnet into filament sensor housing.
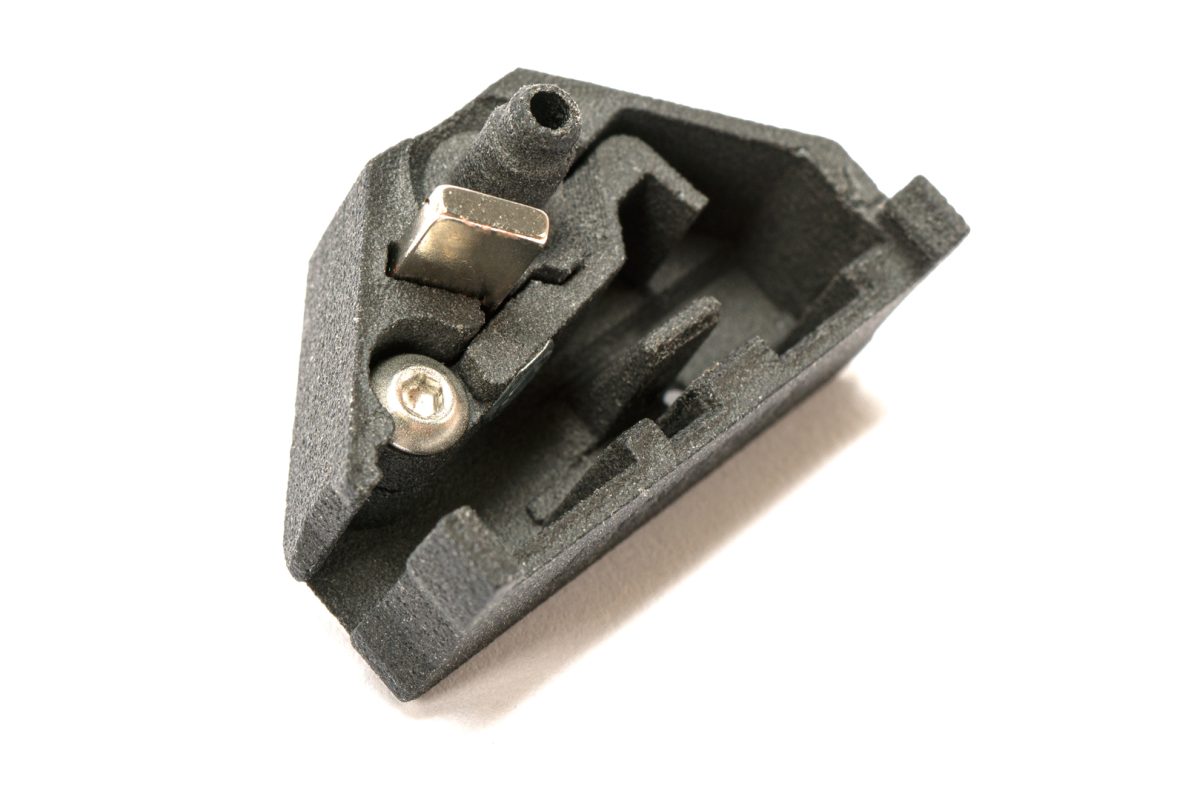
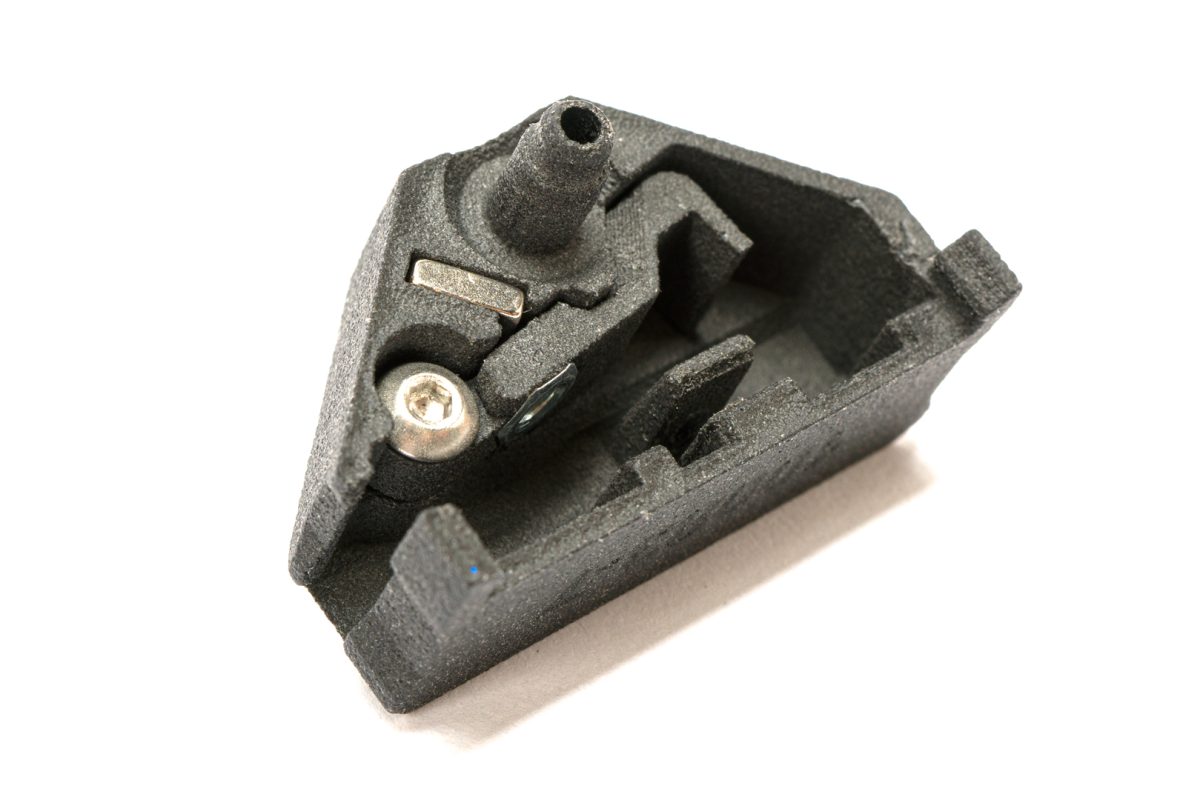
2: Connect cable to the sensor PCB.
3: Install filament sensor into sensor housing.
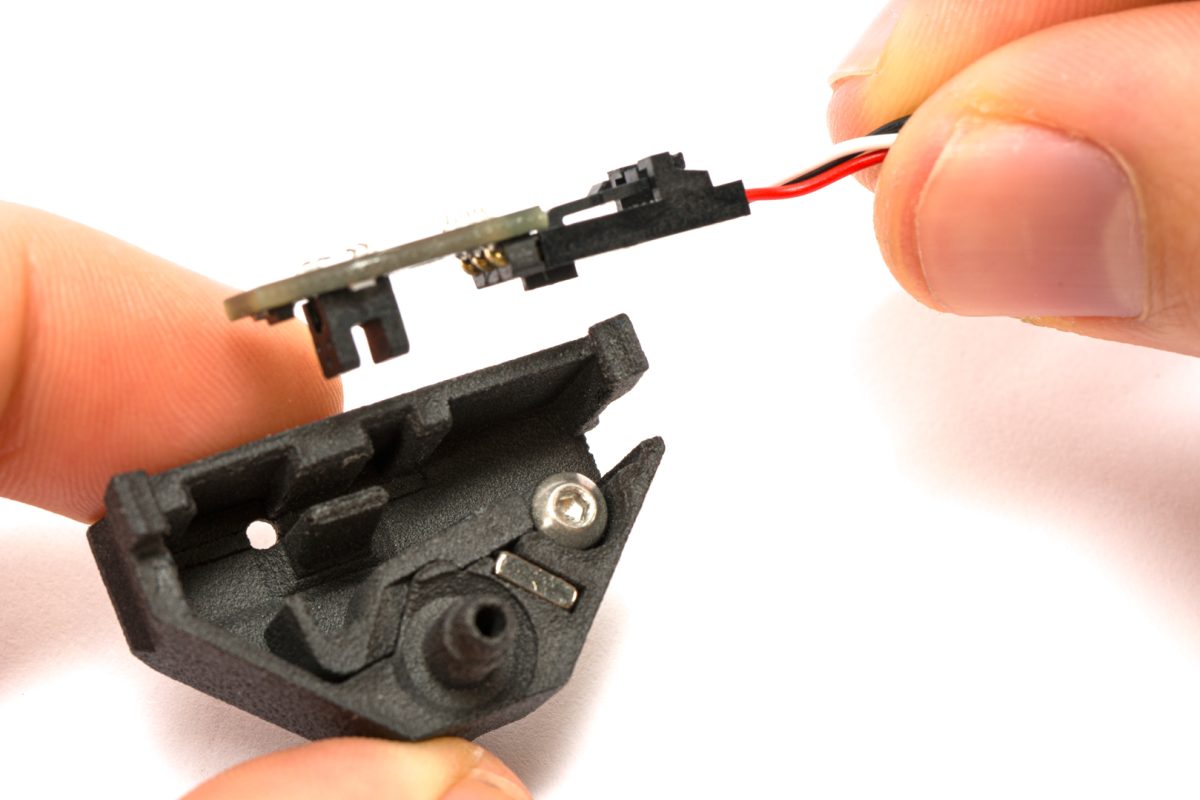
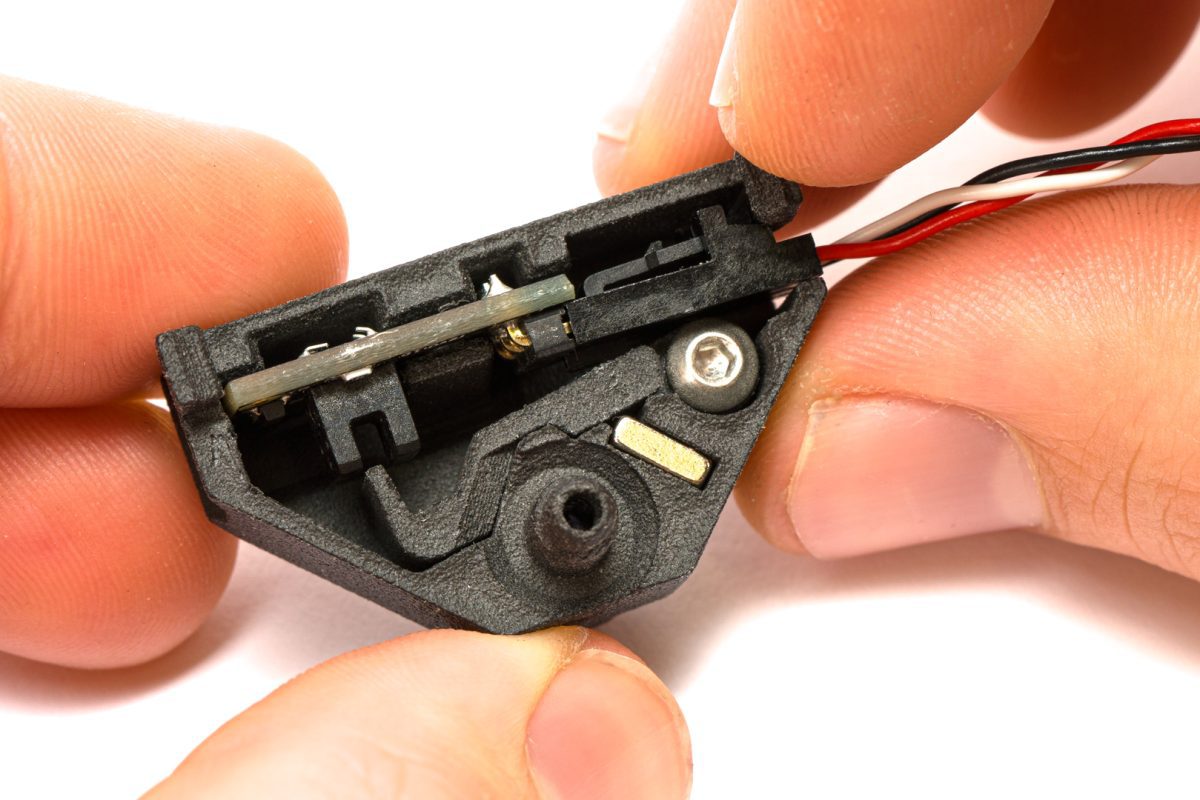
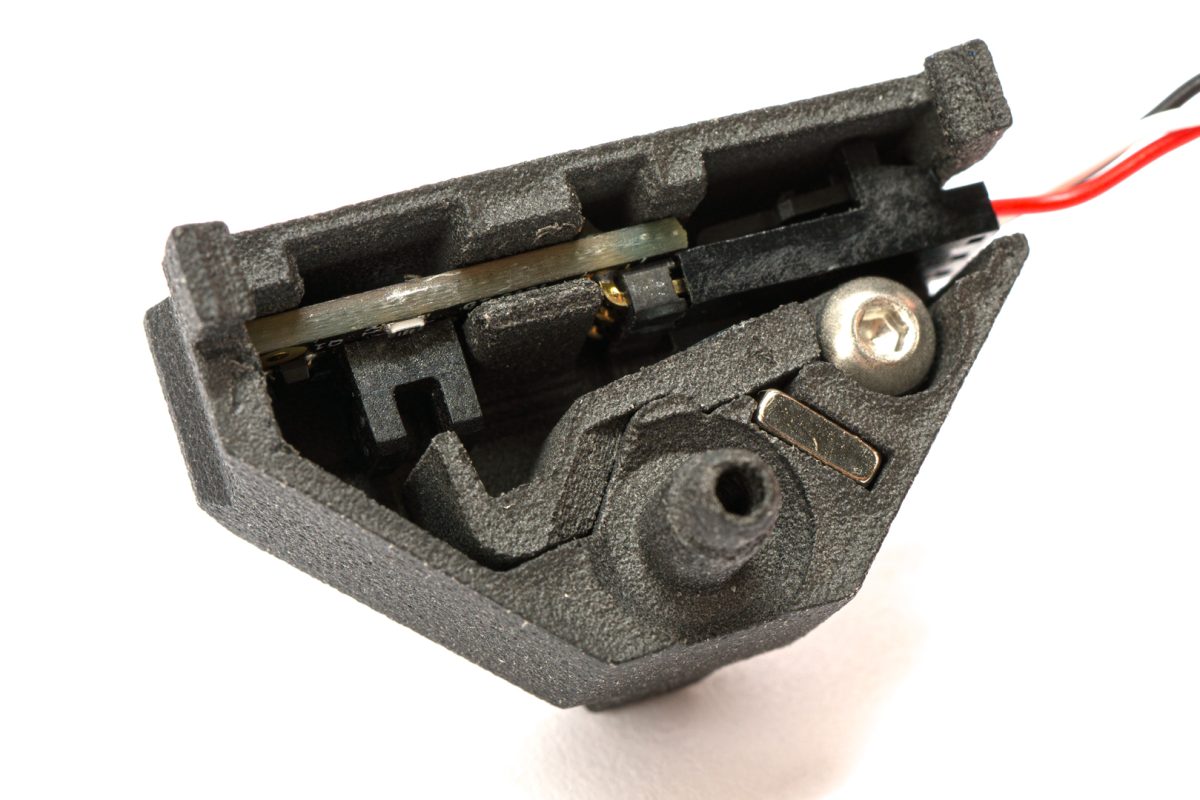
4: Slowly loosen screw until lever suddenly snaps to the magnet.
Test function again by pushing filament in and out to check if the lever snaps back.


5: Remove LGX push-fit collet
6: Install sensor into the extruder and insert cable into cable channel.
02 – Preparing the LGX – 01:09
03 – Setting up the LGX Shortcut Printhead – 05:29
Video shows a LGX Shortcut Copperhead.
When using the LGX Shortcut Mosquito, insert the heater and thermistor from the left hand side (while facing the LGX front).
04 – Assembling The Mounting Accessories – 03:43
05 – Pre-mounting Assembly – 04:45
06 – Mounting The LGX FF On The Prusa i3 – 07:45
07 – Finishing The Installation – 03:07
Click here to visit the step by step guide on how to update the firmware.
CREDITS
Soundtrack is based on 2 Bensound cinematic tunes:
Adventure;
Memories.
Check Bensound at https://www.bensound.com/
Latest Firmware
Based on Prusa v3.14.1
If you are using stock or Slice's 300C thermistor and EINSy10A boardClick here to download an archive with the firmware.
If you are using Slice's 450C thermistor and EINSy10A board
Click here to download an archive with the firmware.
If you are using Slice's 500C PT1000 RTD and EINSy10A board
Click here to download an archive with the firmware.
Please read Prusa’s release note to know about all changes : 3.14.1 Firmware
Click the link below to visit the Source Code page to clone or download.
For older versions Click here
To learn how to install a firmware update on your Prusa i3
Product Videos
Coming soon.
LGX Webinar
Only logged in customers who have purchased this product may leave a review.
Related products
Reviews
There are no reviews yet.